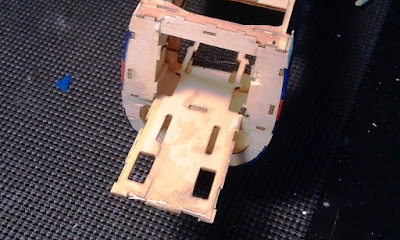
The Cornell in pieces...
The wing refabricated.
Close up of the ugly but functional repair.
Not unexpectedly the right wing was heavier than the left, so I ended up having to put a counter wieght in the other wing. I slid the washer along the wing until it balanced, cut a slit in the underside of the wing, put some cement on a washer in the location it balanced, and slipped it in.
A strip of cote over the slit, and voila,
balanced wing!
The cote job isn't perfect... but it came out pretty darn good. Right top. The red tape covers a bit of an imperfection in the rib structure.
Left wing. Replaced some panels...
Overall, not too shabby.
The forward part of the hatch took a bad hit. I placed a piece of styrofoam underneath it shaped to fit to provide some structure.
The styrofoam as seen underneath the hatch.
Used spackle to fill in the broken areas.
Sanded it smooth, sprayed it with some clear acrylic.
Masked out a template for the black Econocote to fit.
Installed the cote, and added a pilot! He's twin brother to the pilot of the Stearman.
So this is what the stock 3" x 2" x2" motor mount and battery box look like, that nose box sticking out in the front. Part of the battery fits in there, the motor on the front. Mine was toothpicks... So I made one.
Was able to replace the bottom shelf.
Using 4 - 3/8" square dowel perfectly matched, I CA'd and screwed them to a piece of 3x2 3/32 ply aft and the motor mount forward. The ply firewall is CA'd in place and I drilled airflow holes in it. Here it is being dry fit before I drilled the vent holes.
Side view.
Vent holes drilled, motor installed, CA'ing the mount in place. Later I dry fit the cowl, perfect alignment!
Now that the box is gone the firewall blocks the battery from entering behind the motor. So I had to remove part of the floor of the battery box, strengthen the lower part of the firewall and the floor, and pad the frames with fuel tubing...
Added an inclined piece of styrofoam protected with a piece of Dual Lock Velcro, glued to the floor...
So that the battery can incline in, saving some of the forward CG weight, and allowing the battery to fit in the fuse. Its a 3S 3000 mAh battery.
The incline pushes some of the weight forward to preserve some nose weight, and allows the battery to fit below the hatch.
Replaced the aft most servo, which is the rudder servo with an EXI d213f metal gear digital servo cannabilized from my CopterX 250. I had found the original SG90 rudder servo stipped.
The underside of the fuse below the cowl was crushed in, so I lifted it as much as I could then CA'd some salvage sheet balsa, and sanded it down to level.
The cowl screws were forced back along the fuse diggin 4 nice trenches. I filled them with scrap balsa and CA, and sanded it smooth. Those are the bald rectangles just aft of the firewall.
Some internal repairs required removing cote. I also replaced the black angled pieces on the top of the fuse aft of the firewall. As soon as I get some Midnight Blue cote, I will finish up the repairs, install the wings, check all the electronics and the motor, and then take her up for flight certification!


Just for future reference crumpled foam is easily repaired by placing the crumpled piece in hot Water it will restart the expansion process.
ReplyDeleteBloody nice job you did, Mate.:))
ReplyDelete