
Thursday, August 30, 2018
Saturday, August 25, 2018
Mighty Tiny packs a bite! XK K124 Heli

Flying my Motion RC XK K124 when it got a little close and I defended myself. She bit me with her main rotor. Look at that bite mark!
This heli is a bomb. It's twitchy, but she is indestructable after changing to the metal swash. Fun flier, but requires your full attention!
The heli flies with a 2S 700 mAh battery that lasts more than 5 minutes, sometimes close to 10. The transmitter is programmable and the heli is capable of 3D in the right hands (not mine). All the required adjustments are present is the Futaba compatible tranmsitter, including Throttle and Pitch Curves, Expo. Two rate are programmable. Not a starter heli as this is nimble and responds very quickly to small movements, even with 50% Rate and 30 Expo. She is susceptible to drafts in hover but more resistant in flight. I love practicing flying her around the clinic during down times and "walking" her down the hallways. The attack occurred while trying to fly her backwards (nose in) walking her around and I set up a pilot induced oscillation I could not recover from.
Fun stuff! I find the 3D mode nearly impossible to fly, and use the 6G. My 500s and 600s are 3 axis and flybarred. I have flown her outside in light breeze and she did well! All in all a fun heli, and the best flying 250 or smaller I have flown, and sooo much more fun than coaxials.
Saturday, August 11, 2018
New Field Box! Hyper Tough 2 Drawer
I needed a better, sturdier field box. It needs to carry my starter, tools , and batteries. I wanted something metal to protect everything from the LiPOs in the case of fir4e, and I don't want to spend a lot of coin. I found the perfect one.
Hyper Tough Two Drawer Tool Box at Wally-World


Hyper Tough Two Drawer Tool Box at Wally-World

Sticker came of easily.


One of the measurements I could not find was how much room was in the top space. I found a reference to it being "2-1/2" deep, but did mean including the lid? I suspected it did not. The starter on its side is 3" wide.... there os plenty of room! Its about 5" or so deep, I think.
UPDATE: The draweres are 2" deep. My 5S 4500 MaH batteries just fit. The top is 2-1/2" deep with the lid giving another 2" for a total of 4-1/2 of space.


New Photos!


5S 4500 mAh in the top drawer, 3S 2200 mAh in the bottom.

For scale.
Saturday, August 4, 2018
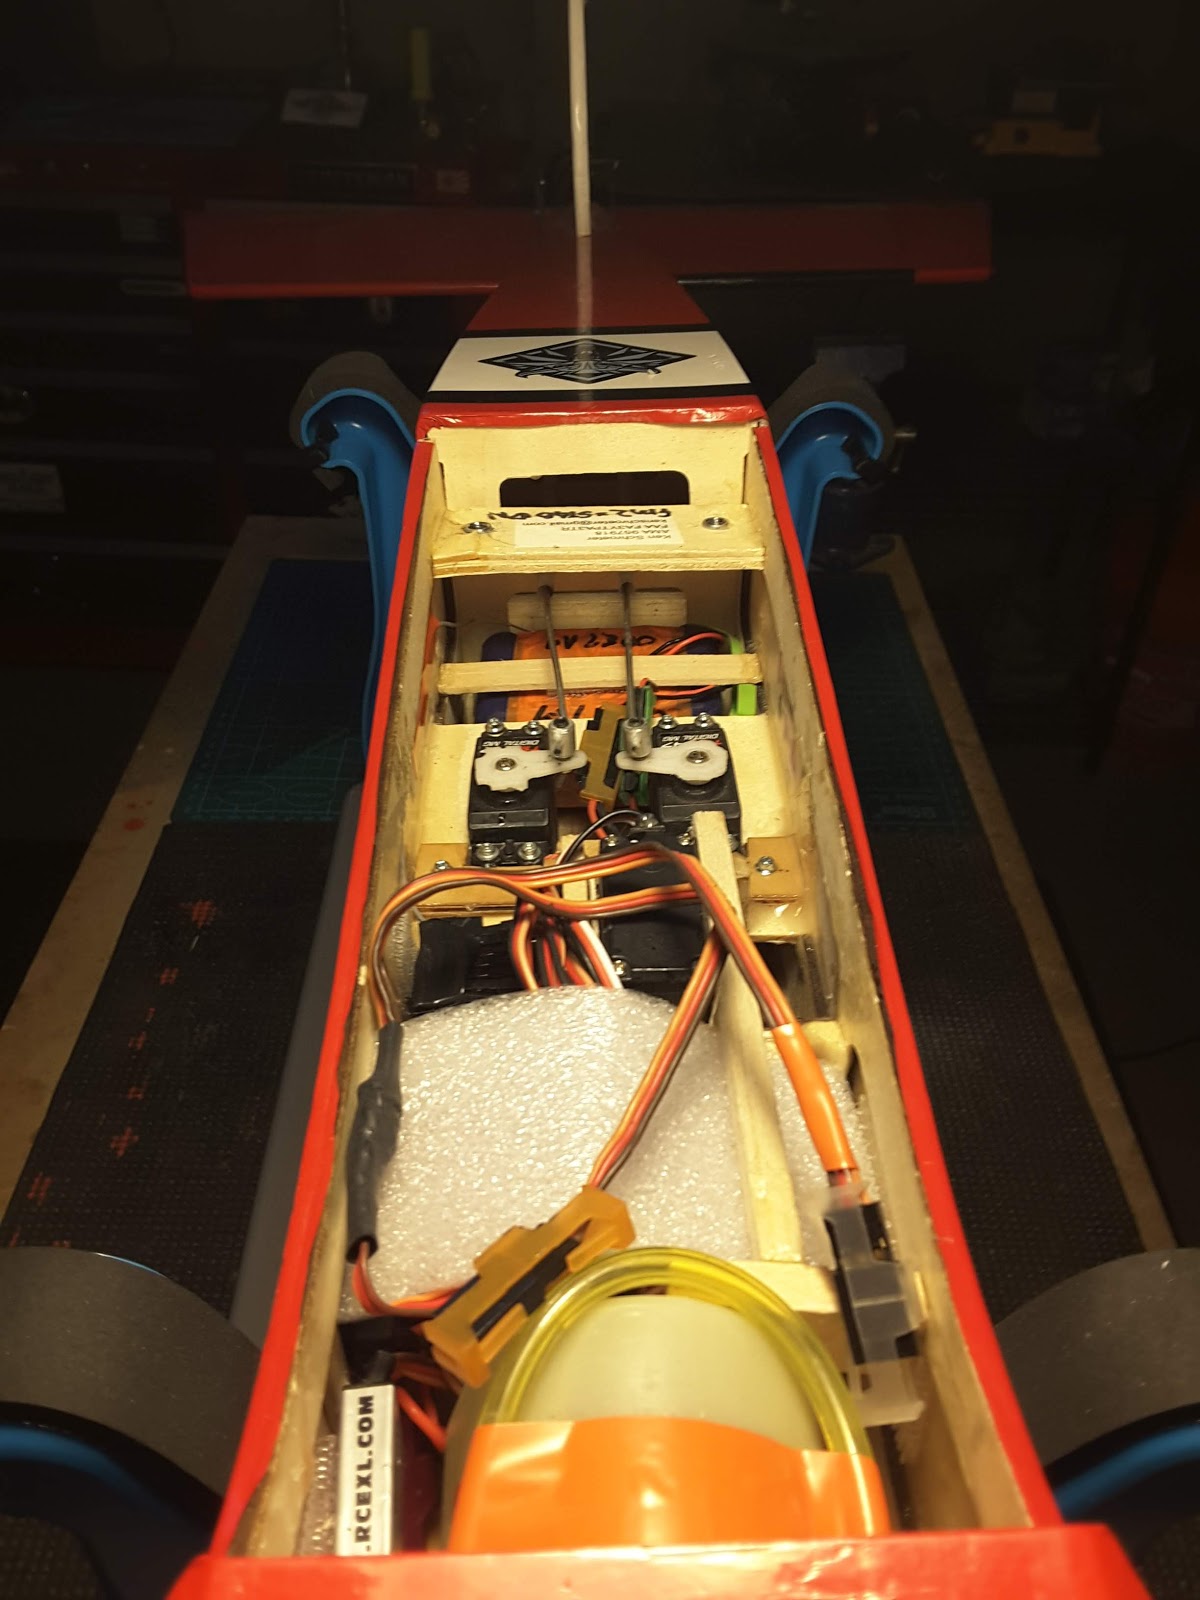
2 Years... and New Ideas for Spitfire 2
I got 2 years and hundreds of flights out of the Turnigy 6V NiMH Reciever and Ignition packs. The ignition pack failed, but I am replacing both.


This put my troubleshooting of the Stik's 10cc RCGF Engine on hold. I replaced the two batteries with the same packs, but have to wait about a week while the FedEx guy rides his bike from Oregon with them.
This got me to thinking about the second Spitfire build that will be my next project. I am moving to using a Tech Aero Ultra IBEC and changing to using a Turnigy 2S 3600 mAh LiPO reciever pack to run both the reciever and the ignition. In my first build I used my usual two NiMH battery backs with the RCExl Opto Kill Switch. This reduces the weight by about 150 gms.
That project is awaiting funding, but will otherwise be the same, using another RCGF 10cc engine from RCGF USA, of course.
Thursday, August 2, 2018
Tuning a Gasser: Keep It Simple Terry's Custom from Flying Giants
I have gotten a couple of good questions about tuning gas engines. I am by NO MEANS an expert, but I have struggled with it for years and have settled on this method. In fact. I don't think there is a better way, and this is the method "masters" have shared with me so I have always used this method for tuning my gas engines. Keep it simple. I got this off a forum years ago, on Flying Giants, "by Terry's Custom". Works well! The hardest part is trying to figure out if the engine is rich or lean...
RICH: Too much fuel, may need to turn needle IN (Righty Tighty = IN)
LEAN: Not enough fuel, may need to turn needle OUT (Lefty Loosy = OUT)

Don't omit any steps and don't do any steps out of order and IT WILL WORK, follow each step and do exactly as described:
Basic tuning:
1 - Tune the engine when it is warm, and double check the tune after a flight.
5 - Tune LOW (L) needle first. Now run the engine up to clean it out with a couple full throttle run ups and then go to to low idle. Listen to the engine.........how long does it take to start to "load up" or start to slow down in RPM? If it is rough right away you are likely way to rich. Normal starting point on 100cc engines is 1.5L and 1.5H. I have had to go as low as 1 3/8 on the low needle on the Walbro carbs. Adjustments on gas carbs are VERY small, like the width of a screwdriver blade or 1/16th of a turn or less.
A good "safe" tuning on the low needle you should be able to clean it out with some run ups, return to idle and it should have a nice steady low idle for at least 15-20 seconds before it starts to load up. If it does this it is still just a "touch" rich but will not die on you and it will run nice and smooth.
7 - Now tune the HIGH (H) needle. There are several ways to do this with RPM but the most simple way for a safe needle setting is this. With the engine warm and the low needle tuned run the engine up to full throttle for about 5 seconds. Now chop it in one quick motion to low. Listen to what it does then. - If it returns to a steady idle, you are very close. - If the idle goes way low and works it's way up to a steady idle you are too rich.- If it stays at a high idle and then slows down you are too lean.- If it dies you are either way too rich or way too lean. With the H at 1.5 (on 100cc engines) you should not be too lean.
RICH: Too much fuel, may need to turn needle IN (Righty Tighty = IN)
LEAN: Not enough fuel, may need to turn needle OUT (Lefty Loosy = OUT)

Good stuff for gasser tuning.
From Terry’s Custom:
Here is the process:
Read each step and follow exactly and move the sticks exactly as I indicate, there is no slow stick movement when checking the H and L needles. Since both needles work together, slowly throttling down or up will tell you very little when doing your base needle settings.
Don't omit any steps and don't do any steps out of order and IT WILL WORK, follow each step and do exactly as described:
Basic tuning:
1 - Tune the engine when it is warm, and double check the tune after a flight.
2 - On the Walbro there is a little silver screw on the carb that is an "idle set screw". it has a spring on it and it sets how low the low throttle arm will physically go down. Take that screw OUT and deposit it in the trash can. Do not remove the black H and L screws obviously.
3 - Start the engine and run it for a good few minutes with varied throttle and some full throttle run ups to get it nice and warm.
4 - If you have not done so, adjust the servo travel for a consistent idle, does not need to be perfect as long as it is as low as it will reliably run for at least 10 seconds or so. You can not properly tune the low needle if the idle is too high! For smaller engines set the low as low as it will reliably run and you can adjust after tuning. You will NOT use a high idle setting during tuning as you cannot tell exactly where the low needle is on a high idle. A good low idle should stand still on the ground while idling. An idle up should just make the plane want to roll on the ground.
5 - Tune LOW (L) needle first. Now run the engine up to clean it out with a couple full throttle run ups and then go to to low idle. Listen to the engine.........how long does it take to start to "load up" or start to slow down in RPM? If it is rough right away you are likely way to rich. Normal starting point on 100cc engines is 1.5L and 1.5H. I have had to go as low as 1 3/8 on the low needle on the Walbro carbs. Adjustments on gas carbs are VERY small, like the width of a screwdriver blade or 1/16th of a turn or less.
A good "safe" tuning on the low needle you should be able to clean it out with some run ups, return to idle and it should have a nice steady low idle for at least 15-20 seconds before it starts to load up. If it does this it is still just a "touch" rich but will not die on you and it will run nice and smooth.
6 - How low should react. Now that you have it running, clean out the engine and let it go to idle. Let it sit for 10 seconds or so and then slam the throttle to full, not slow, nail it!! Listen to what it does. If it dies or almost dies, you are too lean. If it stumbles and works it's way up (may see smoke in exhaust) you are rich. As tuned in number 5 above it should run up quickly with very little or no noticeable stumble.
7 - Now tune the HIGH (H) needle. There are several ways to do this with RPM but the most simple way for a safe needle setting is this. With the engine warm and the low needle tuned run the engine up to full throttle for about 5 seconds. Now chop it in one quick motion to low. Listen to what it does then. - If it returns to a steady idle, you are very close. - If the idle goes way low and works it's way up to a steady idle you are too rich.- If it stays at a high idle and then slows down you are too lean.- If it dies you are either way too rich or way too lean. With the H at 1.5 (on 100cc engines) you should not be too lean.
8 - When H is set return and double check the L and then double check the H. Then it's time for a flight. Listen to the engine carefully for all of the noted symptoms while you are flying. One engine test I do in-flight is for the H needle. Get the engine nice and hot, maybe a high speed pass or something. Now do a full throttle straight up line. Listen! Engine should be smooth and steady until you can't go higher. If it starts to sag at all, land immediately and richen the H needle just a tad and try it again.
This fade can also be caused from overheating not tuning related so make sure your engine is properly baffled if you now the tuning is correct.
There you go, pretty simple and really only takes a few minutes once you get it down.
Wednesday, August 1, 2018
Stik RCGF 10cc Piston Ring Installation and Revisiting the Single Needle RCGF Carb
The piston rings arrived and I installed one. Easy now that I have the right part. Here's how this went. I did solve the problem with the compression, but found the carb wouldn't send fuel to the cylinder. Bad carb.


I spent over an hour trying to get the motor to start. At first she would run a second choked, but only a second with the choke opened. If I put fuel directly in the air intake of the carb she wpuld run a few seconds. So the cylinder works, its just not getting fuel. Fuel is in the lines to the carb. Something is wrong with the carb.
I took the carb apart. It was full of fuel... everything looks fine. I am at a loss now as to what to do next. I guess I will try changing the carb. Maybe I will try the single needle carb...
UPDATE: This evening, for giggles, I installed the single needle carb. I had taken it apart, so first had to put it back together. I have no idea what the factory setting is for the needle. I think I remember I only adjust the tiny needle in the middle, not the big brass housing. It was dry and the engine can't draw vacuum sufficient to dry start it (a problem that doomed it, so now it comes with a Walboro carb). I figured out how to get fuel into the system and got her to start. But the settings are all wrong, so she starts at mid throttle, quits at full and at idle. I have an email in to Joe Nelson at RCGF USA about the factory settings and may try to get it to run. If I decide to use it, I will have to completely reconfigure the throttle servo and linkage, as the Walboro's comes out underneath and the sRCGF carb connects on top as installed. I am going to try to figure out what is wrong with the Walboro, but may need to send it or buy a new one.


The piston ring. There is a gap for installation. Note that it has angles at the ends.

On the piston head in the cleaned ring groove there is a notch. Find it. Its where the opening in the ring goes. Locate it. When cleaning the groove don't damage it.

When the ring is compressed in the cylinder head the two angled ends come together under the notcch in the cylinder head.

Installed. Note the notch and the opening in the ring matched up. The ring slips easily over the piston head into the groove lining up the opening with the notch.

The compressed ring at the notch. Hold this together and work the cylinder head over the piston. It may take a few tries. Start in back opposite the ring notch.

Remember the gasket before you slip the cylinder head on... I grease mine very lightly.

Screw the cylinder head on gorilla tight. Don't strip the screw heads.

Apply the RCGF Logo!
Nice compression!

I took the carb apart. It was full of fuel... everything looks fine. I am at a loss now as to what to do next. I guess I will try changing the carb. Maybe I will try the single needle carb...
UPDATE: This evening, for giggles, I installed the single needle carb. I had taken it apart, so first had to put it back together. I have no idea what the factory setting is for the needle. I think I remember I only adjust the tiny needle in the middle, not the big brass housing. It was dry and the engine can't draw vacuum sufficient to dry start it (a problem that doomed it, so now it comes with a Walboro carb). I figured out how to get fuel into the system and got her to start. But the settings are all wrong, so she starts at mid throttle, quits at full and at idle. I have an email in to Joe Nelson at RCGF USA about the factory settings and may try to get it to run. If I decide to use it, I will have to completely reconfigure the throttle servo and linkage, as the Walboro's comes out underneath and the sRCGF carb connects on top as installed. I am going to try to figure out what is wrong with the Walboro, but may need to send it or buy a new one.

The original RCGF Single Needle Carb installed.

Bottom (top, installed). The throttle lever would have been on top instead of where the servo comes out on the bottom of the fuse. There was no point to keeping it installed, especially after what I discovered (see below video).
Recorded during the first good start. Trying to tune it I only made it worse. It will only start at precisely half throttle, will speed up at 3/4 almost full, but quit at full, and anything less than half.

UPDATE (8/2/18): Well, this is interesting. I am surprised the engine ran at all! I was removing the single needle carb and reinstalling the original but now completely deconstructed and rebuilt Walboro carb when I went to plug the vacuum nipple on the cylinder that the remote fuel pump for the single carb needs. I saw that tis plugged INTERNALLY. I had completely forgotten I had poured solder into it to completely close it off. Somehow the pump worked, sort of, without vacuum. This may be why it ran oddly and could not be tuned.

The brass penis thingy coming off the base of the cylinder is the vacuum nipple for the single needle fuel pump.
Subscribe to:
Comments
(
Atom
)