The flying monkeys got me...

Helis and fixed wing

AMA 957918
IRCHA 4345
AMA Intro Pilot Instructor

Pirate Kid Skeleton by RadDezigns.

Saturday, June 28, 2014

Weather Break!

Finally got a break in the weather, albeit with brisk winds. The winds were kind enough to be directly down the runway from the south. I took advantage of the winds to practice my landings, and am improving. I did manage to crack the new gear again with my last landing (a nice snap was heard). The gear are good, just fractured the CF on the outside. I put some JB Weld on it, and have ordered a replacement, but right now it looks good.

I also flew the Trex 600 and again grounded the tail blades on my last flight, stripping the forward umbrella and this time the autrotation gear (I was auto-rotating to landing when I touched). I read about putting a Trex 700 tail fin on it to raise the tail and will put a servo wheel on the end to add more protection if needed. I realized today that the fin I have is very thin and vibrates, so it needs replacing anyway.

I got a lot of flights in today, and enjoyed every minute!


Hot, sunny, protecting the canopy. Forgot a towel, used the wing bag.


Robby and Jerry flying Robby's glow Escapade.


Kenny's sweet 60cc twin cylinder Carden Edge 540.
Very nicely tuned!


I am probably going to go again tomorrow, weather permitting. Get Aidan out on the Alpha and give him some time on the MX2, which I didn't take today. Enjoyed a great flying day, good conversation and improving my skills!

Friday, June 27, 2014

MX2 Got Her Legs Back!


She got a pair of carbon fiber landing gear from General Hobby, which along with the wheels from Hobbylinc, and the axles from Du-Bro, came in the mail today. The gear I got from Troybuilt for the Sbach are the same ones on this plane, but those came predrilled. The ones from General Hobby had the axle and wheel pant holes drilled, but not the attachment. Easily drilled. She sits much higher than before. I also fixed the left wing where the wheel pant went through it. 

And with that, she is ready to have her CG checked and be declared airworthy!


Wednesday, June 25, 2014

Align Trex 600e Pro and other repairs


I have flown my Align Trex 600e Pro twice now, and both flights went well right up to landing. I landed on both occasions with the tail slightly down at touchdown and in both instances the tail blades ground struck. In the first accident the tail blades broke, and on the second they broke and the forward umbrella gear and torque tube gears stripped a few teeth. 

I spoke with Jason at Amainhobbies, who helped me select the right replacement gears. I asked him about taller landing gear, and he noted the white stock ones are FC3 skids and are about a cm lower that the black standard ones. The black ones would give me more clearance. I don't think you can tell from this picture but the tail fin used to touch the ground with the blades a mere 1/2 inch above the ground. Now the tail is off the ground by a cm and the tail blades are almost 2 cm above the ground. The hell is definitely sitting taller! 

Replacing the gears was a piece of cake. I love the modular tail box: the entire tail assembly comes off in one piece. I opened the box and swapped out the gears (scary moment when the bearings holding the torque tube umbrella gear would not let go of one of the old gear and I was afraid of damaging the bearing). Soaked the bearings in WD-40 Silicone, and put it all back together, total time about 30 minutes.

I also got the landing gear for the 30cc Sbach in from Troybuilt Models. I wish I could order everything from these folks: fast, fast, fast shipping! They went in with a minor modification of the bolt holes (off 1 mm on each side). There is a hole in the center which is to anchor the middle of the gear, where most carbon fiber gears break. My thought is that they break there because of flex, and I don't know that preventing a little fleet there is a good idea... not sure. May just put a screw in there anyway.  I also had to replace the rudder/tail wheel steering rod, a piece of metal rod that makes the tailwheel move with the rudder, as it snapped off while taxing the other day. Replaced another prop (this was my fault, dropped her hard on her gear, hence the replacement, and broke another prop. I need to work on my landings with this bird...).

Weather is expected to suck the next couple of days, no flying expected. I have a set of gear for the MX2 coming from General Hobby, ordered the day before I found the Troybuilt ones (and not sure its even shipped yet). Hobbylinc is sending me some wheels for the MX2. Once those are installed and I repair the wing, she is ready to go! 

Another move coming up, this time to Manchester, New Hampshire. More on that soon!


Sunday, June 22, 2014

Repair of Alpha 450 Broken Wing

As all of us have done, Aidan aborted a takeoff by crashing into a safety fence, putting a pretty nice dent in the leading edge of the Alpha Sport 450. We used some "field cote" (packing tape) to patch the leading edge and kept on flying. Today I took on the repair.


Bent leading edge, wrinkled cote.


Worse under the cote.


Pulled the wood up and CA'd it, then sanded it as smooth as I could. A lot of CA inside.


Spackled the uneven surfaces. Modeling filler is better, but alas, I have none.


I put a piece of packing tape across the repair, then cote over it. I don't have any red or blue cote... used white.  One piece top to the middle of the leading edge, one overlapping, and a third overlapping underneath.


Not my best work, but it came out pretty darn good!


We field named her Jinx, since it really is always something!


MX2 Bottom Rebuild Completed!

I didn't blog about my day the other day, where the MX2 landed sweetly and the landing gear ripped out of the bottom of the plane...

I had flown her for a while, several touch and goes, getting the hang for how she would float into a landing. On my final to stop she landed nicely and after about a foot of roll out the landing gear ripped from the bottom of the plane, taking the entire forward bottom section with it. Post crash inspection I noted that the right wheel hub was broken all the way around. I suspect it failed shortly after this touch down grounding the right landing gear strut and bringing that right side to a sudden and catastrophic halt. This explains why the right wheel pant rolled back into the right wing, and the left wing escaped injury.


In previous repairs the prior owner had heavily built up the bottom, so there were no weak points in the vicinity of the landing gear attachment. The heavy beatings she would take as a gas plane likely weakened the fuse beyond the hard points and after a time she failed. And she failed big. I wasn't sure I could repair it. Given the build up from the previous repair, I was obligated to rebuild her likewise. I think I did a pretty good job, and the weight should be about the same if not lighter (I removed and did not replace a couple of solid wood panels and screws from the original repair).


Ripped clean out.


Cracked the wheel pant that went through the wing. The wheels classically roll back and strike the wing, usually putting holes in both sides. This only caught the right one.


Bottom ripped out. There was a nice pile of debris. If you look closely you can see evidence of the previous repairs.


Rebuilding. The right side of the attachment of the gear point to the fuse broke off clean right at the juncture of the metal L bar the previous repairer used, so I had to place it in situ and use epoxy and supporting wood to reattach it.


It ain't pretty, but its strong.  You can see how I used wood to make connections and to reattach the hard point to the fuse.


Tongue depressor stringers replacing plywood laser cut frame.


You can see where the laser cut frame wood was torn from the fuse and how I fashioned tongue depressor stringers.


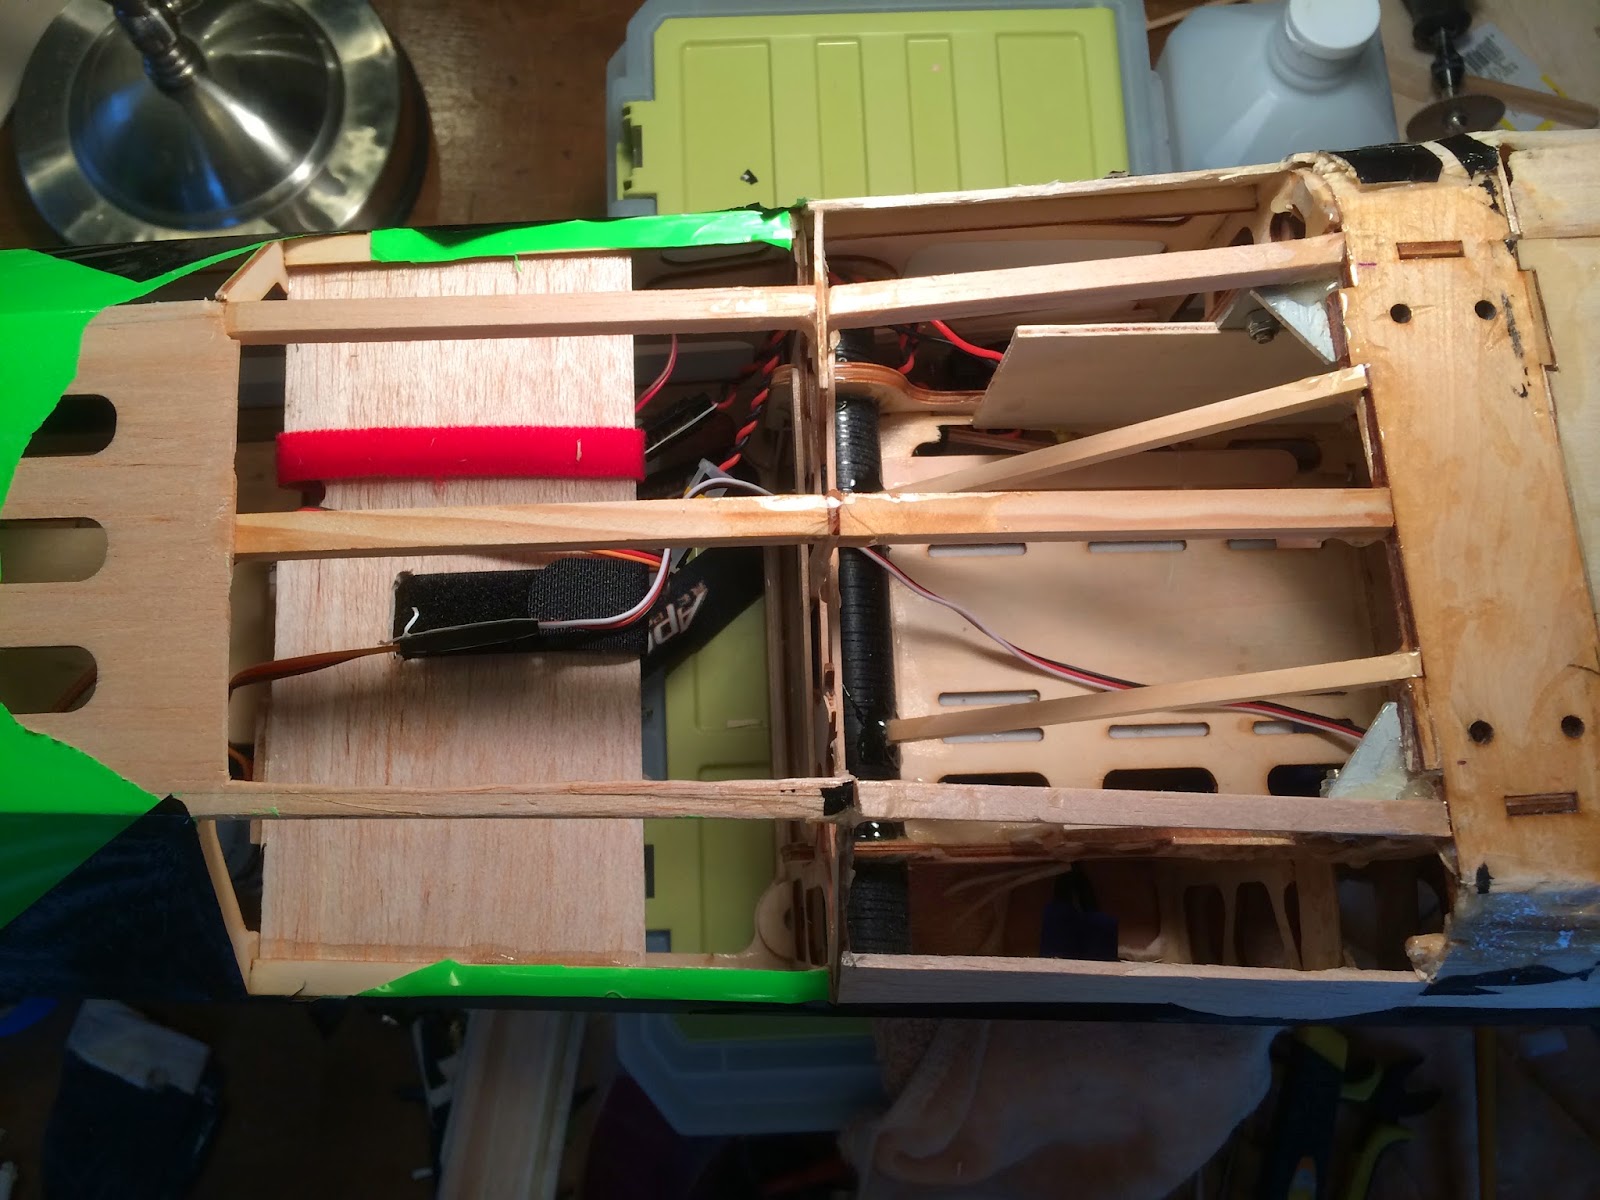
I laid down a hardwood center bar and two hardwood buttresses angled down from the gear hard point connecting it to the wing tube. This directs any aft ward force up and back into the hard support of the fiberglass and carbon fiber wing tube structure. The original repair had a solid sheet of wood between the gear hard point and that first bulkhead aft. I use balsa 4 mm square rod to support the sides along the bottom of the fuse.


You can see the popsicle stick wood I used to reconstruct a bulkhead where the laser cut bulkhead used to be. Some of the bulkhead remained and I used it as foundation.


A better view from fore to aft. In this view I have laid down sheet balsa to smooth out the area in front of the landing gear hard point.


I whittled down that center balsa keel that overlies the hardwood keel, to make it more flat. It looks rounded here as I thought that's what I wanted, but decided to flatten it out some.


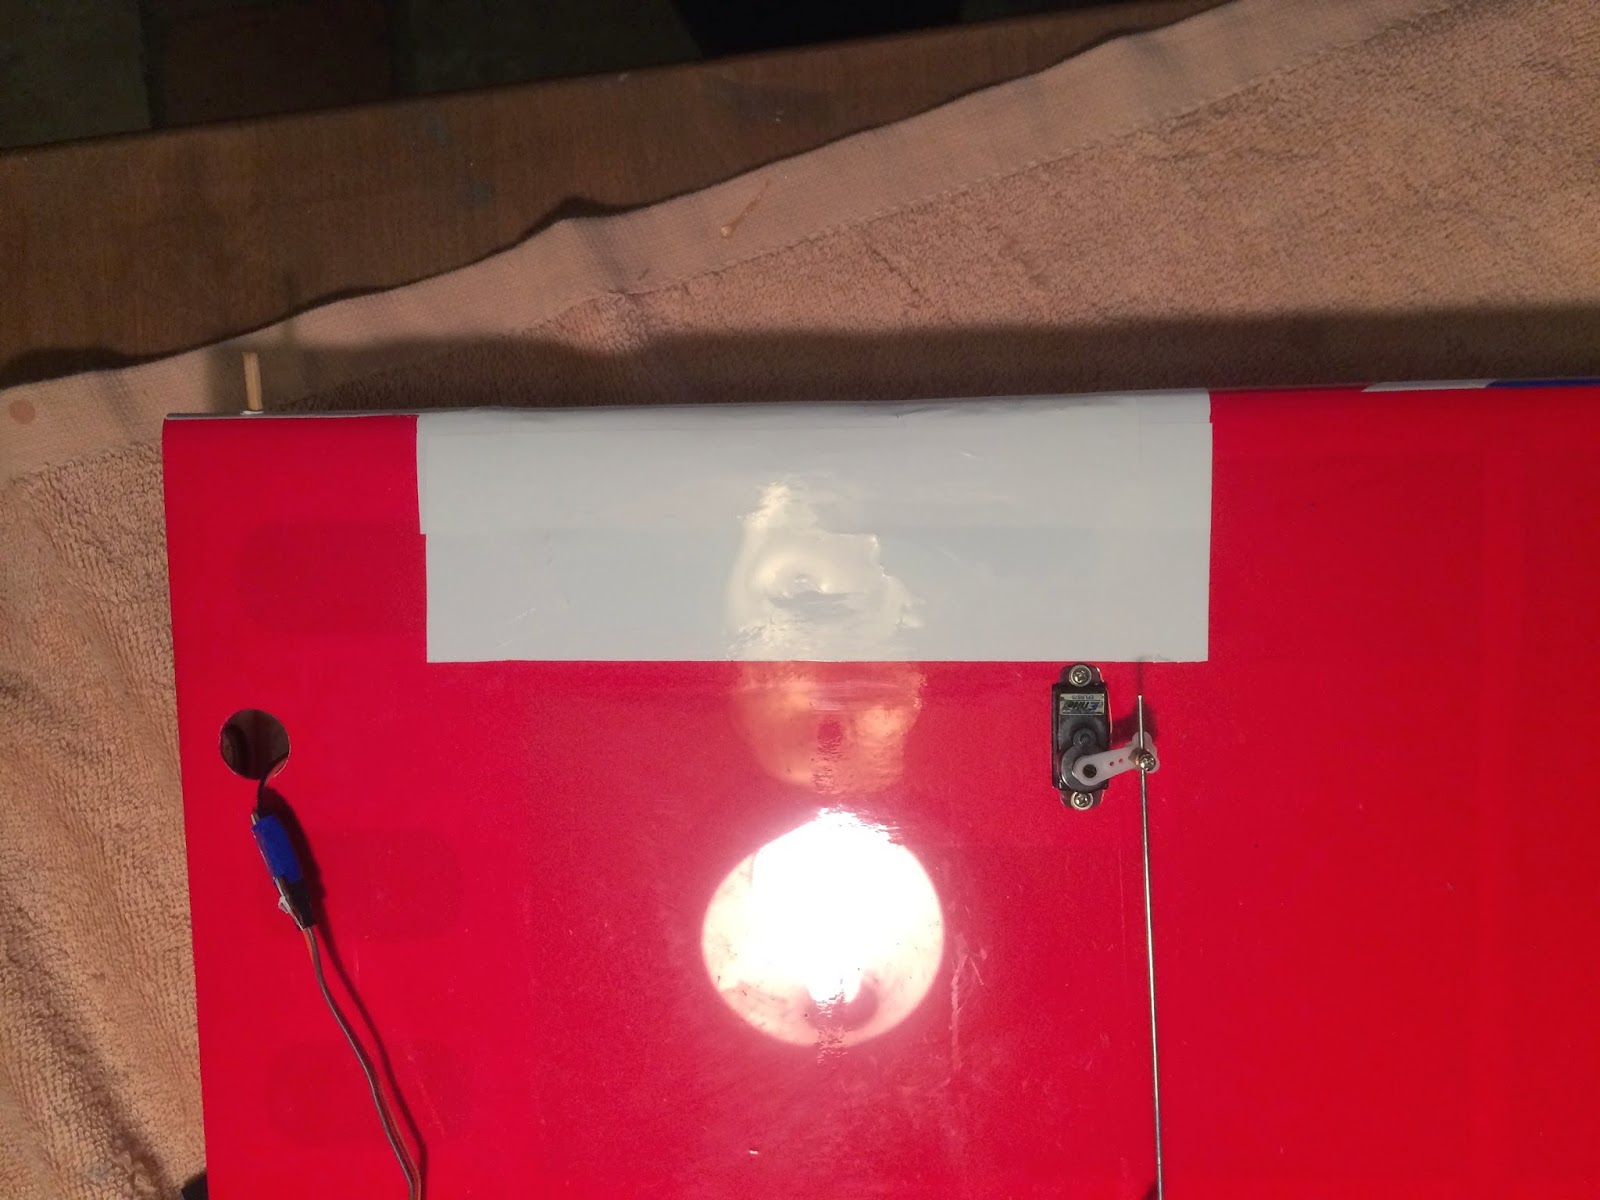
The final cote work. To increase the strength offered by the cote I did it in layers. The front section then the gear hard point and the sides drooping off of it, then one large overlapping strip on each side (they cross in the mid-line at an angle), then a center black strip from the hard point aft bringing it all together. I added the decorative dart as a large white dart, with a smaller white dart on top giving more layer, and then two thinner black stripes dividing the white dart. 

I've learned to tack down the edges with the iron and then use a heat gun to shrink it to taut fit. I have to say it came out perfect, with excellent symmetry and clean lines! Some of my best work yet.


I will repair the hole in the right wing today, and have ordered a set of carbon fiber landing gear to replace the aluminum one that I broke by over stressing it trying to straighten it. One friend suggested using heavy duty aluminum, but the CF one came in at half the price, is lighter and stronger, even though it tends to crack rather than bend when severely stressed. I have already repaired the wheel pant with epoxy and CA, and will sand then paint the inner aspect possibly white to contrast with the other side (not sure yet). Once its all done I will post some photos, check her CG and fly her. I hope the repairs don't change her flight characteristics much, she was perfectly balanced.


Monday, June 16, 2014

DLE/Walbro Carb Metering Diaphragm Mod

As I read up on gas engines and their problems, I ran across a solution to a common problem my 2-stroke 30cc DLE engine exhibits (we think from a poor break in by the original owner). It already 4-cycles (runs rich) a bit more than it should, running even more rich once at altitude. One of the causes can be high and variable air pressure inside a relatively closed circuit cowl with a running engine at the lower pressures at altitude affecting the fuel metering diaphragm and valve. That solution is a metering vent modification I found online at Flying Giants that effectively moves the vent to a more stable air chamber at the appropriate pressure further aft in the fuse.

The metering diaphragm helps control fuel flow as described in this Walbro Tech Tip.


Use a small nitro muffler pressure fitting. Picked mine up for a couple bucks at Orange Grove Hobby in Gulfport, MS.


Drill out the original metering vent hole to fit the 6-32 fitting. If you can tap it, do it, but I don't have one. It still screwed in nicely.


Obviously the fitting protrudes into the metering chamber and needs to be ground down.


To keep it in place and seal it, I used a torch to heat the metal and solder it in place. I did this before grinding down the inside end (see below) as it made sure the fitting stayed put.


Better living through Dremel!  Nice and smooth, finished off with 220 sandpaper, and a small drill bit to reopen the hole to its full size. Smooth as a baby's bottom.


There are variations on the distal end of the vent tube. I used an extra plastic fuel clunk and a deep plastic top of a bottle. The idea is to have the opening of the vent in a still or laminar stable pressure flow. I drilled the top of the plastic bottle to accept the thick part of the clunk so it rests deep inside the plastic top.


I used Tygon tubing to run from the pressure fitting into the fuselage, and secured the distal "cabinet" inside the fuse next to the gas tank. There is good airflow through here, drawn out by the low pressure louver vent I put in the aft fuse. 


The plastic top opening is open to the air in the fuselage, facing aft.

Looking forward to seeing how this affects the engines performance.