The flying monkeys got me...

Helis and fixed wing

AMA 957918
IRCHA 4345
AMA Intro Pilot Instructor

Pirate Kid Skeleton by RadDezigns.

Thursday, April 28, 2016

Spitfire is ready for engine testing!


Yes, the letters are black, not white. Decided I liked the black better. Also, different on either side. It's not meant to be historically accurare.

I decided also to try the 3 blade 13x8 prop, for break in and flight testing. I do have a 14x8 MA Scimitar if I don't like how she flies. As a gasser I think she is heavier than a glow or electric.

It will be a couple of days (work) before I get a chance to fire her up.


Wednesday, April 27, 2016

Oh! Oh! Oh! Its finally available!!


OMG! I have been waiting for this to become available for a couple of months now. JUST TAKE MY MONEY!!!

I want to pair this up with an RCGF 15cc gasser. This is going to have to wait, though, as it is going to be the most expensive project I have ever built or flown. It will have Hitec MG servos, and a Spektrum receiver.


Maybe for Christmas?

Tuesday, April 26, 2016

It was a good day.

One day off yesterday, had to fly AND ride the motorcycle, did both. I flew well and everybody came home as they left!


My Skyline MXS-R Breitling 30cc DLE. Love that sound!

I wanted to shake off the jitters, so I brought out the Alpha 450 and flew the crap out of her. I twisted her so hard her horizontal stab came loose. She still had a jiggy nosewheel (likes to peel off to the right) and I wasn't able to field adjust it fully, solved it when I got home by re-doing the entire rudder/nose wheel/rudder servo assembly. I think I have straightened her out. 

I also had an event on the ground that was odd. While she was on the bench all of the sudden her rudder went hard right and stuck there. Remember that this has happened in flight. The first time I flew in Merrimack I had a rudder issue and had to land despite it. Well when this happened I found nothing wrong, and the control horn didn't strip. I checked my DX8 transmitter and the subtrim on the rudder was all the way 150 right. That's not were I put it. Also all my DR/Expo went to 100/0!  This is a transmitter problem... I had sent my DX8 in after the first incident and it checked out. Spooky. The transmitter is only about 4 years old. I think I will index all the models on the SD, and reinstall the firmware. Curiously it only happens on this plane and I think one other (which one... was it the Pulse?).

Well, despite that I flew 6 packs and did landing after landing, yanked her around a few feet off the ground, take off, immediate 180, downwind landing, takeoff, 180, upwind landing, occasional crosswinds as the increasing winds shifted. I remembered I am a good pilot.

Then I took the 30cc up, less nervous, and flew several tanks, multiple landings and takeoffs, some simple aerobatics. I tried downwind approaches from the south over the Southern Ents, and could get her down but had to work it to drop hard without increasing airspeed or stalling, and with the tailwind ate up a lot of runway. From the north on the Runway 18 approach easy peasy, can easily get her in. I think I can reliably land this big one from the south if I have to, as there will be a nice headwind in that case.

Flew for a couple of hours, one flight after another, and enjoyed it! Left and worked briefly on the Alpha, then got on my Triumph Tiger 800 and spent a couple of hours taking the long way around.

All in all, I am a happy man.

Sunday, April 24, 2016

Skyline Corvus 540 or PA Ultimate Project

So...

I really would like to build the Precision Aerobatics Ultimate, to replace my Eflite Ultimate, representing quite the upgrade in the process, but that's gonna be an expensive build. In the meantime, I want something aerobatic, not too expensive to lose, and fast, to replace the Ultimate and the Pulse XT 25e.  I REALLY want that PA Ultimate... and in the end may just wait and get it. But I REALLY want that powerful Corvus. I spec'd out a Skyline Corvus 540 build, electric with some oomph. At $140, she isn't so painful to replace, and I have the most expensive parts already on hand.
PA Ultimate
Skyline Corvus

But the PA Ultimate... "she so fine..."  and I love the way Ultimates fly. The parts I am getting for the Corvus could easily be used in the Ultimate, and I have the motor and ESC on hand for both planes. The Corvus would require investment in new 6S batteries, the Ultimate would fly 3S with what I already have on hand. The Corvus would be wicked powerful with a 1400 watt motor (she is rated for 1000-1200 watts, but who's got time for that?).

To build either plane I have on hand the motors, ESCs, and receiver, likely the prop. I would need to get the servos, and a BEC,

I spec'd and priced out Spektrum A5040 metal gear mini digital servos, a quite affordable, excellent performer, and Spektrum/Horizon Hobby quality. I love Horizon Hobby, but they use bicycles to deliver parts from Champaign, IL (8 days to get to NH, please...). May buy them from someone else (probably Hobby King... But I think they use cats with ADHD to ship and deliver from their US warehouses and their times have been so hit and miss lately).

I can pick up a 6V BEC anywhere for less than $10.

In the end, there is a $100 difference between the prices of the aircraft, with the PA coming in at $250 for the ARF. That's quite a chunk of change, not just in initial investment, but in "cost of crash" and the agita it induces.

When I finish the Spitfire, I will need to think about what I want to do... I am leaning to the Corvus, and sometime later I can do the PA.

I met a wonderful man some of you may know, James Tyrie. He LOVES to build. I didn't get a chance to talk much to him, but would love to chat and learn from him, see his work!

Friday, April 22, 2016

Not much happened...


In between rain and under cloudy skies, the winds were calm with breezes from the south, and I had been itching to fly, so I took the two gassers out.

The 10CC decided to be a pain in the ass and didn't like the change from 40-50 degrees with no humidity, to 70 and Mississippi muggy. She would run, but didn't actually run right, bogged down and quit time and again in idle. So I abandoned her, and set up the DLE 30 cc Breitling MXS-R. She ran fine, so I warmed her up and since she hadn't been flown in a couple of months, I ran a half a tank through her, refueled and took her up.

Perfect takeoff, tootled around and realized I was scared to death. I have had such a bad run of luck lately that I had no confidence. A couple of simple loops and I brought her in and landed perfectly, trying not to hyperventilate. I calmed down and put her in the bench. Since I hadn't tuned her up since the cold weather and wondered if she ran a bit under powered (still with unlimited vertical) I de-cowled her and tweaked her a bit. In the middle of that my teenager texted that he was back from Boston and needed to be picked up, so I had to pack up. Next time I take her out I will likely finish tuning her.

I got home and tweaked the 10cc, and she is running better than ever. Noticed that with the cowl on I picked up another 200 rpm.  I am glad RCGF abandoned the pressurized pump and single needle carb as it's a bit touchy and needy. I expect that the new edition with the Walboro style carb  I have on the Spitfire will run fine.

Bummed I didn't get more time to shake off the jitters...

Wednesday, April 20, 2016

Phoenix Models 10cc Spitfire Build Update

I've been working on the Spitfire, installing the electronics including the servos for the throttle, rudder and elevators, installed the fuel and ignition systems, and today installed the landing gear, flap and aileron Y-harnesses and passed them into the upper compartment.

I had it in my head that with al these Y's a 6 channel receiver would be enough. Of course I need 7... in no particular order:

1. Throttle
2. Flaps
3. Ailerons
4. Rudder
5. Elevator
6. Remote Ignition Kill Switch
7. Receiver Battery-Bind

Last night I ordered a Spektrum 7 channel reciever from Horizon Hobby. Right after I clicked SUBMIT I realized that I could have picked one up at ABC RC & Hobbies on my rounds today... dammit.

UPDATE:  OMG... The receiver is going to take 8 days to get here! Who knew FedEx uses bicycles for deliver from IL to NH?


Put a bigger wheel on the tail.


Under-side electronics bay. empty.


Upper-side electronics bay, empty.


Bringing the wing together, the vertical and horizontal stabs being hinged.


Upper bay FILLED literally to the brim. The receiver itself will go on the left next to the switches. At least that's the plan.  In this view you can see the fuel dot and intake line. It runs down the port side, crosses in front of the tank to the starboard and goes out of the motor box to the lower nipple on the QuikFire.


The bay is filled. The Remote Ignition Kill Switch, the underside of the switches, the throttle servo, and aft, the elevator and rudder servos. You can see the fuel vent; the only place it could go. There is a spar in the centerline, and I did not want it sitting on the side of the fuse with fuel dribbling down the cote. I chose to let it collect in the airscoop of the cowl and dry/drain from there.


I installed the QuikFire fuel filter. The RCGF ignition is in orange under the box.  I had to trim the exhaust pipe to get this through the cowl. I may need to put a coupler on it to extend it...

In these views the fuel line from the  fuel dot, into the lower of the paired QuikFire nipples is not yet connected.


The Y-harnesses for the landing gear, flaps and ailerons coming out of the wing. I will be making these as short as possible and run permanent leads down from the receiver. I want to be able to remove the wing for transport.  Yes, I did tear the cote... and I have since fixed it.


This is the form fitting cut-out. In the end, to get it to slide on easily and get the spark plug wire though and out, I had to enlarge and expand the openings. When things are done I'll post a new pic of the final.


Wings on! Awaiting the Spektrum 7 channel receiver!  Once that's in I will program it and start working on getting the engine started.  One thing I had to compromise on was the fuel vent... it had to come out under the section just behind the motor box, which puts it INSIDE the air scoop of the cowl. The inside of the fuse is almost entirely taken up by the fuel tank. I coated the inside of the fiberglass  air scoop with epoxy, and will use thinned fuel proofing in the adjacent fiberglass to protect it. I will need to be conscious, more than usual, of the fuel overflow on filling the tank. I vented the bottom of the scoop with two holes, and opened the back a little to allow airflow to dry any gas that drains out. I am not happy with this, but there really is no where else for it to go. On a glow there would be no ignition battery, so it could go there. We'll see if she goes up in flames one day.

Once I have the cowl on and secured I'll start the decal application. 


ABC RC & Hobbies, Windham, NH

Too gusty to fly this morning, and needing three Y-harnesses, I decide to take Clara, my 2014 Triumph Tiger 800 out on a tour of local hobby shops until I found them.


I stopped by ABC RC & Hobbies, 11 Rockingham Road, Windham, NH. What a marvelous tiny but amazingly well stocked shop! I met Fred Padovan, a co-owner, a nice, personable guy. He notes that they are moving next door to a spa e occupied formerly by a gym, which will triple their space. Picked up my y-harnesses at a great price. Show these guys some RC love, will ya?  On the web at the link, on Facebook, and by phone 603.458.6481.

I first went in search of Paul Linn's new location for Model Aircraft Fabricators, but I fear he has closed his business. He's not been at the old location by DW Diner for some time and was planning on moving. His website is closed, and his Facebook shows 301 DW Hi-way as the new location, but the sign displayed is the old one. I rode out there and nothing. His phone is no longer in service. Bummer, I like him and his little shop, sorry to see him go. If you know where he went, please let me know!
Since I found what I needed I didn't stop at RC Buyer's Warehouse. I like them they have a lot, but given a choice if Fred has it, I'm going to Windham. Every time I go to RC Buyers I feel like I don't belong there so I tend to go in and out. At Fred's I wanted to hang out a bit!

Now that its late in the afternoon the winds have died down, but I have kid duties to attend to, so no flying today. I'll be installing the wing on the Spitfire!

Thursday, April 14, 2016

"If you don't want to crash, don't fly."

Its been a rough couple of months. I have had 3 crashes, 3 resets of my "Time since my last crash" clock (scroll down). Two were pilot error, both loss of orientation when I flew into poor visual conditions (one sun, one poor contrast sky), and one was structural, the plane simply folded up and died. All were complete losses. I got to thinking, I don't have many planes that I haven't had to repair, minor or major. Most have been victims of my flying skill, or lack thereof. For those others, there is plenty of time...

The first Twinstar was inverted as I crossed the sun line, too low under a tree line. I lost her orientation as I was turning and banking out of an inverted flight path and threw her into the ground so hard she literally became toothpicks and powder. I managed to recover the important parts, and quickly bought a new one. The price is too good, and she is fun to fly. I have only flown the new one once or twice.  (Twinstar links on my blog).


The Twinstar disaster.


A couple of weeks ago, my beloved but much abused Eflite Ultimate 20-300 was flipping around, when I thought I was too close to another plane and in the gray skies over the woods I lost orientation and could not figure out where she was going, until she arrived at the scene of the crash... An ambitious man might have rebuilt her, but honestly, she had been through enough. It was time to let her go. I won't replace her... can't, they don't make her anymore, and right now I can't afford the Precision Aerobatics Ultimate, a long time dream of mine.


The Ultimate FU.


And lastly, I am sure not my last crash, 
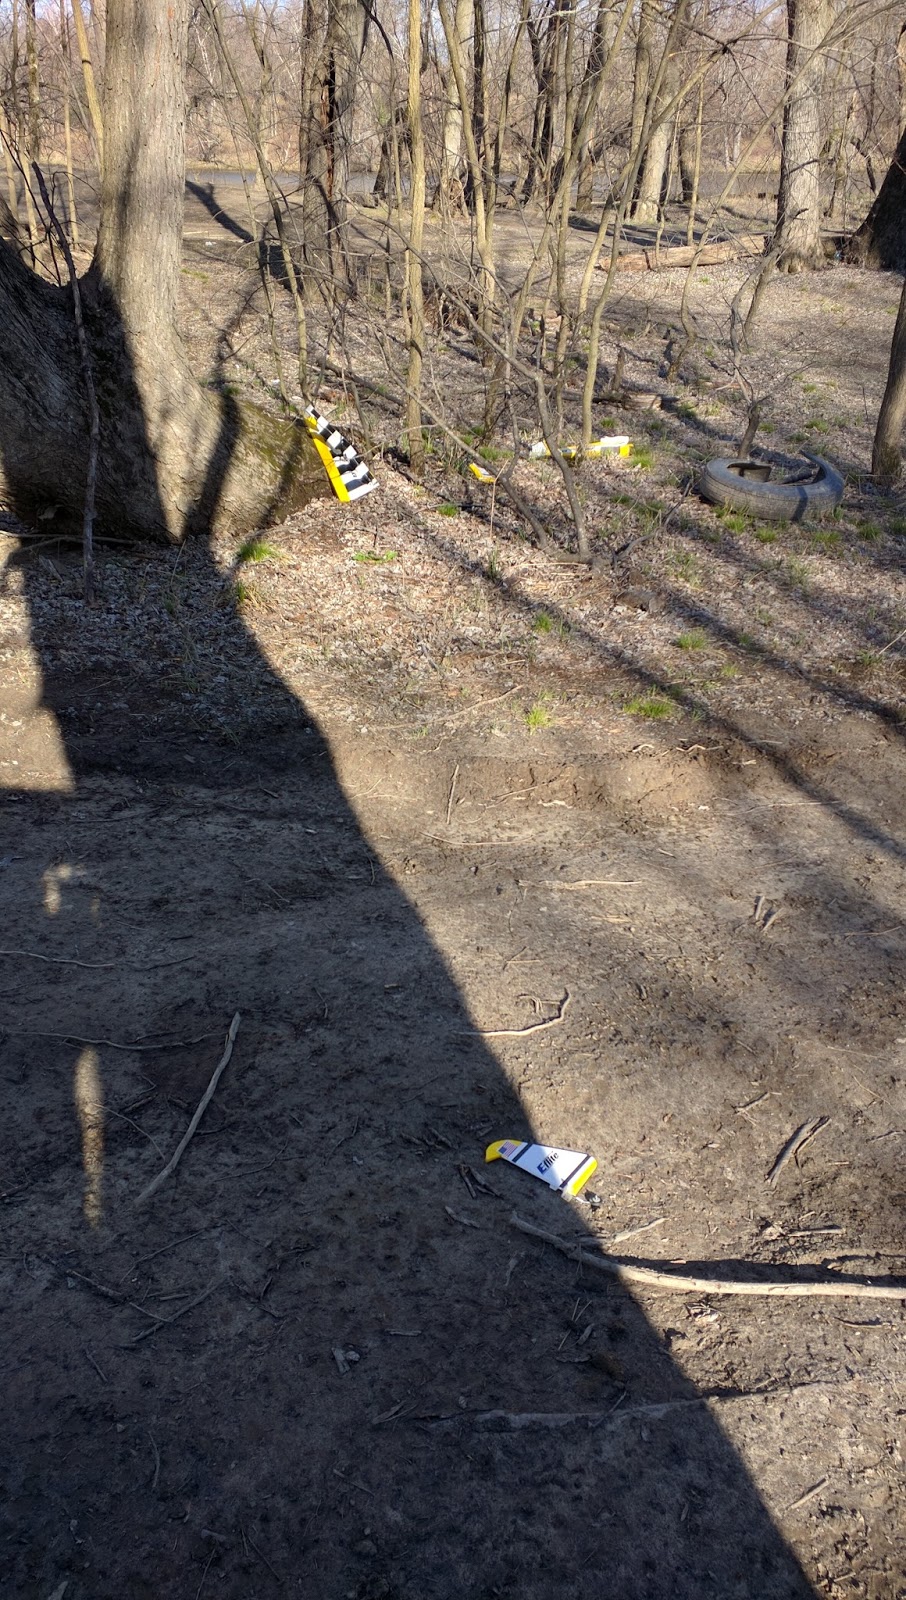
my fourth Eflite Pulse XT 25e simply folded up in mid flight and died an ignoble death falling into the trees and mud between the Merrimack River, and our flightline. Simply. Fucking. Folded. In. Half. At $200 a pop just for the airframe, I have spent almost $1500 on that model of airplane. The first three I admit I killed, but this last one... damn., just broke my heart.


The end of a legend.


I have lost planes. Everyone who flies has. Paul Verger, an AMA hall of fame pattern flyer I am sure, once told me, as we watched the confetti that was once a multi-thousand dollar 100cc plane he had been flying a moment before flutter to the ground, "If you don't want to crash, don't fly."  I get bummed when I crash, but I really don't see the point of getting angry. If you don't crash, you aren't trying hard enough. But its not cheap, and there is a lot of time and effort put into the building. Nothing, for sure, like a kit builder who puts his or her soul into each frame member they glue together, but its still a lot of time, and effort. 

So why am I having this run of bad luck? Have I always been a marginal pilot? WTF is my problem?

Most of my early crashes, or really, all of them, were due to learning where the flight envelope ended, either exceeding the capabilities of the model through ignorance, or just losing control. None of this required skill, I was just a talented member of The Society for Aircraft Demolishers, SAD for short. I am literally a sticker carrying member. It took me while to learn, for example, that even if the Eflite Stearman can twist a tight turn, aerodynamically she can't pull it off and will instantly enter The Spin of Death. I had to learn that several times. Its one of the reasons I am such a good MacGyver builder: I could and needed to fix those bonehead crashes, and I gave myself plenty of practice. I tore landing gear off more times than I can remember, broke engine boxes, crushed wings, broke the underside of frames. put holes in wings, wings in trees, grass and brush fields, crashed in roads, snapped props in half and clean off. Given enough CA, epoxy and wood, I can rebuild anything. Most of the time it was coming in too hot, coming in too low and landing in the trees, practicing the art of the 3-in-1 landings (a Bouncing Betty). failing to flare, or flaring too soon, ran out of gas in the wrong place, learning how not to spin, and that not all stalls are recoverable, and that depth perception matters.  Flying is costly, in time, money and energy. But like any addict, I keep going despite the pain.

Now my crashes are usually mid-flight loss of orientation. I can land anything eventually, and generally intact. But I think my depth perception, which has always been an issue, is getting worse. I also can't always see clearly in my contacts, or even sometimes my glasses, sometimes getting a floating contact while on final. Older eyes. Contrast is a problem: in dark gray skies, even with amber/yellow lenses, I am flying a black silhouette. I have watched a lot of my older flying buddies give up the hobby because they can't see well enough...

I also haven't been on my A game. I have noticed of late I have trouble finding the right DR and expo for my planes, even ones I have flown for a while. I am sometimes heavy handed, other times too light on the controls. Sometimes I watch my aircraft start to stall and am a bit slow to react. Or I do a an aerobatic maneuver too far away in the line of the sun... Its like sometimes when I fly lately, I am not paying attention to flying, and am worried about the tree lines, or the wind. I think a big part of it is that I am not flying nearly the hours I used to, back when I really could fly anything, focused.

But that's changing. I am flying with a club again, and enjoying the friends I am making at the field. I enjoy watching others fly well, poorly or not at all and enjoying it. I like seeing other mortals make mistakes, and marvel as Tommy tosses a plane around in a planned frenetic dance that shows his intuitive flying skills. I love watching the arrogant guys fly and ignore others less worthy around them, a clique of there own, and I love watching Dennis, the new guy, cursing with joy as a plane is taken through its paces, a grown up kid. Everyday that I am working, I wish I was flying. Every day I am flying, I am wishing it wouldn't end.

That's the real change. I am enjoying flying again. I don't think I realized that in the past couple of years where I wan't flying with others or at a club, it wasn't fun. I wasn't flying the hours I usually did. I wasn't sharing this experience with others, and I missed that. I miss Kenny Chandler, and my friends at MCRCC, where I would spend 12-14 hrs a day flying.

So I am trying not to take these crashes too seriously. I am sure I am responsible for 2 out of the last 3.  But that is just the way it is. I am learning, every day I fly, I learn. I need to let these lessons sink in, and become a better pilot, and not get discouraged.

And I am loving every minute of it.  If you don't want to crash, don't fly.

And come on... every pilot knows a crash is just an opportunity to get a new plane.

Wednesday, April 13, 2016

Skyline Corvus 540

Well...

With the death of my Eflite Pulse XT 25e I am itching for a replacment. I am loving this Skyline Corvus 540 from General Hobby.


I have the Eflite Power 32 from the Pulse, and it's ESC. I need to dig them out of the carnage and test them. I may have a couple of compatible servos too, and the reciever. I could fly her 4S and 5S. I would get about 800W at an estimate 5 lbs, or a whopping 160W per lb!

Hmmm....

Lexus CT200h DC tap Updated

After getting some more advice from Ted Ede and Yaz, both of whom I probably should have talked to first, I upgraded the 12V DC tap on my Lexus CT200h, that I had just installed yesterday. I removed the original tap line.  I ran out to O'Reilly Autoparts and picked out 10 AWG wire and and an in line fuse box, and decided on a 25A fuse. At checkout I was reading the case holding the fuse holder and realized that the wiring for it was 12 gauge, so I traded the 10 for 12, as it made more sense (there were no easily identified 10 AWG fuse holders).  I redid the tap line as I had done it yesterday, but with the fuse in line on the red wire. Didn't take long at all.


The tap cable with fuse in line, I later protected the live ends with a converted EC5 adapter, as I had done before.


Tap line just before bolting it on the 12V battery.

Now convenient AND safe!


Worst engine install, ever!

It's just shy of 3 am... The white face cloth is coated with the carbon fiber that was all over my face, in my boogers, densely embedded in my t-shirt.

I went through a couple of sets of engine side bar mounts getting the engine in the Spitfire. The problem isn't the engine, it's how they built the motor box. It's pre-drilled for several orientations, and all the mount holes have back nuts in them. This limits where you can drill custom holes. Add to that they decreased the available space on the front of the box by putting wedges on either side. Between these two issues my choices were limited, and I ended up Drexel modifying the mount bars to fit the engine. Hence, covered with carbon. I used larger arms to compensate for the material I removed. It's plenty strong.

Why did I stay at this all night?  Really? You have to ask? It was an engineering problem, and there was no way (thumps chest) I wasn't going to solve it.


You can see the Dremel marks and mods.


Its came out pretty nice, after all that. The real challenge will be figuring out how to set up the throttle and choke control rods... more on that later.

Time to sleep... let it go.

Tuesday, April 12, 2016

Sonuvabitch...

When I built my first eFlite Pulse XT 25e I read about problems with a wing spar that was too short, allowing the wings to terminally fold up in flight, destroying the aircraft. I managed to destroy 3 of them over the past several years by other means. Until today... when I lost my 4th one to that foretold fate.

It was a bit gusty, I took off, climbed out, felt out the winds a bit, and did a loop. There was an explosive crack, and her wings folded, came off the fuselage and she fell 150 feet into the woods in several disintegrating pieces. One of the wings fluttered down, and landed in the top of a tree, the other fell to the scene of the crash.

I am rather disappointed. I don't think I will replace her, which really upsets me. This aircraft was on of my favorites...

Links to past posts of my various eFlite Pulse XT 25e.


In the woods, the site of the crash of the main fuse and one wing.


Dammit....


Waaay up there, the other wing.


A close up. Skewered.


We recovered the wing spar... half of it. The spar is about 3" long , runs in the spar joiner: the piece of wood that makes up the spar slides into the box in the wing, the remnant of which I am holding. The spar ends where that little piece of wood is sticking up just beyond my thumb.  There just isn't enough spar to take the forces, and as so many others found out, it collapses given the right setting.


We threw away anything that didn't have electronics in it. This is all that is left.


DC Power from my 2012 Lexus CT200h Hybrid 12V Battery

UPDATE: Added a fuse, changed to lower (thicker) gauge wire.

After thinking about doing this for a couple of years, and coming up with ideas that sounded right but with good advice were abandoned, today within a hour I have DC power to charge flight batteries using my iCharger 208B!  I normally drive the iCharger using a Junai 350 watt power supply. This was so incredibly easy, from accessing the battery, to making and installing the tap.

I was given some simple advice by Ted Ede: don't use an AC inverter only to invert it back to DC. Geez... that makes perfect sense.  So today I found the 12V battery in my CT200h. Tapping this will give me power to charge flight batteries at the field. I can leave my car "running", and it will let me use the 12V, battery, the car's computer will urn the gas engine on when needed to charge it keeping it alive. The amount of charging off my 20A max iCharger is limited only by the gas in my tank.


I went to Lowe's and picked up some flexible 14 AWG wire, red and black, and a pair of terminals. I used my soldering torch and used the same technique I use to solder my EC5's, heating the terminal and filling it with solder and setting the wire in it. I shrink wrapped it.


Using a female banana plug that fits the DC male plug on the iCharger 208B, I soldered it to the other end of the wire, about 54", and shrink wrapped that. I repeated this on the black wire, and encased them both in 1/2" cord wrap I picked up at Harbor Freight.


The CT200h has two batteries. The Drive Pack, which is a ginormous LiPO (the large rectangle in front of the gas tank), and the small 12V lead-acid battery (red square). It is found by opening the spare wheel compartment under the back deck, removing the right back corner floor panel (lifts easily, exposing a small storage space). This exposes the 12V battery. Remove the back plastic panel (also easily snaps out) and the entire battery is exposed.


The floor panel removed, exposing the 12V battery in the right back well.


Removed the back plastic panel, exposing the negative terminal side of the battery. The car's connections are secured with bolt on terminal attachments. I loosened them, removed the nut, being careful NOT to cut the power, attached the terminals on the wires I made, and replaced the nut.


Both of my installed terminals tails point to the middle of the battery so the wires converge in the middle. I used a wire tie to the metal battery strap that runs across the top of the battery.


There are two openings in the plastic tray that covers the battery and provides a small storage space. I flipped the cover over and slightly enlarged the opening allowing my tap wire to come through but still be snug.


In this pic I have replaced the plastic floor cover, and you can see the storage space. Note the EC5 connector.  I used a female EC5 plug to house the two banana plugs, being sure to keep + and - , and super glued them. I had to Dremel down the end of the EC5 connector to allow the male plugs from the iCharger to close and fit snugly. 


Here's the terminal tap coming out from under the floor panel.


The styrofoam tray that covers the spare and holds the First Aid kit and some other small crap is put back in place. The folding cover that makes up the rear deck goes over this.


Turned on the car, and plugged in the iCharger. Voila! DC power to my flight battery charger!

I will post some pictures of the charge station in use as soon as I can.