

Saturday, July 30, 2011
Dont' say a word...


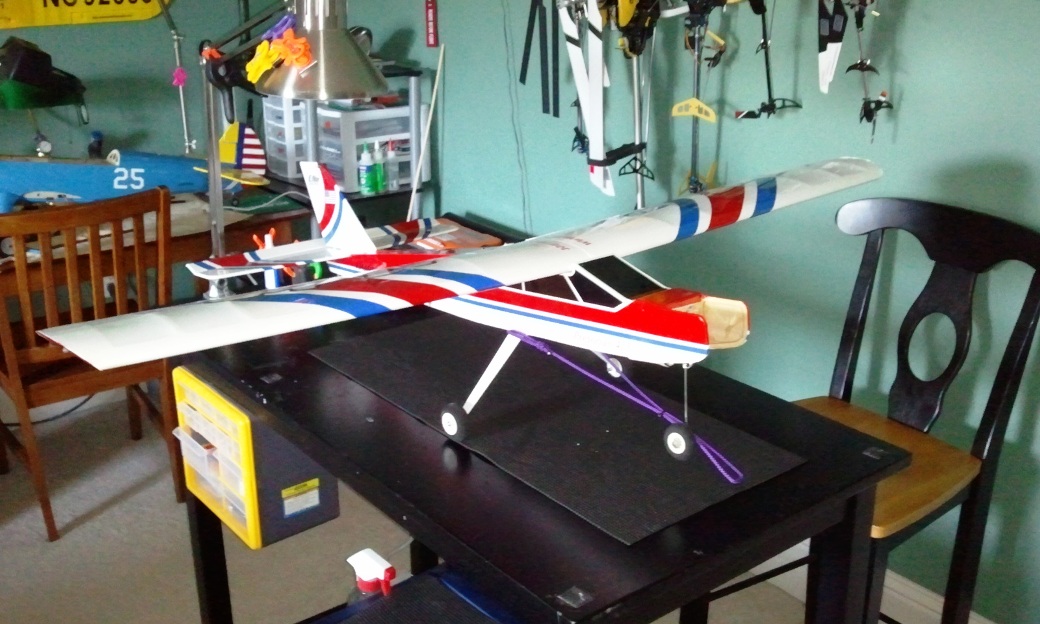
First flight of my Stearman after the rebuild. Took off, tail heavy even though the CG was technically spot on. Figured out quickly she needed high rates, flicked in, got her under control. Trimmed it out and also trimmed in a lot of right aileron then she flew fine, but knew landing would be tricky. One landing, rolled out, tipped over slowly. Second landing tip stalled, landed on and broke the rght wing. No other damage. Should have her fixed with a couple of hours work. Clearly she needs to come in with power on.
Friday, July 29, 2011
Alpha receives Airworthiness Cert
I took the Alpha Sport 450 up today for flight quals after its recent repairs. She flew wonderfully with the new HeadsupRC Power 450 Sport motor. After addressing some issues with the nose gear I flew her for several packs.

Luke was not there today, but Antonio Vilchez was. He was having all sorts of problems with his foamie Texan, so I took him up on the Buddy Box for a couple of flights. He flew very, very well! While I have no doubt he can handle take off and landing himself, the winds were treacherous, so I handled those for him. Othrwise, for the 12 minute flights, he did all the pilotage! We ran through basic manuevers, and he executed them flawlessly. Well done, Antonio!
Next up for cert is the Stearman. Weather should be awesome tomorrow. Heading out to BMF as soon as I finish at work.
Crunched Cornell Rebuild Begins
 Waaaay back when, on June 1, 2011, I crashed my beautiful Cornell. While looking for parts and a possible replacement plane I discovered that Eflite had just discontinued it...
 She was a beautiful flyer, a good looking airplane. I had just gotten comfortable with her. I flew her, did some aerobatics, and while pulling through a loop I started a bit too low to begin with, I eased up on the elevator to open up the loop, and she slammed into the ground. Pure newbie badness.

Greg was having problems with his CA and epoxy holding, so the wing, which was broken clean off (you can't tell in the crash pic, but under the cote it was cracked clean off) remained separated. I took some time removing the glues and cutting the wood surfaces clean.

When I broke her, I broke her good. I noticed I am missing the hatch that goes on top... Wonder if Greg has it? This will be the most industrious rebuild to date. The wing is sheared off, and the firewall/motor mount is toothpicks. I have to see how much of the motor mount I can rebuild. I am considering using an Electrifly replacement motor mount.

I have fabricated a new leading edge and rejoined the wing. It looks pretty flush and level.

I rebuilt the framework using salvaged wood and popsicle stick set with CA, fixed in place with epoxy. I didn't have a big enough piece of balsa for the leading edge, so I made one with scrap wood laid over a dowel, then sanded flush forming a ply. Worked quite well. Pretty much the entire right side of the frame is refabricated. Need to level out a few spots with scrap sanded to fit, otherwise looks pretty good and strong. The square is a thin piece of sheet balsa covering and strengthening the cracked and depressed sheet balsa of the wing root. Letting all of this congeal, will sand the excess epoxy and framework so things are flush, then recote the wing. I don't think its added much weight at all.
In the next several days I will tackle the motor mount and firewall which were shattered in the crash. I also plan to upgrade the servos, some of which are toasted.
Thursday, July 28, 2011
Hanger 9 Twin Otter... Yeah, baby...

Twin Otter ARF
Key Features
- Painted fiberglass Engine Nacelles, Cowlings, Nose and Main Gear Fairings
- Fixed Landing Gear with functional Oleo Nose Strut
- EVO 36/Power 25 ready
- Low-speed handling improved and stall speed reduced by Clark Y airfoil
- Easy-going sport plane flying manners
- Exceptional scale outline
- Plug-in wings with slotted flaps installed
- Balsa/light plywood airframe
- All hardware included
- Easy and fun landings made possible by large landing flaps
Overview
Hangar 9’s Twin Otter is a scale model of the UV-18 'Twin Otter' is the military version of the DeHavilland DHC-6. The trim scheme is based on the three UV-18B planes used by the US Air Force Academy cadet parachuting program which carry a pilot, copilot and up to 17 jumpers, and are the only three owned by the Air Force. Although this is a multi-engine model, the high wing design and Clark Y airfoil improve low speed handling and provide stable flight characteristics which make this a great first-time twin for intermediate to advanced pilots. The Twin Otter ARF also features an electric power option which adds to the reliability and fiberglass cowlings and fairings which make it very durable and easy to repair. The aircraft also includes fixed gear and large landing flaps to provide easy and fun landings without the addition of complicated landing gear being necessary.

The full scale version!


Stearman Rebuild Complete
It was three weeks ago I stalled and crashed my beloved Eflite Stearman. A lot of work and waiting, and today, I installed the cowl, the prop, and tested her motor and surfaces. Everything in working order! I checked CG and its spot on.
But as I have learned with this hobby, "its always something".


But as I have learned with this hobby, "its always something".

Last night I poured some extra epoxy into the front of the cowl to strengthen the brown part. I left a wadded up paper towel in the hole to keep it from leaking all over, not anticipating it would soak into the paper towel and, well, wad up the hole... I was able to cut and dig this out easily.

I was able to clean it up pretty well.

The cowl is on. Its a tight fit, getting the motor centered to clear the cowl. I also hand drilled 4 holes in the front face of cowl to increase air flow through the motor and across the ESC. Otherwise the only way air gets into the fuse is around the prop hole.

CG is spot on! Can't wait to fly!!!!
Wednesday, July 27, 2011
Nose Job
A blink away from completing the repairs to my Stearman. I set up the mount screws per the instructions (geez, I took no pics...). Using card tabs placed over the mount posts, I note the location of the mount holes and transfer them using a Sharpie to the cowl, then drill the holes in the cowl. Honest though, just like the Eflite instructions. I added a post to the top of the cowl to hold the weight of the lead in the cowl a bit better, though it was doing pretty well before. I have to be careful where the lead goes or the motor or ESC blocks the cowl. There's a lot of weight. I am using the same amount of weight, in fact the same weights, as were in before. I used 60 minute epoxy, let it set overnight and put the cowl on tomorrow. I put some of the weight on the motor block, where a piece was already. That's it, ready to fly Friday.


New post at the top of the firewall.

I also set some, well, a lot, of epoxy in the front of the cowl that is the false motor cylinder set. Its very fragile and this epoxy will strengthen it. The false motor is beautiful, the best one I have seen on a Stearman, but the plastic is extremely fragile. The "wires" on the front snap off if moved at all.
Can't wait to fly!
Tuesday, July 26, 2011
Stearman almost ready!
Repairs on my Stearman are nearly complete after her stall crash. I detailed the major repairs in a previous post. The cowl, cabane struts and N struts arrived from Horizon today. I had found I needed to replace only one of the N struts (the other is bent a little but fine otherwise), and used one I had to replace the other. I installed the cabane struts fairly simply, some minor annoyances from screws not quite lining up on one of the forward struts attachments to the fuse post repair.


I had to repair the lower carbon fiber wing support spar since it fractured and they are out of stock at Horizon. In re-installing the wings it gave me issues, overcome with some sandpaper and a light layer of strong cursing. In the end everything lined up nicely and fits straight. I did find I had to remove a couple of the fiberglass tubes through which the CF spar passed, one in the fuse and one in one of the upper wings as they were damaged. Tested her control surfaces and everything is sweet.


She looks great! I will install the cowl tomorrow and replace the nose weights, reset her CG which has surely changed with the repairs. I am so looking forward to having her ready to fly this by this Friday!
Alpha rises
I described the crash and rebuild of my Eflite Alpha 450 Sport in "Asleep at the switch". Yesterday the PowerUp 450 motor arrived from HeadsUpRC (fast shippers, those HeadsUp guys). I installed it last night, with some minor difficulty getting the standoffs in place and getting a good thrust vector on the motor due to changes in the firewall from the repairs. She fired up sweet! the prop adapter that came with the motor was too small for the APC 10x6 I am flying on her, so I had to drop by my LHS today and pick up an Eflite one. It is a tad short so I can't use the stock white spinner...I'll have to see if I can find a longer 4mm adapter. It looks a little naked without it.
The nav lights had issues. I plan a short blog entry on those later. A couple of them stopped working and it took some time to trouble shoot that it was the bulbs. I ended up sacrificing the other kit I ordered for a couple of its bulbs, but for now everything looks good. The forward facing white light is quite bright so I may get the scale landing light effect I was going for; the light may not wash out in sunlight. We'll see! So, Alpha is ready, and come Friday when I can get away to the field, weather permitting, Luke and I will return to the sky!

The nav lights had issues. I plan a short blog entry on those later. A couple of them stopped working and it took some time to trouble shoot that it was the bulbs. I ended up sacrificing the other kit I ordered for a couple of its bulbs, but for now everything looks good. The forward facing white light is quite bright so I may get the scale landing light effect I was going for; the light may not wash out in sunlight. We'll see! So, Alpha is ready, and come Friday when I can get away to the field, weather permitting, Luke and I will return to the sky!

Sunday, July 24, 2011
My Field of Dreams...
Its raining, no flying today... but I can dream.
Inspired but some really nice facilities across the country, I took a Google image of BMF, and laid out my dream field. Using a manufactured surface, geotex seems a nice layer to put down over undulating landfill, then adding some nice markings. A grass field would be nice to keep as well, and I would include some nice helipads.

Inspired but some really nice facilities across the country, I took a Google image of BMF, and laid out my dream field. Using a manufactured surface, geotex seems a nice layer to put down over undulating landfill, then adding some nice markings. A grass field would be nice to keep as well, and I would include some nice helipads.

Someday...
Saturday, July 23, 2011

Friday, July 22, 2011
Found and Lost
Ever have parts in a holding bin that you forgot about and have no idea which plane they belong to?
Hmm.... I found these but lost what they belong to. I have no idea what these go to. Its not like I have a lot of choices...

Hmm.... I found these but lost what they belong to. I have no idea what these go to. Its not like I have a lot of choices...

Mad Max grounded
Mad Max, my POS BlitzRCWorks MX2 is grounded for mechanical failure. I had her tuned up, motor running and flight ready. Took her out to BMF and got the loose wire alert from the ESC. No flight.
The ESC, whose wiring has been poorly soldered, had parted an attachment point and I can no longer resolder the white ESC wire to the motherboard. I tried. I had resoldered all three at one time or another, and the black motor wire, which had also come undone. Its finally no longer capable of holding the solder as the tab on the motherboard has come off. So, Mad Max is grounded until I decide I want to spend more money to get a 70A ESC with a switching BEC (linear gets too hot for the ESC location in the fuse). I may do it... if Mad Max won't fly, I can use the electronics in my next aircraft.

The ESC, whose wiring has been poorly soldered, had parted an attachment point and I can no longer resolder the white ESC wire to the motherboard. I tried. I had resoldered all three at one time or another, and the black motor wire, which had also come undone. Its finally no longer capable of holding the solder as the tab on the motherboard has come off. So, Mad Max is grounded until I decide I want to spend more money to get a 70A ESC with a switching BEC (linear gets too hot for the ESC location in the fuse). I may do it... if Mad Max won't fly, I can use the electronics in my next aircraft.

Asleep at the switch...
The Alpha 450 has finally sustained a major crash, but it wasn't as bad as it could have been. Thing is, it shouldn't have happened at all...
Luke was flying on the Buddy Box and was doing such a good job that about 8 minutes went by without my having to intervene at all. I was enjoying his success and cheering him on! So when he finally got into an orientation he couldn't get out of, it caught me by surprise. No problem, we were still high. "I got it..." Wait, I'm not getting any response to my inputs! She's diving straight down! Heart pumping, cold sweat, not breathing... WHAT THE HELL IS GOING ON! SHE"S DYING! I suddenly realized I hadn't let go of the trainer switch, Luke was still the pilot, and he was shaking his sweaty hands dry watching the emerging disaster! I let go of the trainer switch, gaining control just in time to break the dive, but not in enough time to remain airborne. She struck the ground hard with a glancing blow and a nerve wrackingly loud thump... I knew I had flattened out the trajectory, but I wasn't sure it was enough. It was a long hundred yard walk through the blackberry field to the hills of Mordor. I still wasn't breathing, saying a soft prayer to the Flying Spaghetti Monster hoping it wasn't too bad, so I didn't think to get a photo of the crash site... (You'd think I have been blogging long enough to remember by now...).
The wing had popped off cleanly, knocking out one of the front pegs and shearing out the aft wing mount. The wing itself was unharmed. The motor was bent upwards and the firewall crushed in at the top. The metal X-mount was bent, but curiously the prop was intact. The motor hand turned cleanly, but later I would see that not just the prop adapter was bent, the motor shaft was too just outside the outrunner. (I removed it, tried to straighten it, but then the motor outrunner now rubbed against the stators. It was toast). I repaired the wing mount with CA and epoxy, rebuilt the firewall with chips and popsicle sticks (very useful things, those popsicle sticks), and some salvaged plywood. Its not pretty but functional. I ordered a Poweup 450 Sport motor from HeadsUpRC(my favorite parts supplier) to replace the Eflite 450 motor. A more powerful 450 motor at half the cost. I decided that with a more powerful motor, I would take a 40A ESC from Frankenheli and put it in the Alpha, so I have removed the Eflite 25A ESC.
I also took the opportunity to change the front white LED of the Turnigy nav lighting system (more on that later) to a forward pointing alignment, and built a curved housing over it.
All in all it looks pretty good, albeit not scale perfect! The motor should be here soon. Luke and I will be back in the air, and I will stay awake at the switch!

The post crash pic...

Pieces of popsicle stick strengthen the front of the firewall. The entire top section (with the two blind nuts) was crushed back into the fuselage.
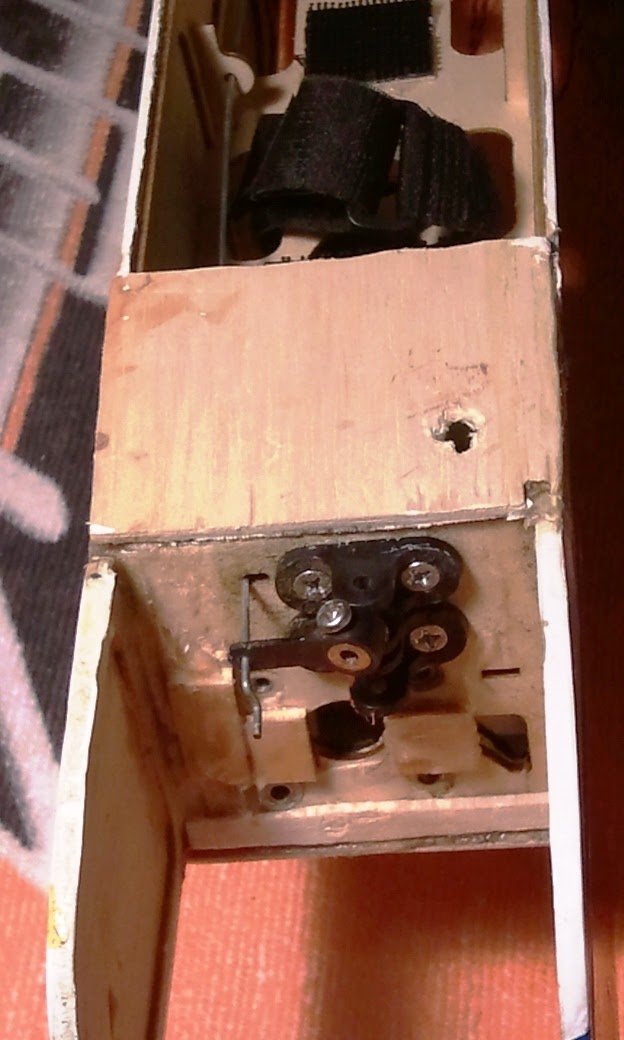
A view from below. The opening for the forward nav light.

View from behind the firewall. I would later put a cross piece along the bottom of the front cover, where a piece is clearly missing.

The aft wing mount was sheared cleanly off the plane. I replaced it with CA and buttressed it with epoxy. The top of the forward aft fuse behind the mount was also broken off. I removed the cote and rebuilt the balsa, and squeezed some balsa chips into any remaining gaps. CA the whole bugger, as Greg Reed recommended, I drowned it all in CA. Thank goodness for the 20g Locktite CA.

Built a sheet balsa enclosure for the forward nav light, which I wanted to be forward facing. I didn't think of doing this mod until I had coted the cover. I removed the cote and recoted it.

To get a smooth finish, I used dry wall spackle. I sanded it as smooth as I could, but couldn't get it just right. The hard part was getting cote to lay down over it smoothly over the curved surfaces. I think I can do a better job next time.

Dried and sanded Not so good with the smoothing.

Try as I might I could not get the cote lay down wrinkle free. I tried a variety of application methods, and think I can get it right next time. I can make this look a lot better.

I was using a Velcro strap across the bottom of the plane to keep the battery hatch in place. The magnets work well, but they can let go in a hard G maneuver, and I don't want to lose the cover. I don't like the Velcro strap on the outside, so I put in a cross bar (popsicle sticks...) and laid some Velcro across it and the hatch. Works nicely.

She looks very good post repairs!


Waiting for the motor. Can't wait to take Luke back up on the box. I don't think it will be long before he is doing takeoffs and landings as well!
Subscribe to:
Posts
(
Atom
)