The flying monkeys got me...

Helis and fixed wing

AMA 957918
IRCHA 4345
AMA Intro Pilot Instructor

Pirate Kid Skeleton by RadDezigns.

Tuesday, March 29, 2011

PT-19 Flight Ready


With the arrival of the 4 Screws of the Apocalypse, I quickly finished off the PT-19 Cornell for E-flite. A special thanks to the folks at Horizon Hobby fo sending me the screws I found impossible to find locally.

I can't wait to fly her next time I hea out to Bob Miller Field!

Monday, March 28, 2011

Gyros

GilliganSC on Helifreak sent me an old school mechanical gyro. An interesting contrast to the new Assan Hobby King miniMEMS 250 gyro. The miniMEMS $10 gyro purports to contain $150 MEMS micro electronic gyro technology. I bought a couple and hope they work as well as users are saying they are. Hobby King cannot keep them in stock they are so popular.


The case says its a Quest Gyro Systems gyro.


Inside I found a solid brass wheel on one side, and what looks like a wheel on the other covered in metal. Other mechanical stabilization gyros I have seen have a pair of brass wheels, so I wonder if there is a wheel under the cover. The wheel and covered-wheel are on a pivot that can turn only a few degrees each way.


Assan Hobby King miniMEMS 250 gyro kit.


The miniMEMS on my CopterX 250. Foam tape, steel plate, foam tape, Zeal gel tape. This should solve my tail wag! It looks better than it, well, looks....

I will let you know how theses things work out. I have two, another on the way. One on my 250, another  is going on my EXI 450, and another on my Frankenheli 450.

Horizon Hobby Rocks!

Worked wiith Horizon Hobby Customer Service to get 4 screws for the cowl, and they decided to send the 4 screws with a complete new cowl! Now thats taking care of the customer!

Thursday, March 24, 2011

Downtime...

Got an itch I can't scratch, need to fly something... Between work and getting to all the honey-do's, I haven't even been able to tinker.

Hate it when life gets in the way of life...

Saturday, March 19, 2011

Flying the Syma in Meridian


Brought my Syma S107 up to Meridian with me to fly in the company apartment. Almost brought up my ERazor but didn't want to drag up all my equipment. I had forgotten how much fun this little 3 channel is to fly. Was hard to try to fly and capture a pic at the same time.

Monday, March 14, 2011

Hangar Shuffle

PT-19 is "done", and I want to hang it next to the Stearman, so I shuffled the a/c around a bit, and moved the Alpha Sport 450 over the TV in the media room.  My wife sighs and shakes her head whenever she walks by...


Sunday, March 13, 2011

PT-19 Build Day #4

I got a little further than I thought I would tonight and am now held up by 4 missing screws...


Motor and ESC were easy to install, especially now that I am familiar with the "backwards" motor concept. 890kv 450 size motor, and a 40A ESC with 3A BEC. Bound the receiver and checked the ailerons, elevator, rudder and motor. Had to reverse the rudder servo, but the others were fine. Re-centered one of the ailerons and the elevator. Easy, peasey. Realize now I didn't program the ESC. I'll do that tomorrow.


Had to break out the sealing iron for the first time. I guessed that each number on my hangar 9 sealing iron represented 100 degrees F, set it at 250 degrees (220 deg + 10% for the sock). Worked wonderfully after smoke stopped coming out of it... I applied the center blue strip (there were two blue Ultracote strips in the kit, no instructions. I suspected they intended for me to cover the middle joint between the wings on both sides. Fit perfectly suggesting this was in fact their intention.


Here's why I had to learn how to iron Ultracote. The wing walk strip (that black band along the fuse where the pilots can step) peeled back on the port wing. It went back into place easily and looks great. 


The center strip and the repaired walk strip.


I loose fit the cowl in place. E-flite did not include the 4 screws that I need to secure the cowl to the fuse. I have 4 similar screws, but two are the same size, and the other two are shorter, and one of those is shorter than the other. Since I have time here, I am going to ask Horizon to send me the screws. She is beautiful!


So, I may tape the cowl on and hang her up until they send me the screws. This is one spectacular model... wow!

MCRCC My First Day Gettin' Skooled!

Today was my first day flying with other people and at a club field...

IT WAS A BLAST!!!! This was THE best day in my RC history. I knew it was something I needed to do, but now I really understand the importance of belonging to a good club. I am very glad I joined and cannot more highly recommend it! I happened to come on a day with a wonderful group of people to start with.

MCRCC has this incredible field, supported by Harrison County. We have a nice clubhouse, with a bathroom, and covered benches with AC power. The grounds are immaculate, well groomed and clean. The field looks great, but apparently Harrison County is coming out to level it and help improve the runway!  This is a great, great club!

Special thanks to Jim, who spent hours with me getting my rotor head cleaned up and tuned. We got it sweet and snug, no tracking issues for the first time ever. But, the GY48V gyro is just not any good and I will need to replace it before I can fly it. Jim even tried and the tail kicked out in a simple turn. I will be replacing it, first with the 250 mini-MEMS, and if they aren't any good, a Spartan Quark.  Its amazing between the slop in the head, the fact I didn't know I needed to set the swash not just in pitch, but in aileron and elevator, that she flew controllably at all. We replaced the feathering shaft and that brought everything into final alignment. I always thought something was weird in that I set the blade pitch, but never the aileron and elevator; I just didn't know how. I never thought my rotor head would get so cleanly set up! Now she is setup sweet, and I know what I need to do to the ERazor and CopterX. No wonder I had problems with them. My EXI's CCPM is so tight, I never thought I would have such a balanced head with no tracking problems!

Dick and CJ (who drives over from Slidell) were also incredibly generous with their time! Thanks to CJ for the Align links that helped tighten up my EXI's CCPM, and the great pics, and Dick for letting me fly his 600!


Unpacking for the first day of school at MCRCC! I brought the EXI 450 helicopter, the Cubby (which stayed in the car), and the Alpha Sport 450.


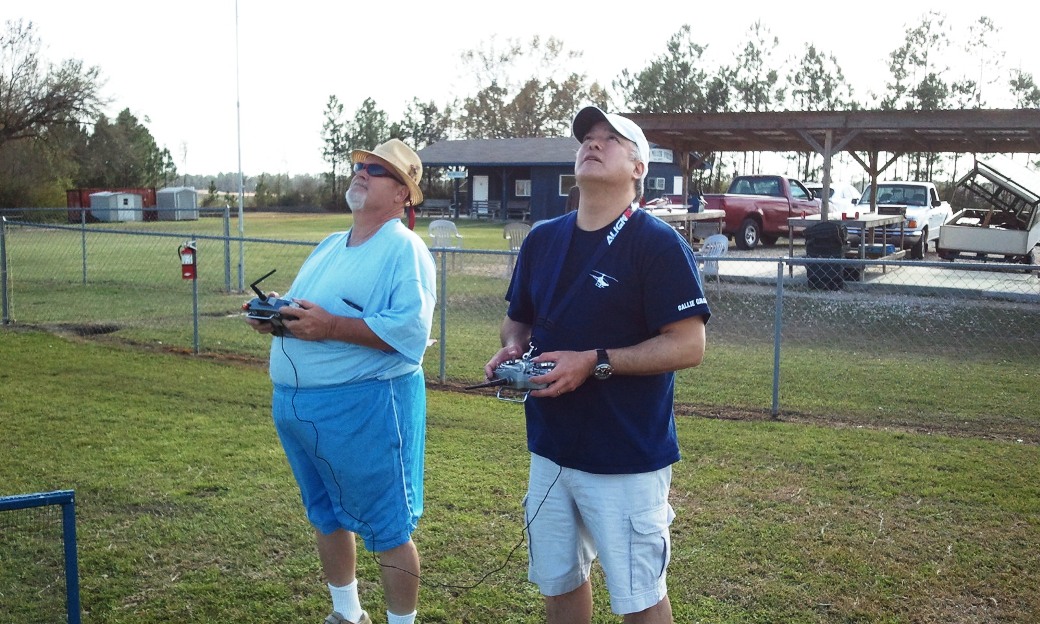
Jim taking a look at my CCPM setup. Dick (left) and Dickie (right, President of MCRCC) in the background. The 600 is Dick's. He let me fly it with Jim on the trainer box. It was incredible flying a large stable heli. Jim was generous with his time and knowledge. A man with a lot of energy, he spent a lot of time with me between flying his own 450 (his 600 was in the hurt locker). What I learned from him in this one afternoon has put me leagues ahead of where I was when I walked in.  Jim will continue to be a great heli mentor.


Here is another MCRCC gem, Mr. Ron, a true Southern Gentleman. A seasoned pilot he is one of the three designated Instructor Pilots at MCRCC. I walked up, introduced myself to him, and asked him to help me. Without hesitating, he took me under his wing. We checked out my Alpha Sport 450, fixed a couple of things, and took her out to the flightline. He connected our transmitters with a Trainer cord, took off and handed her off to me.


We flew "3 mistakes high" for my first flight. The winds were brisk (I measured sustained winds at 7 mph, 12 mph gusts). The first flight I kept hearing the Trainer tone go off when I would lose control of the airplane and Ron would take control. Ron was cool and calm, straightened her out and hand her back to me. I was very nervous on the first flight, a bit less so on the second.  I flew the second with one or two hand-offs, and he let me get down to "1 mistake high"!

CJ Bordelon's Pics


Me, Dick and Dickie, and the crowed Heli Bench. We all just sort of precipitated together. Dickie is the current club president, and is a heli driver.


Me flying Dicks Trex 600, Jim on my left  on the master box.


This amazing pic CJ took in panorama. Runway on the left (with me in a bit of leakover from another pic), the flightline and the work area. We do have a remarkable field!

I can't wait to get back there with my 500!

PT-19 Build Day #3

The PT-19 build continues slowly.  Last night landing gear, and the elevator and rudder servos.


The landing gear was pretty straightforward, but I found the wheel got in the way of a clean shot for the screwdriver. Removing it solved that minor annoyance. 


Tower Pro SG 90's don't fit by a few molecules. A little work with a file and they fit great!
Not much work, but it was a late night. Don't know that I will get anything done today, kinda spent.

Saturday, March 12, 2011

My "New" HDX 3D-500SE

Luke and I drove out to just north of Bogalusa, Louisiana, for me to meet Dave, who connected with me via HeliFreak. He wanted to sell his HDX 3D-500SE, and his Dx6i. It made for a long day (started around 11, got lost going there a couple times, blew past his house and went about 10 miles off in the wrong direction. It didn't help that his house address doesn't match the street he actually lives on, but that's his address and his house is really where it is, not in the middle of a Wildlife Management Area over 10 miles away like Mr. GPS said it was). This is a beautiful heli. Its the first CCPM machine I have bought RTF, so I need to go over her and get a feel for her build. She is a clean machine!  Here's a pic of her hanging in my hangar with her new peeps. I'll post more pics when I "deconstruct" her.  Very nice, very excited to see her fly!


(Which one's the HDX 500? Hint: Its the ginormous one)

Friday, March 11, 2011

Key Chain Cam! Too cool!

This is way cool!I got it to film my RC flights as a hat cam, but I could also attach it to an aircraft as a FPV cam! $16 shipping included from novapcs on eBay. You will need a microSD card for it as it does not come with one.


The key chain camera I will be using as a "blind" hat cam arrived today!


I used Dual Lock Velcro to secure it to a large plastic clip (it also has a magnet).


Clipped on! It aims pretty well, level, for down range. It does not obstruct my field of vision, in fact after a moment I forget its there.


Close up.


Easy to remove from the clip. Dual Lock literally locks it in place.


First run of the key chain cam, low light conditions.  Pretty darn good!

PT-19 Build Day #2 Wings


Slow day... I epoxied the wings together with 30 min Epoxy, went per the instructions, no excitement.  the broken spar came together nicely! Sanded down the glue build up and it remained strong, fit perfectly. Pretty pooped, busy day, so that's it for the night!


Thursday, March 10, 2011

E-flite PT-19 Build Day 1

As expected, this build is easy as much of the piece work has already been done. My experience with the Stearman, of which the build concepts are similar, has made it easier still. But it was not without its small setbacks.


The connectors for the servos use a plastic disk press fit to the post, rather than the nut used on the E-flite Stearman. I prefer the nuts... hmm... salted cashews...


It was awkward to press the disk on firm enough to press it with pliers. I finally got it balanced after a dozen tries...


Pressing carefully only got it down to the post.


But ball link pliers were a perfect tool to seat it all the way down snug. 


Finished. Once I am done with the build I will touch it with a spot of CA.


Epoxying the servo blocks in place. I find the cut out bottom of a 1 oz Dixie cup works great for mixing epoxy.


Using dental floss to hold the extension snug to the servo lead. Pass it through the gaps in the wires on either end, tie a square know or two and clip the bitter ends.


Aileron servos ready for installation.


Pulling the servo wires through the wing using the string they had passed and secured at each end. I tied it to the lead and centered it using their piece of tape, then easily worked it through the wing frame.


Setback. The block, well, blocks the cover from being secured into place. I noticed these blocks were cut a bit longer than those on the Stearman.


Used my Dremel to sand the corners that were blocked down to fit.


Clean curves on the blocks preserves a good amount of block for the servo screws.


Nice fit!


Different setback. On the other side it was the servo itself that blocked fit. I used the Dremel to sand down the edge of the screw mount on the wing. See the lower left one; slightly different in shape after sanding, just enough to allow the servo to fit.


Servo installed, cover secured with sheet screws touched with a spot of CA, proximal lead secured to prevent it falling back into the wing, using the string and piece of tape they provided to secure the string. 


Show-stopper setback. The bridge that will fit between the wings securing them internally and eternally together was warped. I barely pressed on it while thinking about what to do when it snapped, almost clean across. I suspect it got stressed in bending out of shape and the slight force I applied was all it took to snap it. CA didn't hold it, but a little Goop has done the job. I will let this set and tomorrow will sand it down. It will be covered with 30 min epoxy to secure the wings together, so I have no concern it can secure the wings without failing.

This was it for the night. I have some family commitments tomorrow, but suspect most of the build will be completed. I need to put a receiver and ESC in her to complete the build, and have neither due to shipping delays and the bad receiver (see below).  

By the way, the fit and finish of this aircraft is better than any of the E-flight birds I have owned, the bent spar aside. The Ultracote is tight and smooth! This is one beautiful aircraft!

Bad Spektrum Receiver, Bad boy!

The Spektrum AR6110 receiver I purchased on eBay from ValueRC arrived a couple of days ago, and today I tried setting up my servos with it. It failed... but ValueRC has agreed to swap it out, no questions asked! Thanks, ValueRC! Heres the vid of the test showing the failure.


My PT-19 project can be moved forward, but much will need to wait for the receiver. The motor arrived today from HeadsUPRC, the ESC is in the mail from Hobbypartz.

Wednesday, March 9, 2011

PT-19 Unboxed!

Yay! Another plane I am afraid to fly...

My E-flite PT-19 Cornell from Horizon Hobby arrived today!  I unboxed it and and some of the parts I also received. I am still waiting for the motor and ESC to arrive, but I will probably start the build tomorrow. I can't wait to fly her!  (If things go well with the Cubby, then the Alpha 450, this will be the next one I fly. still afraid of the Stearman since the Phoenix Flight Sim version is a twitchy brick... People who fly the real model, and what I can see in vids, say this isn't the case. but me afraid because she so pretty...).


The receiver is going to be a Spektrum AR6110 (I have a Y-harness), the ESC an Exceed Volcano 40A with 3A BEC, Tower Pro SG-90 servo's (maybe EXI D213Fs, I haven't decided...), and the motor from HeadsUpRC is a 2836-09  900 kv 200W brushless outrunner, on which will spin a 10x8E prop.  Everyone speaks well of the SG-90s, but the EXI servos are digital metal gear, and the TP SG90's are reliable, well known and widely used analog servo. I just haven't used the SG90's but I have a bunch of them. I think they are at least as good as, if not identical to the E-flite stock ones on my Stearman.

Chipping away

Hovering the EXI 450 in the garage...

The weather improved, but I wasn't able to get out to a field, so I hovered in the garage. The EXI is still having blade tracking problems, but the CCPM and cage are set up sweet; I have never figured this one out and have wondered if its something in the blades themselves. Well, don't you know, I get to find out... In hovering, I brought her down near the trash can, she bounced and just winged the can, but this chipped the ends of the blades enough to delaminate them. And I had just been wondering how I have had this heli for months and she still had her original blades!

I put some new fiberglass ones on, rechecked the CCPM and everything looks good. The Feathering shaft and the main rotor are fine. these blades were nicely balanced out of the bag.

I hope the tracking issue is gone with the new blades. It was off about 0.5 cm at mid throttle, even with a nicely tuned CCPM. The feathering shaft is straight and the pitch is right on. We'll see if these new blades resolve the issue. I plan to fly a few packs tomorrow! The weather looks good! I am excited to get her out.

Frankenheli

I am wondering if Frankenheli should get the 4 blade rotor head? The larger rotor disk will stabilize her more being that I won't have a FBL system in, though I have been toying with the idea of getting a BeastX for her. It would be one way to get a stabilized flybarless heli without buying a two blade FBL head. Hmmm...

Gyros!

I am excited that Hobby King has shipped my GA-250 mini-MEMS gyros. These little pretties are getting good press as a $10 MEMS gyro, a relabel of an Assan gyro. Yup, $10! I had mine backordered, and they are already NIS! I need to think about getting a few of these little puppies!  BUT WAIT!  Looky at what I found when I went to get the link for the GA-250s!  HK has another MEMS gyro, a programmable one, for $70! The Turnigy mini-MEMS with programming box. Very nice... Must consider...  I had purchased another Detrum GY48V, an inexpensive piezo, but of course the moment I ordered it I got the email telling me HK was shipping by backordered MEMS. A guy on Helifreak crashed his Blade 400, and being on some tough times he was upset about the crash and not being able to fix it. While he wasn't seeking sympathy, the HF's banded together around him and he is essentially receiving a new Blade 400 in parts pieces! I am sending him what he needs for a Milton Mod (which I am trying on my 250, and my other helis as well probably), and will be including that GY48V, since I don't need it. very happy for him!