I have detailed
my experiences with the Hobby King Sbach 342 1000mm v2, which recently ended in the first ones demise from a dive it could not pull out from. I ordered a new one, and have completed its build, with a couple of modifications. It is powered by a
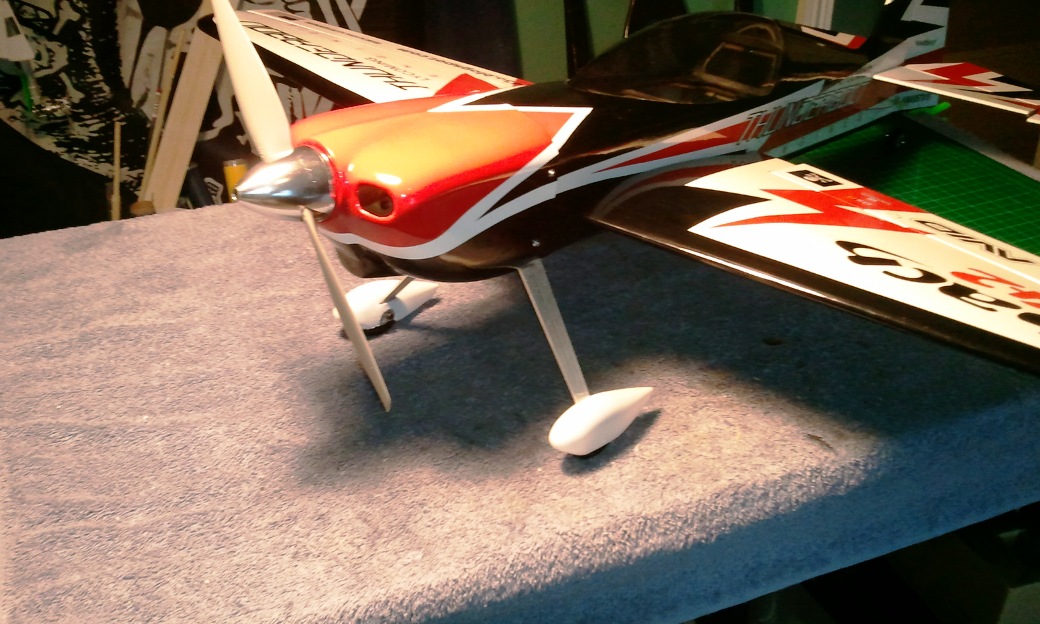
HeadsUpRC PowerUp 15 1000kv 550 watt motor, turning a 11x5.5 APC eprop (to start), an Art Tech 40A ESC (salvaged from another plane), and will fly with 4S 3300 mAh 30C battery. She is only slightly nose heavy, her all up weight (AUW) is 2.75 lbs (1250 gms).
One of the problems I had with the original is I tossed my canopy in flight into deep woods, and Hobby King doesn't stock replacement parts. I added a magnet and washer to a set of opposing crossbars. Makes big difference!
I wanted to fortify the firewall since my first one caved in on a blade strike after going head over heels in bumpy grass on a landing. I placed two cross bars of popsicle stick wood behind the firewall where the screw holes would later go for the larger mount for the 15 size motor. One is on top behind the front lip of the firewall, and the other on the bottom. I like to coat the frame in what nitro guys use to fuel proof the wood: 30 min epoxy thinned with a splash of alcohol, painted on with a brush, after using CA on all the major joints. I paint anything I can see. Light and strong! I also put Gorilla polyurethane glue in the wheel box to strengthen it.
I have always thought the tabs for the cowl were very wimpy. I placed a piece of that ever useful popsicle stick wood cut to fit behind each tab and CA'd it not just to the existing tab, but also to the fuse itself. I used the method I describe in my build post to set the position for the screws.
I wanted to use mini servos instead of micros for the rudder and elevator, I think the 9g servos were overwhelmed by the aerodynamic forces in a high speed dive. I Dremel'd out more space in the existing servo tray, and placed on top of it popsicle stick wood cross bars to allow me to secure the JR MN-48 mini servos. This went perfectly! These are a little slow (I think 0.18 sec/60) but have great torque (3.5 kg), compared to the 9gm micro servos (about 1.5 kg torque). I prefer the faster Hitec HSG 225mg servo, same torque, faster, around 0.12 sec/60 I think, but I have these MN-48s because I replaced them on my Eflite PulseXT 25e with the Hitecs.
The packers cut the tip off the sticker for the canopy... I used a piece of white sticker I have laying around, you can only tell up close.
As seen here. Can't tell!
To accommodate the 4S battery, which fits inside the cowl and ends at the carbon fiber wing tube. I added a couple of pieces of light balsa to make a bed, over which I put a piece of Dual-Lock Velcro. It sits at a slight slant, and is secured further by two pieces of standard Velcro wire ties.
All done!
I really don't like the look without the wheel pants... The number 2 a tribute to its being my second one!
One of the build issues was this gap under the wing (smaller on top). It clearly was a wing tube that was cut too long. I sanded off about 0.5 cm and everything went back flush. I saw some of you had this gap problem; check your wing tube!
I really wanted the wing pants to work out. I am using a bigger tire, I think 1.5 inch. I could not figure out how to get these pants to work with the first plane. I tried a couple of different approaches, and came up with a way I think pretty ingenious and stable!
I cut a small slit in the plastic pant with a Dremel cutter, and slipped it over the strut. I then installed the wheel and pulled the pant down into place. I had previously Dremel sanded out a notch, and enlarged the wheel opening to accommodate my larger wheel. I set it where everything cleared well, and CA'd the pant into place. Between the hold from the slot and the CA its very stable! There is a wheel collar between the strut and the wheel.
View of the electronics bay with a 4S 3300 mAh battery in place. You can see the battery is partly tucked up under the motor cowl forward, and stops just short of the wing tube aft. This puts the CG just a smidge in front of the wing spar which runs about where the light glare is (the tube is just aft of CG). I am using a Spektrum AR600X receiver this time (had a HK Orange and satellite in the original). You can also see the MN0-48 mini servos in place. Plenty of room. In maiden flights I prefer a bit nose heavy plane.
I thought I had a pic of the 15 size motor in place, but I don't. I wanted to show the smaller standoff in place, so I took this pick through the right air hole in the cowl. The 15 is 10mm longer than the Turnigy 480 850kv I originally used, and pretty much the same diameter, maybe a couple mm more. Fits fine!
I am really excited about being able to maiden her tomorrow! As always, nervous about how she will handle. As I noted I propped up to an 11x5.5 (up in length, down a bit in pitch). I may try a 12x8... Exciting stuff! She has a whole lotta power! Maybe I can get a watt meter on her later. More to follow!
UPDATE: I wanted a little more freedom with moving the battery to adjust CG, so I made a couple changes:
I removed the long additional balsa to allow clearance in inserting the battery from behind the first spar (the cross wood over the wing tube) and put Dual Lock Velcro in the tray in its place. Before I passed the battery into the cowl then slid it aft under this spar. Now I bring it in aft of that spar. I had to remove the top of the second spar (over the receiver) to make it easier to clear. This allows the battery to move aft towards the receiver. More flexibility! I also cut a vent opening on the underside just forward of the tail wheel. Theres's a small framed area there that I cut an X in then ironed down the sides of. This allows air to flow, and pressure to be drawn out, increasing cooling, and reducing pressure trying to pop off the canopy.
UPDATE (3/31/12): I found my largest 4S wouldn't fit under the middle spar, and that while I could get the smaller Nanotechs in, this could be simpler. I decided to remove that middle spar, but since its across the wing spar and likely provides needed stability, I built one just in front of the wing tube, and one just forward of the original spar. For the lower one I placed a piece of popsicle wood in front and behind the frame piece, and placed 3 small squares between them to creat a unified strong structure. The upper one is two pieces, one secured underneath the rim, and the upper piece cut to fit cleanly across. Much better access!
Below I also provide a pic of the vent hole in the underside.
Also, I went back to the HeadsUpRC.com site and reviewed the 4S specs for the PowerUp 15, and they recommend a 10x5 prop. I have a couple wood Xoar eprops coming from GravesRC.


No comments :
Post a Comment