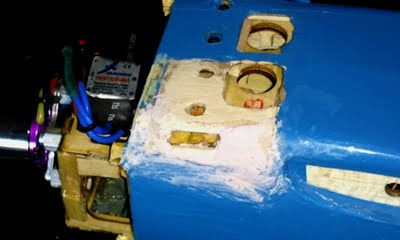
Okay, I faked this photo, because I had already power drilled out the broken dowel, but you get the point. Since the replacement spar tubes are out of stock, have been for months, will be until Jan 2012, I have strengthened the tube and repaired it by fitting a conveniently perfect sized dowel down the middle. These are the outside ends, but the broken part looks the same. Power drill out the ends of the broken section and use the hand drill there to clean up the detritus.
So it looks clean, about 20mm deep on each end.
I measure out a 40 mm section, which I intentionally cut a mm or two short.
I put a dot of CA in one end, shove and tap the dowel into place, and do the same to the other end. Tap them snug together and CA the joint. Once it dries I sand it all smooth so it will fit. It breaks along the same lines every time it breaks. This preserves the wing structure by absorbing the forces.
This is what the landing gear well looks like. It looks like rotted wood, but its just busted. I have peeled back some of the cote. I was doing this bit by pit, opening those holes, pushing wood, trying to avoid opening the fuse.
It became clear I was going to have to repair this by opening up the space.
That half of the plate was just hanging there loose, and here its removed. I cleaned up the edges.
Using 1 hr epoxy I set the plate back into place. The white stuff is lithium grease to keep the clamp from sticking to the epoxy. I left this overnight.
The next morning I dry fit the gear and rebent it to the correct angle with pliers, refitting and rebending.
I put some support pieces in the well, and placed a piece of plywood over it, cutting out the weight reducing space and the screw holes. Its supported on all 4 sides. I sanded it down. I also had put piece wood along the outer edge of the fuse to close the space and sanded this down as well using a Dremel then by hand.
I used some spackle to fill in the rough spots where a mix of crushed balsa and CA couldn't fill.
Let that dry a few hours then sanded it down. Cleaned it with alcohol.
I then recoted the entire section and poked out the screw holes. Never can get those to be pretty...
Came out pretty well! The wing was reinstalled and she's ready to go!


No comments :
Post a Comment