The flying monkeys got me...

Helis, Fixed Wing, RC Sailing

AMA 957918

Pirate Kid Skeleton by RadDezigns.

Sunday, February 12, 2012

Thunder Tiger eHawk 1500 Arises

And rather cheaply too, I might add. I described earlier how poorly her maiden went, that I had a pic post crash that I cannot find, that Thunder Tiger wanted a lot of money for a new fuse, that I redesigned the wings by throwing the aileron servos out there (work awesome now) and that she required a lot of work to rebuild. Here's the resurrection of the eHawk in pictures!


The entire nose was crushed and splintered, the motor mount/firewall disk shoved out of the opening, and there was nothing left to attach it to. I had idea how I was going to rebuild the firewall, hence I was also looking for a new fuse. CA'd things back into place and secured them with epoxy when I saw excess epoxy pooling in the nose. I realized I could mold a new firewall out of pure epoxy! So I taped her nose down on paper towel and poured epoxy in... You can see it pooling here.


Taped upright, left overnight to cure.


Some Bondo work to smooth things out.


You can see the paper towel pattern in the firewall. I drilled out the mounting holes using the old motor mount disk as a template. I had thought about drilling out a circle and using the remaining flange for the motor mount disk, but thought this better since the new wall was thick.


I ended up replacing the box hex screws with flat screws to gain more clearance with the new prop spinner. These screws worked fine with the spinner, but were a bit long and protruding into the motor itself when screwed in. They cleared the motor rotor, but I had another option and liked it better.
This is what the motor looked like mounted before that change.


The tail rod had snapped off where it connected to the fuse. I cleaned this up and gave it a clean flat surface. I also redid the back shelf of the wing mount which can be seen on the left.


The tail rod fit sweet into the end of the fuse. Originally they were joined with a smaller cone of fiberglass that came out from inside the back of the fuse and fit inside the tail rod. I epoxied this and the next morning was initially pleased with how sturdy it turned out. Looked clean! But a few flexes and it was loose again. More on this later, because at this point it was working fine, but with handling came loose.


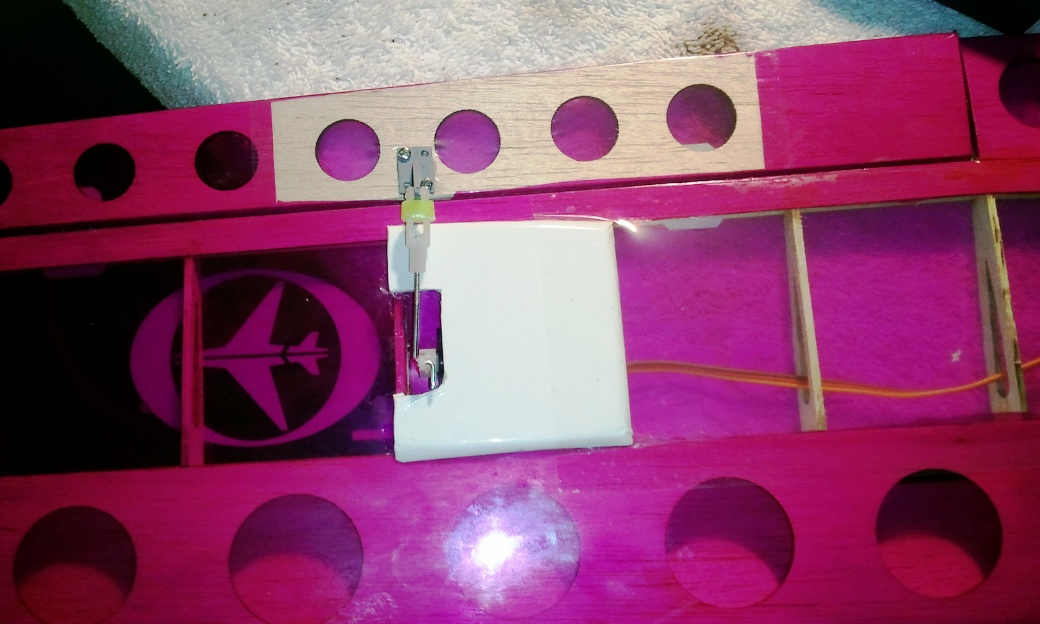
Had to build a tray for the servos. I needed to get everything lined up perfectly. The double center wood had to be cut out as the servos fit snug next to each other so their control arms clear the fuse. I placed with CA and secured with epoxy.The purple line delineates where the servo horns will be.


Here you can see the servos abut against one another.  Underneath each abeam servo shelf is a 1 inch leg that gives each tray shelf 3 points of attachment. Barely room for the servo arms which run from the servo out towards the fuse.


During the above work the tail worked loose. I CA'd it in place properly aligned, but it had to be secured better. I thought of just using epoxy, but wasn't sure that would stand the flexing... so decided to use a 1 inch wide piece of fiberglass cloth to wrap around the joint. I used CA edges on the cloth to keep it from unraveling, which made it difficult to keep from unwinding from around the rod. Ended up using floss to wrap around the cloth to hold it in place while the epoxy ser. This was cosmetically unappealing, but certainly sturdy.


I sanded down the epoxy I used to soak the cloth once it dried and it was so uneven it looked horrible. I decided to Bondo the whole thing... can you see I have been making this entire process as I went along?


In the end I sanded down the Bondo and got a mostly smooth surface, but not good enough, so I covered it with black electrical tape and it looked great! I painted with gloss black lacquer the section of the tail rod CF that had sanding abrasions to clean it up. Sweet.


 Nice work, if I do say so myself. Hopefully soon we will see how off her CG is... and see if she will fly! All her surfaces work and she has some mighty ailerons now! Still not impressed with the throw of the tail surfaces, but the servo control arms are so short to clear the fuse there isn't much more I can do. I shortened the control surface horns, and maxed the travel on the servos. Best I can do.

Thursday, February 9, 2012

Just take those pants off...

Funny, they work so well on my Eflite PulseXT and my Cosmic Wind, but, well, a picture is worth a thousand words...


Trim flight of the Sbach. It wasn't a hard landing, and the speed was not great. She touched down and peeled them right off...

I had maidened her a week ago, and she bent her motor box. Rebuilt her, with pretty darn low rates and higher expo. She still needs to be dialed down from 40% with 30 expo on aileron and elevator. So after trimming her out and tooling about a bit I brought her in, she touched down... it was a short roll out to say the least.

,

Placed the landing gear on the fuse for this shot. The cote just peeled right back. The landing gear block just popped out.


Closer view of the peeled fuse. You can see the hole in the wing.


The closer part is the wheel box. Its pretty frail.


Side view. The rectangle to the left is the landing gear box, where the gear plate is attached. I missed getting a pic of the repair... I used popsicle stick to run two frame pieces across the back of the gear box (right edge of the box, next to the red velcro). I ran three pieces of 4mm square stock along the right and left fuse after replacing the broken stringer at the top. I ran the stock along it, and did the same on the other side, and one down the middle. This supported the popsicle stick wall I built earlier. I then replaced the landing gear box with CA after some judicious trimming, and set it with Gorilla glue inside the box.


On their way past the plane, the wheel pant poked a hole in the sheet balsa, also quite thin. I pulled it back up and CA'd it, then applied a little hobby filler. Sanded it down, and recoted it. There was no other damage.


All done, underside.


Propped down from a 10x7 to a 9x6. On a subjective static test it felt like it had a lot more thrust. In the trim flight she again seemed a bit under powered, but the motor should provide more than enough. Looking forward to seeing what happens next.

Monday, February 6, 2012

Wearin' me down...

Last time I flew the Erazor she crashed when I tried to turn her and psyched myself into a spin. I rebuilt her, some surprisingly slight damage, and hovered her. She stripped her main gear. What? Stripped another one. Noticed the mesh between the pinion and the main gear was off, reset the main motor so they touched with a paper between. Stripped another gear... Decided to remove the cover and get to the pinion, and damn, whodda thunk?


The one on the right is worn completely out... I was surprised. It has been almost a year and a half, so it was about time. I need to pay more attention to this. The one on the left is a replacement. The original is a 11T, the new one is a 12T. The old one looked like the new one when I started! Set up the pinion and main gear, and ran her without blades to check the mesh, backlash and make sure it wasn't overheating. Worked awesome! Tomorrow I will fly!

Sunday, February 5, 2012

Back to Basic 2 Blade FBL

I decided to set my EXI BeastX FBL system up as a 2 blade system rather than as the 4 blade system I had originally set up.  I didn't have much success flying her. There was some pitch instability that made her jump up and down violently. I don't know if it was a link that came loose or if it was the BeastX (which does all the CCPM mixing and pitch control beyond the pitch curves). I don't know if one of the blades went rogue (the swash stabilizer arm had bumped one of the swash control rod ball links off, thought I had addressed it, but maybe not?). I am learning a lot about this BeastX and look foward to mastering it before setting it up on my Trex 600e Pro FBL later this year.


Two Bladed EXI 450 BeastX FBL.


CopterX Swash, generic (Tarot, most likely) FBL Rotor Head. I took the feathering shaft out to inspect it and grease the bearings. Its a standard 450 feathering shaft. Not sure what else I expected, but I like that.


The kit included this silver aluminum piece. It had 3mm threaded holes on either end, and another in the base. I have no idea what its for...

Looking forward to seeing how this goes!

Saturday, February 4, 2012

Sbach is back

Though I suppose you never knew she left. For a blogger I suck at remembering that an event is blogworthy or that a photo would explain a lot... A couple of weeks ago I built my Hobby King Sbach 342 1000mm v2. What I failed to blog, probably because it pissed me off, was that I maidened her. It was a ADHD moment that we survived, only to learn she has a flight characteristic I shouldn't be surprised she has.

So all excited, after flying everything else I had brought out, I decided it was time to set off with the new Sbach and maiden her. I had set everything up a few days before. I installed the battery, checked CG, did control surface checks, set her to mid rates, and powered up for takeoff! She rolled out sweet, taking a bit of field which at first I thought looked under powered, but once airborne she hauled booty! The small wheels in tall grass didn't help her rollout. I thought she was a bit tail heavy and god almighty twitchy! The slightest input had an incredible response! Everyone stood at the fence giving me advice, but I figured out what she needed, brought her around and landed her sweet. I took a look at her and everything was fine... but thought, geez, that's a lot of throw for mid rates. Checked my DX8... crap.

I hadn't set any rates or expo... I was flying her at 100% with zero expo in all rates! Fixed that and took her back up. Even with 50% and 30 expo she was still twitchy but controllable. It took a few passes but I trimmed her out. She flew sweet! Great responses, no ill flight characteristics, even a clean stall with a long glide, though she does like speed better. Since I was still using the same battery I brought her in for landing. I figured that much like my Electrifly Cosmic Wind she would need some speed on landing, and on the first pass she came in a bit hot, and I went around. The wind swung around from a cross wind to from the south, so I made my second approach into the shifting wind. A foot above the ground she stalled when the wind changed to a brisk cross wind again and I got caught behind the power curve. The right wing touched, she cartwheeled touching her nose and coming to a stop without a full revolution, more of a rough landing than a crash. Yay! Everyone agreed she should be fine. I picked her up an noticed that the motor was bouncing around in the cowl... the cowl was still attached, but chipped up where the spinner had struck it. There was no other damage. This was a slow nose touch, and the the firewall punched through!

At home later in the week I quickly repaired the firewall and strengthened it. That was easy. The extra space of the new firewall moved the motor a hair forward so I was able to remove 2 of the washers I had on the shaft to allow the spinner to clear the cowl, so now there is more adapter on the shaft. I used Bondo and repaired the cowl, painted it (learned that there is white primer and it works so much better when using white gloss, which turned grayish with the gray primer). Put that all together this evening, tested her motor and controls, and she is flight ready!


Repaired the firewall/motor mount. You can see the cross wise popsicle stick. Much sturdier.


I realized that the wheel pants weren't going anywhere, so removed the wood spacer crap I had put in there and put a wheel collar on the inside. Much freer wheel spin!


The redone cowl (should have gotten a pre pic...). In the background is the rebuilt pod for the Thunder Tiger eHawk 1500 whose rebuild I introduced earlier,  but more on that later. Damn fine work!


All pretty and ready to fly! I think she is going to fly wicked nice!

Thursday, February 2, 2012

eHawk Wing Grows a Pair

My Thunder Tiger eHawk 1500 met its demise on its first flight within seconds of launch. It rolled and had no aileron authority to come back upright before coming hard into contact with the earth. This shattered her fuse-pod and that was about it. I lost the post crash photo... the tail boom snapped off the pod, the motor mount was forced back into the pod, and the forward part of the pod that connected to it was toothpicks. I am rebuilding it (Thunder Tiger via Tower Hobbies special order for $70 plus S&H from Thunder Tiger to Tower Hobbies then to me, my ass...) and will post those pics when I'm damn good and ready.

Back to the wing. The stock eHawk has a single servo driving individual crank control arms, which you can see in the build blog entry above. It sucked from square one, and I had to dicker with it to get it to work. The control throws were within specs, but seemed too small to me, It also seemed to move the inner end of the aileron more than the outer as the aileron twisted along its length. And flight proved this. Others had dealt with this same series of issues and had put the ailerons on their own servos out on the wing. So I decided on this go around to give the eHawk a pair, and it went pretty damn good, if I do say so myself!


I used salvaged generic 9g analog servos. cut the cote over the servo site and ended up pulling it off inward as there was no way I was going to get the servo wires passed to the center otherwise. The servo just sits in that spot.


Long view. One wire was long enough, the other has a 45 cm extension joined with floss (servo connector holder thingy was too bulky to sit in the wing spar where it would be).


Recoted. The cote was pulling away from the aileron, so I replaced it with clear where it wrinkled. I used clear cote on the wing. The white over the servo is sheet balsa coted with white Econocote to give it strength and color. I beveled the edged as it sits on top of the servo and a drop of Beacon 3-in-1 holds the servo to it. The square is CA'd to the wing. Not optimal if I need to replace the servo...


Close up. Clean, works excellent on a servo tester with great throw. NOW she's got ailerons!


Wing looks good! I should have the pod done, and the whole thing put back together by next week. Hope to fly her next week, well this time...

I didn't mean too, but I did...

And I like it! I had planned on adding the Align Trex 600e EFL helicopter to my hangar. One night I was cruising eBay when the Trex 600 EFL Super Combo caught my eye at somewhere around $200. I was excited and decided what the hell, I could bid $500 for this normally $1000 heli, and if I lost no problem, since I wasn't really looking anyway. So I bid!

Then I noticed in very big letters all over the post that it is sold without the electronics...  no 3GX, nothing... CRAP! I wrote the seller hoping there was some way he could cancel my careless bid early in the selling, but there isn't, and so I won it for $365. Whew... It is still worth it for that price, but I would be a little disappointed if it got to $500 since I could but a complete Trex 500e flybar kit for that much. As it became evident that I was going to win the bid, I checked out more of mhein18's eBay store, and he's got a lot of other good deals. He's an excellent eBay seller and I will likely get the 3GX system from him later. I will put together a digital servo set, ESC, and HV BEC together on my own, and add a good Spektrum receiver. I will collect the parts over the next several months.

Keep checking in and watch how this new project comes together!