
Monday, January 30, 2012
Hoppity Hop Hop
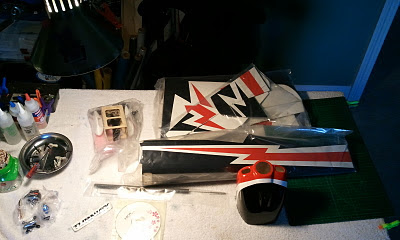
Took the BeastX EXI 450 up today in the garage. Had to make a few adjustments for items I incompletly understood during setup. In flight she had a real problem. She would hop up and down violently and throw herself down and across the garage floor. She shattered the plastic blades, special CopterX blades for multiple bladed helis. They were not tracking perfectly, but not too badly. I had to change the main rotor shaft and after doing so I powered her up without blades to see if it was the BeastX inducing oscillations in pitch, if it was the rotor head, or maybe, as I suspected, the very flexible blades. The rotor hub spun perfectly without any oscillations... this suggests the blades were forcing some sort of pitch oscillation, but then, the blade grips were not loaded, it could still be the rotor head. I am confident it was not the BeastX, certainly not directly. I am thinking of putting regular blades on her. This would put the load of four blades on the motor... I have a twin blade FBL head, but the point of this was to have a four blade heli. I have plenty of blades, and will be ready this time.
Sunday, January 29, 2012
Sopwith Untwisted
I had taken the Hangar 9 Sopwith out, but before I could fly her with her new setup, I noticed a twist in the puter edge of the left lower wing. Bill Page convinced me not to fly her, and to repair the wing before I do. So this afternoon I did. I am getting to where I care less and less about this plane as I have yet to fly her successfully. this affected my dedication to perfection. I accepted mediocre... which is okay, I honestly don't think the small deflection left in the lower edge is critical.


Pre. You can see the missing wood.

After I laid in and sanded down some sheet balsa. The very outer edge could use more wood, but I didn't feel like it...

And here she is all coted back up! You really can't see any residual twist. The issue wasn't that the wing was twisted, but that the leading edge was higher than it was supposed to be on the outer edge. All fixed. Yippee. I get to crash her again... Hopefully not!
Friday, January 27, 2012
BeastX

I installed it on my EXI 450, with the CopterX 450 4 blade head, which I had set up several months ago. I haven't been flying helis for a while, and have been focusing on the Erazor 450 so I would be working on one heli at a time. I removed the Assan MEMS gyro I had and put the BeastX in the gyro platform. Step by step, walked through the manual on installation, then setup. A few do overs, but in the end she works fine! It seems. In some extreme inputs one of the blade control rods gets popped of by the swash arm (holy crap... that's bad), but I don't think it is a problem in the normal flight envelope. I will be checking that out some more later. With 4 blades I can use the perpendicular blade holders as my "flybar" reference for setting pitch. Push comes to shove I have a 2 blade flybarless head on the shelf. In static testing the BeastX is amazingly responsive and she moved the surfaces in the expected dierction. Hope she shows her stuff in flight, possibly as early as tomorrow.


Monday, January 23, 2012
Friday, January 20, 2012
Hobby King Sbach 342 v2 Build
My Hobby King Sbach 342 1000mm version 2 arrived the other day! Over the course of the past 3 days I put her together. The kit was very well made, the cote tight, the parts fine (with the exception of the clevi, which wouldn't screw on to the control rods). The control horns were solid and well constructed nylon. At the end of the build she looks awesome! The directions on the enclosed CD are in PDF format, and are rather uninstructive, but have good photos if you pay close attention (hint, hint). So I decided to take a lot of pics.


 \
\


The box had a photo of the version 1 plane (the black landing gear), which caused me a moments discontent. I was worried this might happen...

But the number 18652 on the side of the box is the stock number HK uses for version 2. The kit turned out to actually be version 2.

Unboxed.

I started with the aileron servos. You have to use psychic powers and feel out the box, it is angled a bit. I first tried cutting an edge along the inner boundary of the box, but the cote peeled back. I fixed that, and then just cut a X.

Worked perfectly. I used a 15 cm servo extension (Hobbypartz.com) and servo connector locks.

Used T-pins to mark and keep the CA hinges centered.

The long machine screws (blunt tip) are for the control horns. I first CA'd the control horn where I wanted it (not necessary, just made it easier). I then drilled holes through the wing via the holes in the control horn. Getting the screws to come out precisely on the other side never happens, so it took some work to get the screws to screw into the plate on the otherside.

Centered the servo with a servo tester (from Hobby King), and set up the aileron.

The wheel pants were a pain in the ass. I ended up McGuyvering it with popsicle sticks with a hole drilled in the center to space it and used a servo screw in the second hole on the landing gear to stabilize it, and added some cement for good measure. I put the bolt through with the head on the inside and used a nut to secure it to the landing gear. Then placed the two pieces of wood (serves to press the pant against the landing gear and keep the weight down. One piece of wood and a plastic spacer would work too). Washer, wheel, washer, and a nut to secure it all. Didn't spend much time on the plastic, but did need to cut some back. I may redo this a bit cleaner with some planning, but at the moment used what I had on hand. I didn't attach the landing gear until I was done with the fuse at the end of the build.

I cut away some of the cote on the horizontal stab to help secure it to the fuse. On further examination it probably doesn't matter because there is nothing in the fuse for it to adhere to...

Push the horizzontal stablizer FORWARD after centering it. Make sure to push the elevator connector through before gluing the stab in place. Measure twice, glue once...

Test fit the tail gear, then drilled the end hole and dug a trough in the base of the rudder for the tail gear to sit in. CA'd along the entire length,.

The entire tail assembly in place. The cote cleaned up, by the way...

You can't tell where the control rods exit the fuse, so pass them through their tubes and see where it puckers, poke a hole there with a blade.

The motor box installed easily. CA'd in place.

The fuse servo rack cutouts are oversized, I guess to allow larger servos. I had to use the brackets for my Fusonic MG-D-9g servos, which, by the way, I used all around.

Rudder and elevator servos in place. Notice the overbuilt support for the guide tubes. I had installed to provided base where it fit across the fuse only to find that it fit too low and the control rods came out under the servos. So I cut the support free and built a new one to CA it to using popsicle sticks, positioned to fit the control tubes where they are supposed to be.

On installing the cowl it was clear that the motor was going to come up short with the motor installed against the wall like it shows in the instructions.

I could cut the cowl to pull it back, but naah... never a good idea.

So I put the motor on some spacers I happened to have, and fortunately found some screws just the right length.
 \
\
I used an Eflite trick to position the holes I needed to drill through the cowl to hit the cowl connection tabs on the fuse. Tape some index card back from the cowl, and draw a dot where the hole goes.

Then position the cowl and secure it in place with low tack tape. Drill the holes.

Even with the spacers it came up a bit short. 3 washers did the trick. Still enough shaft for the prop adapter, but I threw a little locktite on just to be sure.

All in place! Used RTL Fastener servo screws. They are truly screws with a million uses!

Cut the slots and holes for the wing. I had to shorten the CF rod about 2 mm to get the wings flush.

They are secured with theses nifty thumb screws. I put a washer on it.

View of the equipment bay from above. HK Orange receiver and satellite. I will be using Turnigy Nanotech 3S 2200 mAh batteries.
All done!


You have to put the stickers on. The ones in the HK photos are not the ones that came with the kit. I used the white letters, which to my chagrin turned pink when placed over the red flash... Added a few of my own.


CG was spot on! I used spray window tint (hate that stuff, never goes on right) on the canopy. Looks good from afar. Looking forward to maidening her!
Ascension

Bobbing and Weaving


Subscribe to:
Posts
(
Atom
)