The flying monkeys got me...

Helis, Fixed Wing, RC Sailing

AMA 957918

Pirate Kid Skeleton by RadDezigns.

Saturday, February 4, 2012

Sbach is back

Though I suppose you never knew she left. For a blogger I suck at remembering that an event is blogworthy or that a photo would explain a lot... A couple of weeks ago I built my Hobby King Sbach 342 1000mm v2. What I failed to blog, probably because it pissed me off, was that I maidened her. It was a ADHD moment that we survived, only to learn she has a flight characteristic I shouldn't be surprised she has.

So all excited, after flying everything else I had brought out, I decided it was time to set off with the new Sbach and maiden her. I had set everything up a few days before. I installed the battery, checked CG, did control surface checks, set her to mid rates, and powered up for takeoff! She rolled out sweet, taking a bit of field which at first I thought looked under powered, but once airborne she hauled booty! The small wheels in tall grass didn't help her rollout. I thought she was a bit tail heavy and god almighty twitchy! The slightest input had an incredible response! Everyone stood at the fence giving me advice, but I figured out what she needed, brought her around and landed her sweet. I took a look at her and everything was fine... but thought, geez, that's a lot of throw for mid rates. Checked my DX8... crap.

I hadn't set any rates or expo... I was flying her at 100% with zero expo in all rates! Fixed that and took her back up. Even with 50% and 30 expo she was still twitchy but controllable. It took a few passes but I trimmed her out. She flew sweet! Great responses, no ill flight characteristics, even a clean stall with a long glide, though she does like speed better. Since I was still using the same battery I brought her in for landing. I figured that much like my Electrifly Cosmic Wind she would need some speed on landing, and on the first pass she came in a bit hot, and I went around. The wind swung around from a cross wind to from the south, so I made my second approach into the shifting wind. A foot above the ground she stalled when the wind changed to a brisk cross wind again and I got caught behind the power curve. The right wing touched, she cartwheeled touching her nose and coming to a stop without a full revolution, more of a rough landing than a crash. Yay! Everyone agreed she should be fine. I picked her up an noticed that the motor was bouncing around in the cowl... the cowl was still attached, but chipped up where the spinner had struck it. There was no other damage. This was a slow nose touch, and the the firewall punched through!

At home later in the week I quickly repaired the firewall and strengthened it. That was easy. The extra space of the new firewall moved the motor a hair forward so I was able to remove 2 of the washers I had on the shaft to allow the spinner to clear the cowl, so now there is more adapter on the shaft. I used Bondo and repaired the cowl, painted it (learned that there is white primer and it works so much better when using white gloss, which turned grayish with the gray primer). Put that all together this evening, tested her motor and controls, and she is flight ready!


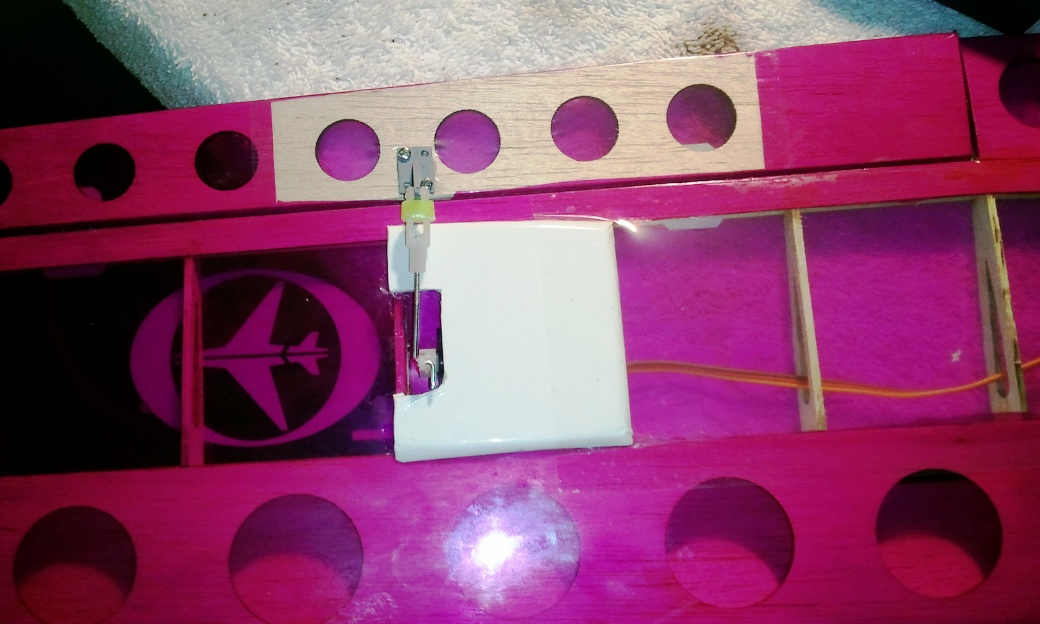
Repaired the firewall/motor mount. You can see the cross wise popsicle stick. Much sturdier.


I realized that the wheel pants weren't going anywhere, so removed the wood spacer crap I had put in there and put a wheel collar on the inside. Much freer wheel spin!


The redone cowl (should have gotten a pre pic...). In the background is the rebuilt pod for the Thunder Tiger eHawk 1500 whose rebuild I introduced earlier,  but more on that later. Damn fine work!


All pretty and ready to fly! I think she is going to fly wicked nice!

Thursday, February 2, 2012

eHawk Wing Grows a Pair

My Thunder Tiger eHawk 1500 met its demise on its first flight within seconds of launch. It rolled and had no aileron authority to come back upright before coming hard into contact with the earth. This shattered her fuse-pod and that was about it. I lost the post crash photo... the tail boom snapped off the pod, the motor mount was forced back into the pod, and the forward part of the pod that connected to it was toothpicks. I am rebuilding it (Thunder Tiger via Tower Hobbies special order for $70 plus S&H from Thunder Tiger to Tower Hobbies then to me, my ass...) and will post those pics when I'm damn good and ready.

Back to the wing. The stock eHawk has a single servo driving individual crank control arms, which you can see in the build blog entry above. It sucked from square one, and I had to dicker with it to get it to work. The control throws were within specs, but seemed too small to me, It also seemed to move the inner end of the aileron more than the outer as the aileron twisted along its length. And flight proved this. Others had dealt with this same series of issues and had put the ailerons on their own servos out on the wing. So I decided on this go around to give the eHawk a pair, and it went pretty damn good, if I do say so myself!


I used salvaged generic 9g analog servos. cut the cote over the servo site and ended up pulling it off inward as there was no way I was going to get the servo wires passed to the center otherwise. The servo just sits in that spot.


Long view. One wire was long enough, the other has a 45 cm extension joined with floss (servo connector holder thingy was too bulky to sit in the wing spar where it would be).


Recoted. The cote was pulling away from the aileron, so I replaced it with clear where it wrinkled. I used clear cote on the wing. The white over the servo is sheet balsa coted with white Econocote to give it strength and color. I beveled the edged as it sits on top of the servo and a drop of Beacon 3-in-1 holds the servo to it. The square is CA'd to the wing. Not optimal if I need to replace the servo...


Close up. Clean, works excellent on a servo tester with great throw. NOW she's got ailerons!


Wing looks good! I should have the pod done, and the whole thing put back together by next week. Hope to fly her next week, well this time...

I didn't mean too, but I did...

And I like it! I had planned on adding the Align Trex 600e EFL helicopter to my hangar. One night I was cruising eBay when the Trex 600 EFL Super Combo caught my eye at somewhere around $200. I was excited and decided what the hell, I could bid $500 for this normally $1000 heli, and if I lost no problem, since I wasn't really looking anyway. So I bid!

Then I noticed in very big letters all over the post that it is sold without the electronics...  no 3GX, nothing... CRAP! I wrote the seller hoping there was some way he could cancel my careless bid early in the selling, but there isn't, and so I won it for $365. Whew... It is still worth it for that price, but I would be a little disappointed if it got to $500 since I could but a complete Trex 500e flybar kit for that much. As it became evident that I was going to win the bid, I checked out more of mhein18's eBay store, and he's got a lot of other good deals. He's an excellent eBay seller and I will likely get the 3GX system from him later. I will put together a digital servo set, ESC, and HV BEC together on my own, and add a good Spektrum receiver. I will collect the parts over the next several months.

Keep checking in and watch how this new project comes together!

Monday, January 30, 2012

Hoppity Hop Hop

Took the BeastX EXI 450 up today in the garage. Had to make a few adjustments for items I incompletly understood during setup. In flight she had a real problem. She would hop up and down violently and throw herself down and across the garage floor. She shattered the plastic blades, special CopterX blades for multiple bladed helis. They were not tracking perfectly, but not too badly. I had to change the main rotor shaft and after doing so I powered her up without blades to see if it was the BeastX inducing oscillations in pitch, if it was the rotor head, or maybe, as I suspected, the very flexible blades. The rotor hub spun perfectly without any oscillations... this suggests the blades were forcing some sort of pitch oscillation, but then, the blade grips were not loaded, it could still be the rotor head. I am confident it was not the BeastX, certainly not directly. I am thinking of putting regular blades on her. This would put the load of four blades on the motor... I have a twin blade FBL head, but the point of this was to have a four blade heli. I have plenty of blades, and will be ready this time.

Sunday, January 29, 2012

Sopwith Untwisted

I had taken the Hangar 9 Sopwith out, but before I could fly her with her new setup, I noticed a twist in the puter edge of the left lower wing. Bill Page convinced me not to fly her, and to repair the wing before I do. So this afternoon I did. I am getting to where I care less and less about this plane as I have yet to fly her successfully. this affected my dedication to perfection. I accepted mediocre... which is okay, I honestly don't think the small deflection left in the lower edge is critical.


Pre. You can see the missing wood.


After I laid in and sanded down some sheet balsa. The very outer edge could use more wood, but I didn't feel like it...


And here she is all coted back up! You really can't see any residual twist. The issue wasn't that the wing was twisted, but that the leading edge was higher than it was supposed to be on the outer edge. All fixed. Yippee. I get to crash her again... Hopefully not!


Friday, January 27, 2012

BeastX

I've had my BeastX flybarless (FBL) stabilization system sitting on a shelf for a couple of months, a bit daunted by it and the complexity of setting up a FBL system. It has sooo many wires, and the manual asked questions I have no idea how to answer as I don't have the data (how many hz does an EXI d213F servo run at?).  That ended up being the only input I guessed at. There is nothing anywhere that tells me how to use the USB to set up the BeastX... I figured out how to upgrade the firmware to 2.0.4, but other than that I got nothing. So I set up the BeastX using the push buttons and actually it wasn't so bad. I think. We'll find out when I try to fly her.

I installed it on my EXI 450, with the CopterX 450 4 blade head, which I had set up several months ago. I haven't been flying helis for a while, and have been focusing on the Erazor 450 so I would be working on one heli at a time. I removed the Assan MEMS gyro I had and put the BeastX in the gyro platform. Step by step, walked through the manual on installation, then setup. A few do overs, but in the end she works fine! It seems. In some extreme inputs one of the blade control rods gets popped of by the swash arm (holy crap... that's bad), but I don't think it is a problem in the normal flight envelope. I will be checking that out some more later. With 4 blades I can use the perpendicular blade holders as my "flybar" reference for setting pitch. Push comes to shove I have a 2 blade flybarless head on the shelf. In static testing the BeastX is amazingly responsive and she moved the surfaces in the expected dierction. Hope she shows her stuff in flight, possibly as early as tomorrow.


Friday, January 20, 2012

Hobby King Sbach 342 v2 Build

My Hobby King Sbach 342 1000mm version 2 arrived the other day! Over the course of the past 3 days I put her together. The kit was very well made, the cote tight, the parts fine (with the exception of the clevi, which wouldn't screw on to the control rods). The control horns were solid and well constructed nylon. At the end of the build she looks awesome! The directions on the enclosed CD are in PDF format, and are rather uninstructive, but have good photos if you pay close attention (hint, hint). So I decided to take a lot of pics.


The box had a photo of the version 1 plane (the black landing gear), which caused me a moments discontent. I was worried this might happen...


But the number 18652 on the side of the box is the stock number HK uses for version 2. The kit turned out to actually be version 2.


Unboxed.


I started with the aileron servos. You have to use psychic powers and feel out the box, it is angled a bit. I  first tried cutting an edge along the inner boundary of the box, but the cote peeled back. I fixed that, and then just cut a X.


Worked perfectly. I used a 15 cm servo extension (Hobbypartz.com) and servo connector locks.


Used T-pins to mark and keep the CA hinges centered.


The long machine screws (blunt tip) are for the control horns. I first CA'd the control horn where I wanted it (not necessary, just made it easier). I then drilled holes through the wing via the holes in the control horn. Getting the screws to come out precisely on the other side never happens, so it took some work to get the screws to screw into the plate on the otherside.


Centered the servo with a servo tester (from Hobby King), and set up the aileron.


The wheel pants were a pain in the ass. I ended up McGuyvering it with popsicle sticks with a hole drilled in the center to space it and used a servo screw in the second hole on the landing gear to stabilize it, and added some cement for good measure. I put the bolt through with the head on the inside and used a nut to secure it to the landing gear. Then placed the two pieces of wood (serves to press the pant against the landing gear and keep the weight down. One piece of wood and a plastic spacer would work too). Washer, wheel, washer, and a nut to secure it all. Didn't spend much time on the plastic, but did need to cut some back. I may redo this a bit cleaner with some planning, but at the moment used what I had on hand. I didn't attach the landing gear until I was done with the fuse at the end of the build.


I cut away some of the cote on the horizontal stab to help secure it to the fuse. On further examination it probably doesn't matter because there is nothing in the fuse for it to adhere to...


Push the horizzontal stablizer FORWARD after centering it. Make sure to push the elevator connector through before gluing the stab in place. Measure twice, glue once...


Test fit the tail gear, then drilled the end hole and dug a trough in the base of the rudder for the tail gear to sit in. CA'd along the entire length,.


The entire tail assembly in place. The cote cleaned up, by the way...


You can't tell where the control rods exit the fuse, so pass them through their tubes and see where it puckers, poke a hole there with a blade.


The motor box installed easily. CA'd in place.


The fuse servo rack cutouts are oversized, I guess to allow larger servos. I had to use the brackets for my Fusonic MG-D-9g servos, which, by the way, I used all around.


Rudder and elevator servos in place. Notice the overbuilt support for the guide tubes. I had installed to provided base where it fit across the fuse only to find that it fit too low and the control rods came out under the servos. So I cut the support free and built a new one to CA it to using popsicle sticks, positioned to fit the control tubes where they are supposed to be.


On installing the cowl it was clear that the motor was going to come up short with the motor installed against the wall like it shows in the instructions.


I could cut the cowl to pull it back, but naah... never a good idea.


So I put the motor on some spacers I happened to have, and fortunately found some screws just the right length.


\

I used an Eflite trick to position the holes I needed to drill through the cowl to hit the cowl connection tabs on the fuse. Tape some index card back from the cowl, and draw a dot where the hole goes.


Then position the cowl and secure it in place with low tack tape. Drill the holes.


Even with the spacers it came up a bit short. 3 washers did the trick. Still enough shaft for the prop adapter, but I threw a little locktite on just to be sure.


All in place! Used RTL Fastener servo screws. They are truly screws with a million uses!


Cut the slots and holes for the wing. I had to shorten the CF rod about 2 mm to get the wings flush.


They are secured with theses nifty thumb screws. I put a washer on it.


View of the equipment bay from above. HK Orange receiver and satellite. I will be using Turnigy Nanotech 3S 2200 mAh batteries.


All done!


You have to put the stickers on. The ones in the HK photos are not the ones that came with the kit. I used the white letters, which to my chagrin turned pink when placed over the red flash... Added a few of my own.


CG was spot on!  I used spray window tint (hate that stuff, never goes on right) on the canopy. Looks good from afar. Looking forward to maidening her!

Ascension

Took the PulseXT #2 up today for her maiden flight! She flew perfectly, just like her sister. The better access to the battery tray was a nice treat, glad I moved the ESC to the back of the compartment and made the extensions. On the last flight I got lulled into a zen comfort zone, and on landing was late to recognize she was drifting down on me in the strong cross wind. When I did she was angling for one of the flight station barriers. I was shocked and frozen, thinking I was going to lose her again!!! She missed the barrier as I tried to decide to climb out or let her land, when she landed, heading for a setup station and the fence. I pulled a Devon (quick turn), so hard it stripped the rudder servo, and she slid in like a car in a commercial into a parking spot right under the bench, striking her left wing only lightly before spinning around it. She ended up under the bench with a small dent in the left wing and wrinkled her cote (can't see either now that I heat gunned the cote), with no structural damage except the servo (which I have also replaced with my standby. Waiting for gears and will repair it as a standby). I had panicked when I realized what was happening, but the turn saved her from further damage. That was it for the day, I had used up all my luck!

Bobbing and Weaving

Took my HDX 500se up for several packs today. It was a bit breezy, but she handles very well. I practiced moving her all around the field, all tail in (earlier I parked the Erazor in a fence trying to hover side in. Still get psyched out). I love this heli. She is built solid with a really tough rotor head. I'm told she isn't a 3D machine which is fine by me. I think she's a perfect trainer for scale flight! Kenny Chandler videoed her for me. She looks closer than she really is (the grainy look is from the digital xoom and she is a big heli).

There is a strong wind with gusts that accounts for most of the up down, but the lateral movement is me and my developing skills. When I want to keep her in one place I have gotten pretty good at nailing her down. When I move her I am still getting use to a delay in response due to her inertia: she is big! I plan on focusing on my heli skills more everyday.