The flying monkeys got me...

Helis, Fixed Wing, RC Sailing

AMA 957918

Pirate Kid Skeleton by RadDezigns.

Monday, July 19, 2021

Waco Repairs Day 3

I made a lot of progress yesterday on the Waco repairs. While my work is not always elegant, and I really have no idea how to lay down large areas of cote with complex curves, I did a pretty decent job on this project!


The port side of the fuse had one minor cote cut out where I made a small sheet repair.
You can see the reconstructed wing root surface here, painted red. I didn't feel like cote-ing over.


Managed to match the curve nicely.


This is the starboard side. this required massive puzzle reconstruction because my skill set does not include forming balsa sheet into complex curves. Its not fully apparent here but there is a continuous S curve along the side through the wing root. The patch work came out smooth and follows the contours nicely. Spackle smoothed the remaining cracks and crevices. Allowing this to set overnight before a light sanding and ironing on the cote.


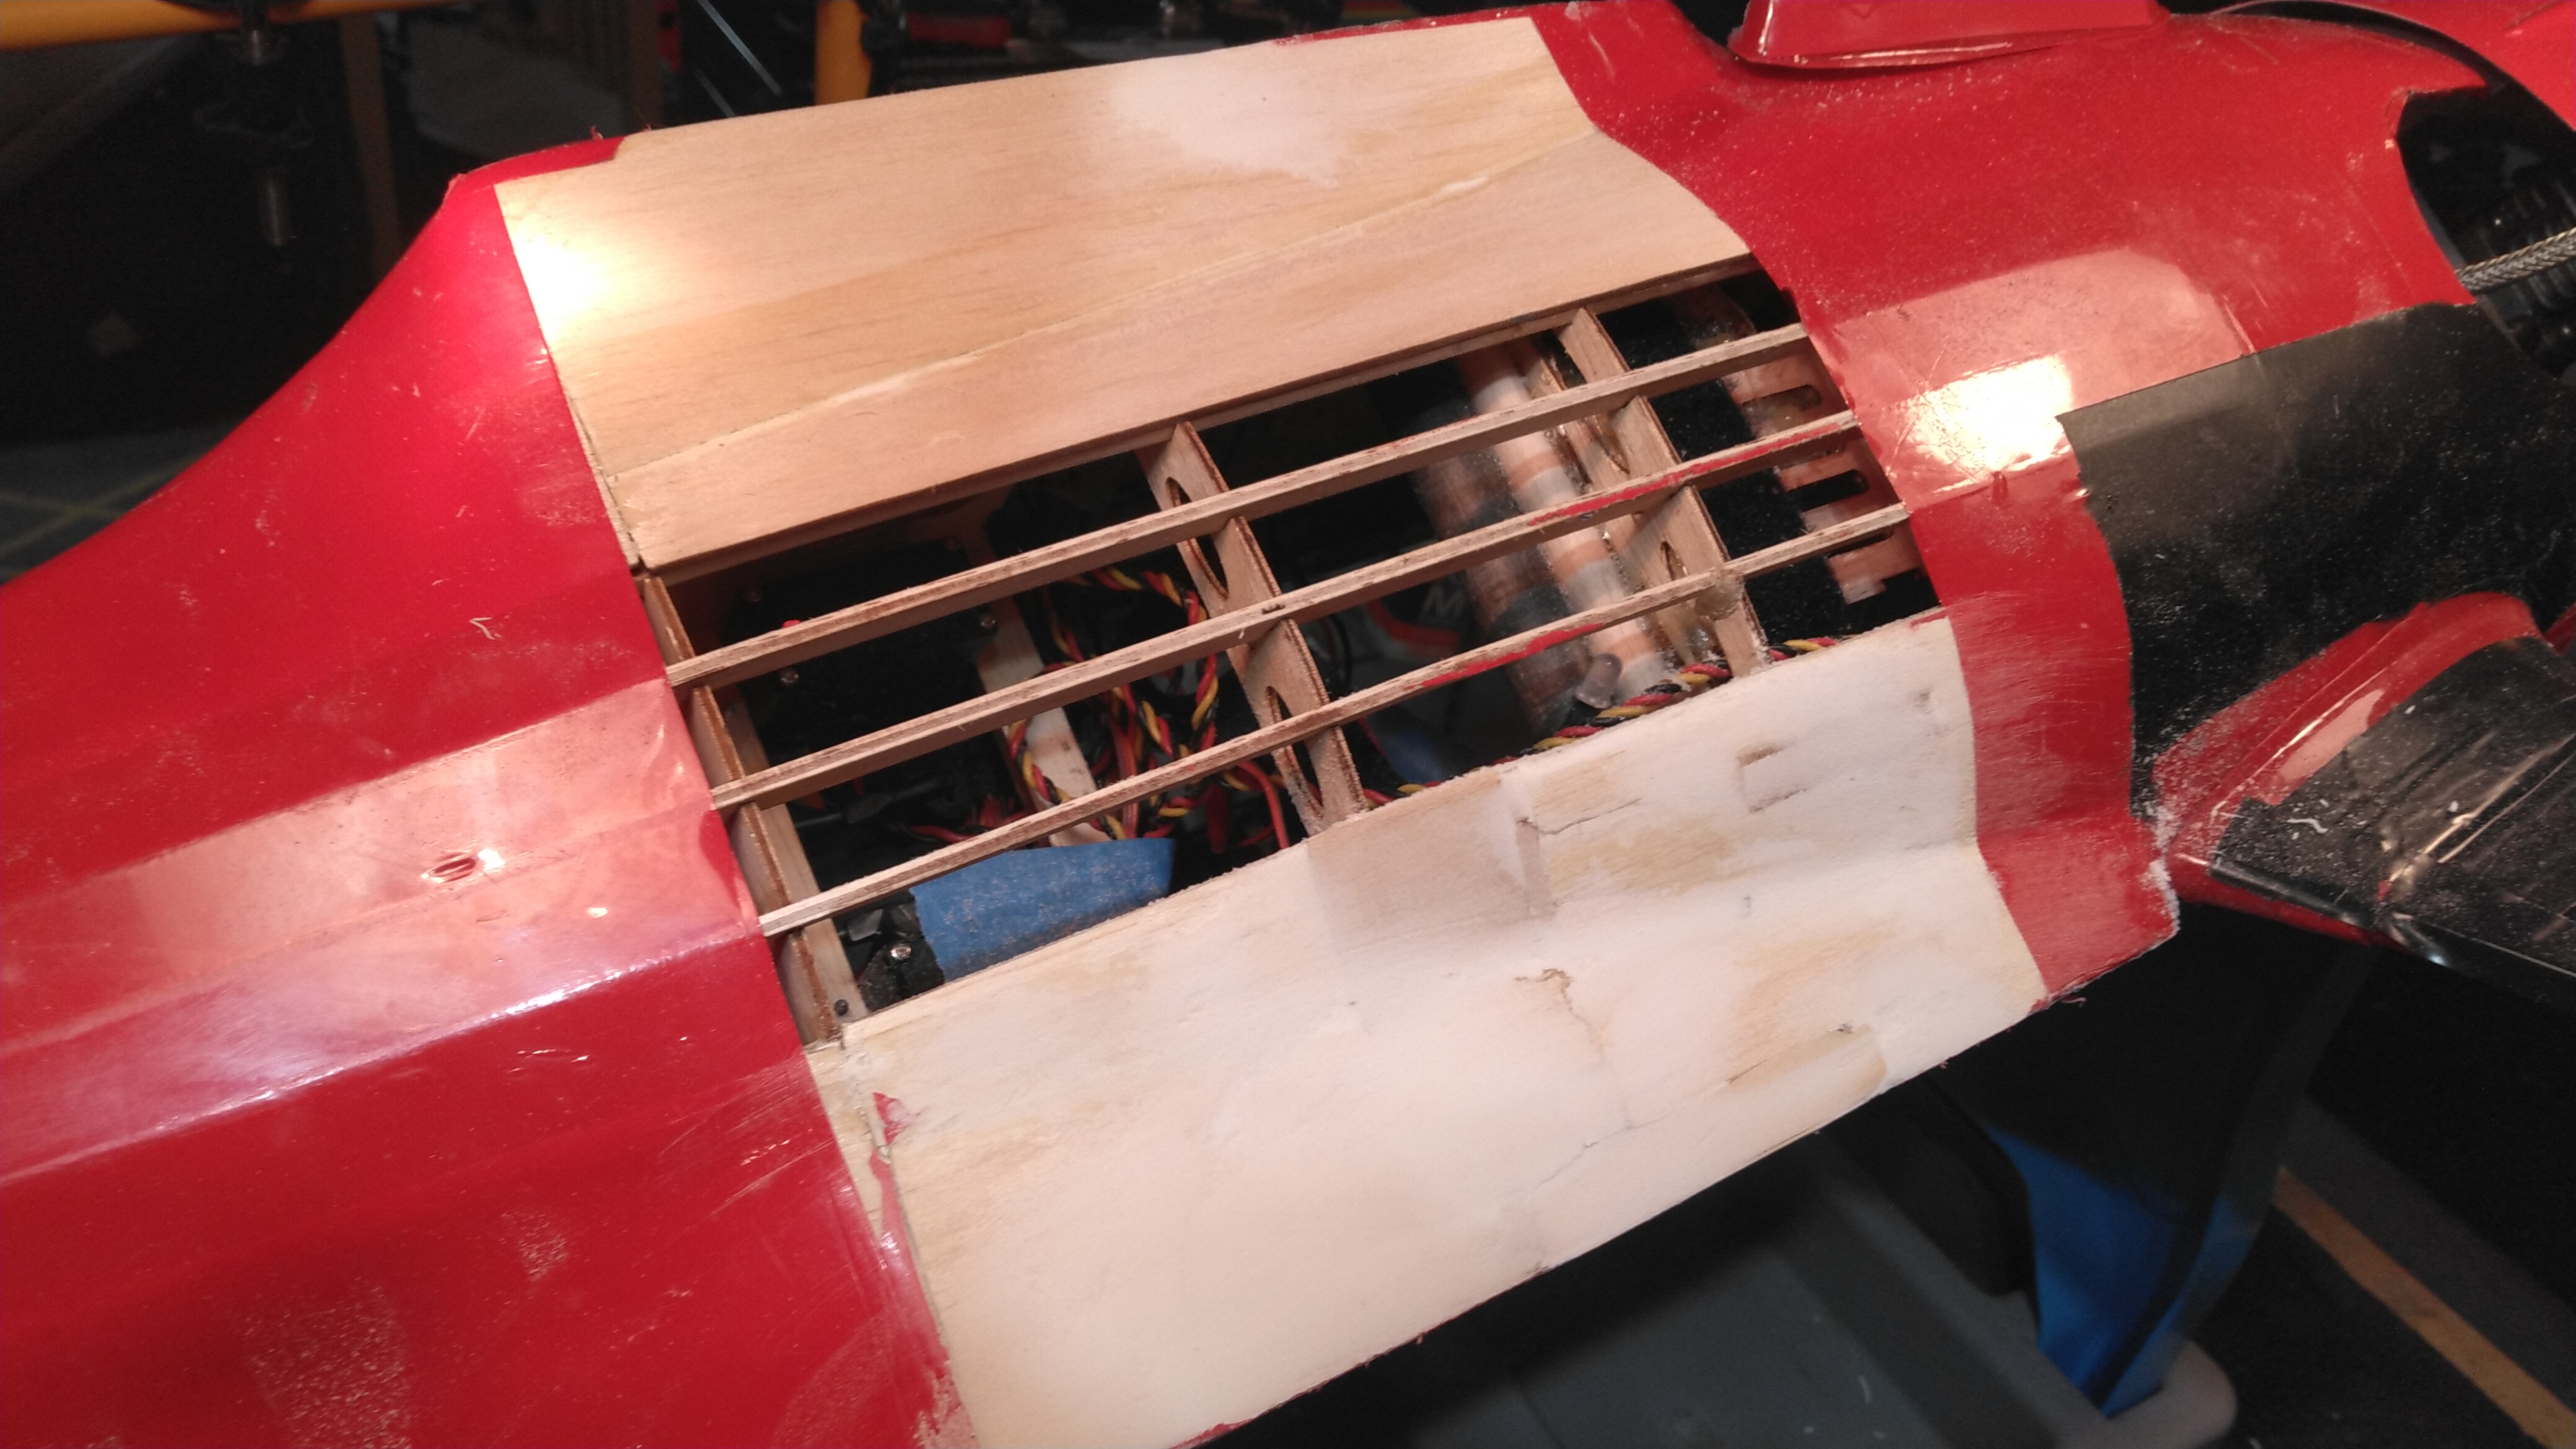
As I feared, I didn't manage to align the port wing root hardpoint and its wing tab. This happened because of a curious "oversight". See that piece of vertical wood with the hold in it on the left of the hardpoint and screw? So that fit perfectly, both on the tab side, and almost on the bulkhead (you can see it duplicates part of the wood its attached to). That hole in the wood also clearly has red on it from the cardboard wing tube guide; that indicates it should be in FRONT of the tab, not behind. This assembly of the hardpoint and this piece of wood fit so nearly perfectly in the spot I decided to go with it hoping the alignment would be spot on as a result. Later I would realize that this piece of wood was certainly on the WRONG SIDE OF THE AIRCRAFT. Nothing survived of the starboard side internal attachment of the hardpoint so I couldn't match fit it, but the clues were obvious I had repaired this wrong. So, no surprise the hardpoint and the wing root tab did not align. I popped out that piece of wood with the hole in it and discarded it, and with less difficulty than I expected, extricated the hardpoint, aligned it properly and reinstalled it.


Perfect. The port wing attachment hardpoint after realignment repair. Put a cross piece between the hardpoints spanning the fuse, will strengthen this with the goal of distributing any forces across both hardpoints. It does not touch the stringers underneath.


The underside, sanded and sealed with thinned epoxy (like fuel proofing). 
Wanted to seal the spackle from moisture. The lower (port) side is the side that externally took severe sheet damage that required extensive puzzle piece repair. It came out awesome. You can see the complex curves.


As admitted, my large complex curve cote skills are lacking, but this came out decent. I applied 3 layers of cote to strengthen the underside, having decided not to fiberglass it.


The underside is also done!!!

This whole repair project is going much better than I had ever imagined. Not wanting to deal with the complexity of the repair, and worried it was trashed inside, I had set it aside all fall, winter and spring. I am pleased this has gone so well, can't wait to finish up that starboard side, put the wings on, start her up and FLY!

Saturday, July 17, 2021

Waco Repairs Continue Day 2


The wing tube was really just a pair of cardboard guides. All of the wing lift forces were transferred to the fuse only at the two wing mounting lock tabs, secured with one screw on each side used to mount and dismount the wings. Any yaw torque on the wings was transfered to the thin balsa sheeting and stringers, not capable of withstanding that. So when the weeds yawed the wings they tore the sheeting and stringers and the serious damage resulted from a light force applied just wrong. I am replacing them with a carbon fiber tube that traverses the fuse and is firmly secured in all planes. Its not going anywhere.


Ugly patch work. Replanted the formed pieces that had been attached to the cote that laid over it when it was fractured. Lots of epoxy on curved surfaces will be very hard to sand.


As discussed above, the wing mount hardpoint was more firmly attached to the port side, ripping out the entire underside it was attached to. The Starboard side mount popped without taking the fuselage sheeting with it..


I am not entirely confident that the wing mount hardpoints are properly placed and aligned, but that sucker is firmly epoxied now. I would go on to strengthen the surrounding structures for more support. 


Here you can see the carbon fiber wing spar tube being measured in place. It was nicely perpendicular to the midline. I am sure its aligned properly.


Now installed. You can see the tube is perfectly aligned with the frame. Note that the port (lower) wing hardpoint is against the tube, but the starboard one (top) has a couple of mm of space. I am not confident these are aligned. They are placed where the nearby attached parts made them fit. They may not have been aligned before but worked.


To act as a hardpoint for the wing tube I installed a dowel in front of the wing tube, epoxied in full contact with the wing tube and a frame abutting the bottom tray. The wing tube is going to affect fuel tank fit, but we will deal with that later. This firmly transfers forces to the major fuselage structures rather than  just a few stringers and sheeting.


That heavily epoxied ares sanded as best as I could.


Spackled, done for the day to allow all the sparkling a good 24 hr dry before hand sanding smooth.


This repaired area underside was more patch worked than the side was. Thought I had a pic, but alas here it is spackled. After sanding I plan to apply a thinned coat of epoxy, and then will put a Sheet of cote across the stringers there. I am considering laying down a sheet or two of fine fiberglass onto provide a lot of structural strength. I think that may be needless, and add more weight than benefit.

So tomorrow will be telling. I will test fit the wings and see if I will need to come up with a new way to secure them to the fuse if the hard points don't allow an aligned fit. The space difference between the tube, which is true,and the mounting hardpoints suggests this isn't going to go well.


Friday, July 16, 2021

Waking up the Waco


I learned last year that the Phoenix Waco wing connection to the fuselage was poorly designed. I ran it into some weeds and it tore the wings off. Weeds. The damage was massive, so disheartening I let it just sit on the floor broken for the entire fall, winter and spring. Today I decided to take up the challenge. This plane is a sweet flier and one of my favorites. It deserves a rebirth.


She spent three seasons sitting here.


And so, the work begins. The following assess the damage.


Epoxy everywhere. The hard point (the bolt) was torn out on both sides. This was the only hard connection point, a screw pressing down on a flange from the wing.


The patient had to be secured to the table to allow access to the less damaged starboard side. I needed it fixed first to help align the cardboard tubes used to guide the aluminum wing spar. I think I want to replace the two small cardboard tubes with a full span carbon fiber tube. I think I have one that can act as a supporting guide for the aluminum tube.


I like to overbuild the repair. The hard point is now epoxied in much stronger than the original which was secured with hot glue. Runners are stinger and doubled (popsicle wood). Letting things dry.  More to follow!


Thursday, July 15, 2021

FINALLY! Awesome flying day!

Today was that perfect golf swing kinda day! That one where you getting kinda frustrated, depressed even, and then you hit that sweet spot with a graceful fluid swing and the ball sails. It was that kinda day!

Yesterday was disappointing. The PulseXTs RCGF-USA 26cc was still misbehaving, and the once perfectly fine RCGF-USA 35cc decided it wouldn't start. Today I decided to see if the M4F sparky was the same as a CM4, it fit in the 35cc, and it ran sweet right away, so yes! I couldn't find M4Fs anywhere, so this was great! Have 3 CM4s. Since this worked, I decided to replace the M4F in the 26cc as well, and damned if that wasn't the cure! I thought I had changed it last year, but it being the unfindable M4F that wasn't possible. That was easy. She too now runs pretty smooth!


Beautiful day to fly! Solid steady cross wind, but easily handled.


PulseXT 60 with its now sweet RCGF-USA 26cc!


Sweet once again!!


Straight out 90 degree wind! At least it was consistent


The innards of the MX-Bach. So glad she is running wonderfully, and flying well. She is super sensitive to control inputs. Dropped the DRs and found the expos a bit much making her a bit sluggish (55% on the ailerons, 80% on the elevator). I dropped the DRs, and next time will change the expos (forgot to give that a try today). I had to dial in a minuscule amount of up elevator on the flaperons. These humongus control surfaces have such profound effect. The full down flaperons need me to max the DR for any control authority, so I need to decrease the throw of the flaps to give it some more authority and less drag. The winds were getting gusty up high and she spooked me a couple of times, so I landed and called it a day. Every takeoff was smooth, every landing greased.  I love the way these heavy planes land. Awesome day.


New spark plug, all is well!


Next, I think I need to fix the Waco! Ground looped it into the weeds and that torqued the wing. I think it won't be as bad I as fear.

So great to have an awesome flying day, that perfect swing kinda day!

Wednesday, July 14, 2021

Welll, that's just annoying is what that is...


The RCGF-USA 35cc was running just fine. Got her to the field and she would not start... After a hundred flips and occassional sputters, I did get her running, but when I went to idle she quit suddenly, no wind down, just quit. Got her to do that twice in 90 mins before I gave up. I have no idea what its problem is, and really don't feel like taking the engine apart, but a boy gotta do what a boy gotta do I guess.  I am hoping she will just start tomorrow and we agree to forget these shenanigans.


I was soooo excited to fly her, but alas... unrequited.


I did fly the PulseXT 60 with the 26cc, but she started sputtering again, mostly at WOT. It is what it is, there is nothing more I can do for it now. I accept it. This plane is such an amazing flier.
 

Sunday, July 11, 2021

Pulse XT 26cc RCGF engine running better after cleaning

In hopes of solving the sputtering and 4 cycling that has plagued my RCGF-USA 26ccsince last year. Yesterday I pulled the engine, rebuilt it (left the cylinder on the crankcase, those bolts weren't going anywhere), and completely  dismantled and cleaned the carb. The parts and gaskets were all fine. On the diaphragm side there was a surprising amount of fine grit in the pump side. I wonder if thats what the main problem was? The enginenisnt running perfectly mbut its so much smoother. Right now the sputtering is softer and only at wide open throttle (WOT).


The engine before breakdown and cleaning.


After the breakdown dn cleaning. 

Saturday, July 10, 2021

RCGF-USA 35cc MX-Bach Ready for 2021

Today I took down the MX-Bach and fired her up. She started right up, of course! No setting changes required.


The fill-drain tube inside the tank broke off... pulled the tank, cleaned it, and replaced the short piece of tubing and reinstalled the tank. Will need to remember to out her nose down to get it all.

I also discharged the ignition-reciever pack and recharged it. She is all ready to fly!