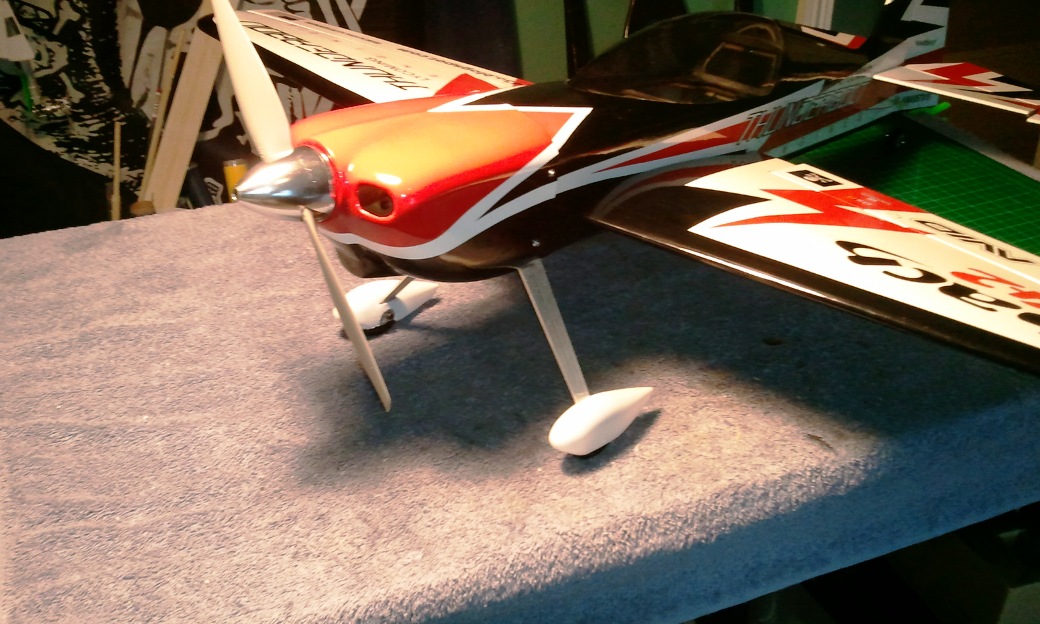
The flying monkeys got me...

Helis, Fixed Wing, RC Sailing

AMA 957918

Pirate Kid Skeleton by RadDezigns.

Sunday, April 1, 2012

Everybody came home!

It was a beautiful day to fly at Bob Miller Field in Gulfport, MS. Occasional winds were variable, but consistent, if that makes any sense. It was a fun day! Big crowd, wide range of planes. Took Antonio up on my PulseXT with the buddy box. He flew awesome and really enjoyed himself! Later he took his Cessna up in a very good wind. Well done!

Dick and Arnie worked on Dick's Decathalon, which eventually threw itself into the ground in an uncommanded left turn. They were getting pretty close to getting her sorted out, and she needed some sorting out. Sorry for your loss, Dick...

I flew the trio, all behaved nicely! I still have to work ar relaxing when flying the Cosmic Wind. Darn thing is fast, fast, fast, and agile as a cat. Constant attention is required. I realized I have a nitro prop on her, and have ordered some lighter APC eprops, which I suspect will give me a lot more rpm, and even more speed! The Ulitmate is just one fantastic plane. Fun to fly, stable, reactive, quick! And the PulseXT is easily my favorite plane. Need to figure out why one flaperon drops differently than the other; causes the right wing to dip when the flaps are deployed. She definitley is easier to land with 45 degrees. With full flaps, she wobbles a bit. I suspect I just need a little more power, but then, what's the point of the flaps? I usually land with 45.

Waiting for the props for the Sbach. Cannot wait!

Saturday, March 31, 2012

HDX 500se Gremlins

I have been chasing one gremlin after another on the HDX 500se heli. Grinding main gear teeth, unexplained brown outs, frying servos, a dead BEC, a failed gyro (the Algin GP750 gyro wires wore out... and I had to replace it with the Align GP790). Its original equipment is aging. Other than the gyro, Occam's razor has an answer.

The issue has been brown outs. In flight these were a nightmare as the heli would change to default pitch. I could not figure out what was wrong. I suspected the BEC... I think the BEC was actually fine, though I fried a bad replacement, and now have a new 5A BEC on it that works fine. Today, having installed the new BEC, the brown out issue continued. I decided the only thing I haven't looked at was the reciever and its satellite. I changed out the reciever and the problem resolved. I reinstalled the original reciever, without the satellite, and it was fine. I installed the satellite and it browned out. I installed another satellite and cable and it browned out. Ah, ha! The old AR6200 works fine, but its satellite port shorts out. I powered up with a fresh battery and she remained bound for 10 minutes. The brown outs were probably causing surges as this process burnt out two servos. It doesn't take much to fry these Hitec HS 81mg servos, which is probably why they were discontinued, so I am replacing them with the improved 82mgs.

This took longer than it should have and I went through more parts than I should have. Here's hoping I have killed all the gremlins.

Friday, March 30, 2012

Hobby King SBACH 342 1000mm v2: Take 2

I have detailed my experiences with the Hobby King Sbach 342 1000mm v2, which recently ended in the first ones demise from a dive it could not pull out from. I ordered a new one, and have completed its build, with a couple of modifications. It is powered by a HeadsUpRC PowerUp 15 1000kv 550 watt motor, turning a 11x5.5 APC eprop (to start), an Art Tech 40A ESC (salvaged from another plane), and will fly with 4S 3300 mAh 30C battery. She is only slightly nose heavy, her all up weight (AUW) is 2.75 lbs (1250 gms).


One of the problems I had with the original is I tossed my canopy in flight into deep woods, and Hobby King doesn't stock replacement parts. I added a magnet and washer to a set of opposing crossbars. Makes big difference!


I wanted to fortify the firewall since my first one caved in on a blade strike after going head over heels in bumpy grass on a landing. I placed two cross bars of popsicle stick wood behind the firewall where the screw holes would later go for the larger mount for the 15 size motor. One is on top behind the front lip of the firewall, and the other on the bottom. I like to coat the frame in what nitro guys use to fuel proof the wood: 30 min epoxy thinned with a splash of alcohol, painted on with a brush, after using CA on all the major joints. I paint anything I can see. Light and strong! I also put Gorilla polyurethane glue in the wheel box to strengthen it.


I have always thought the tabs for the cowl were very wimpy. I placed a piece of that ever useful popsicle stick wood cut to fit behind each tab and CA'd it not just to the existing tab, but also to the fuse itself. I used the method I describe in my build post to set the position for the screws.


I wanted to use mini servos instead of micros for the rudder and elevator, I think the 9g servos were overwhelmed by the aerodynamic forces in a high speed dive. I Dremel'd out more space in the existing servo tray, and placed on top of it popsicle stick wood cross bars to allow me to secure the JR MN-48 mini servos. This went perfectly! These are a little slow (I think 0.18 sec/60) but have great torque (3.5 kg), compared to the 9gm micro servos (about 1.5 kg torque). I prefer the faster Hitec HSG 225mg servo, same torque, faster, around 0.12 sec/60 I think, but I have these MN-48s because I replaced them on my Eflite PulseXT 25e with the Hitecs.


The packers cut the tip off the sticker for the canopy... I used a piece of white sticker I have laying around, you can only tell up close.


As seen here. Can't tell!


To accommodate the 4S battery, which fits inside the cowl and ends at the carbon fiber wing tube. I added a couple of pieces of light balsa to make a bed, over which I put a piece of Dual-Lock Velcro. It sits at a slight slant, and is secured further by two pieces of standard Velcro wire ties.


All done!


I really don't like the look without the wheel pants... The number 2 a tribute to its being my second one!


One of the build issues was this gap under the wing (smaller on top). It clearly was a wing tube that was cut too long. I sanded off about 0.5 cm and everything went back flush. I saw some of you had this gap problem; check your wing tube!


I really wanted the wing pants to work out. I am using a bigger tire, I think 1.5 inch. I could not figure out how to get these pants to work with the first plane. I tried a couple of different approaches, and came up with a way I think pretty ingenious and stable!


I cut a small slit in the plastic pant with a Dremel cutter, and slipped it over the strut. I then installed the wheel and pulled the pant down into place. I had previously Dremel sanded out a notch, and enlarged the wheel opening to accommodate my larger wheel. I set it where everything cleared well, and CA'd the pant into place. Between the hold from the slot and the CA its very stable! There is a wheel collar between the strut and the wheel.


View of the electronics bay with a 4S 3300 mAh battery in place. You can see the battery is partly tucked up under the motor cowl forward, and stops just short of the wing tube aft. This puts the CG just a smidge in front of the wing spar which runs about where the light glare is (the tube is just aft of CG). I am using a Spektrum AR600X receiver this time (had a HK Orange and satellite in the original). You can also see the MN0-48 mini servos in place. Plenty of room. In maiden flights I prefer a bit nose heavy plane.


I thought I had a pic of the 15 size motor in place, but I don't. I wanted to show the smaller standoff in place, so I took this pick through the right air hole in the cowl. The 15 is 10mm longer than the Turnigy 480 850kv I originally used, and pretty much the same diameter, maybe a couple mm more. Fits fine!

I am really excited about being able to maiden her tomorrow! As always, nervous about how she will handle. As I noted I propped up to an 11x5.5 (up in length, down a bit in pitch). I may try a 12x8... Exciting stuff! She has a whole lotta power! Maybe I can get a watt meter on her later. More to follow!

UPDATE: I wanted a little more freedom with moving the battery to adjust CG, so I made a couple changes:


I removed the long additional balsa to allow clearance in inserting the battery from behind the first spar (the cross wood over the wing tube) and put Dual Lock Velcro in the tray in its place. Before I passed the battery into the cowl then slid it aft under this spar. Now I bring it in aft of that spar. I had to remove the top of the second spar (over the receiver) to make it easier to clear. This allows the battery to move aft towards the receiver. More flexibility! I also cut a vent opening on the underside just forward of the tail wheel. Theres's a small framed area there that I cut an X in then ironed down the sides of. This allows air to flow, and pressure to be drawn out, increasing cooling, and reducing pressure trying to pop off the canopy.

Tuesday, March 27, 2012

Take 3: Eflite PulseXT 25e

I have long written about my love affair with this plane. I also had the sad duty of reporting the loss of the first two... The first was due to a radio problem (I suspect a bad NiMH transmitter battery), and the second due to pilot error (fying with my head up my ass... pulled out of a dive too late). I completed the third one day before yesterday, the build a couple of days ago, and finally when Horizon Hobby sent me a replacment canopy (the one in the box was cracked, HH sent me a new one shortly after I called asking for one). Yesterday I maindened her at BMF, and as expected she flew wonderfully!


One thing I changed was the aileron servos, and I may change the rudder and aileron servos as well. I had JR MN-48 mini servos in all four places. I changed the ailerons to Hitec HSG-225mg. These are much faster than the JRs, which I have always felt were slow.

So, back in my hangar, always a joy to fly!

Friday, March 23, 2012

Lucky me...

Well... I think I am done with the CopterX 450 4-blade head. I was never thrilled with the screw as a feathering shaft into a hollow aluminum head. I suppose some variation of this is used on all multi heads, but if I try it again it will be with a higher quality head. While hovering it today trying to figure out why my BeastX is misbehaving the head threw an intact blade with its grip across my lawn, 90 degrees from where I was standing, some 30 feet. It would have hurt if it hit me, but not too bad I think. The force of the imbalance bent the mainshaft and loosened all the remaining grips, bending their screws. The grip that came off can't be secured snug as the hole in the rotor head is stripped...
I have that bargain head coming, but I plan on replacing it with another Tarot 450 FBL head. I'm thinking of moving the BeastX to the Frankenheli with the good Tarot head on it. Maybe tomorrow.

Or... maybe I'll get one of these?


Thursday, March 22, 2012

Tarot 450 Flybarless Rotor Head

I purchased a Tarot 450 Flybarless Rotor Head from CNC Helicopter, along with a Tarot ZYX 3-Axis Flybarless gyro, with which I am having a few issues. This rotor head is the best I have found at one helluva great price. I will buy this one exclusively from this point forward! In this blog post I take it apart, inspect, grease and Locktite it, then install it on my Frankenheli 450.


The head comes as seen here, without the control rods.


I took it apart. It uses the standard Align feather shaft arrangement on a 4mm shaft. I realize now that I failed to measure the length, so I can't say its a standard length, but given the design is otherwise that of an Align head, I don't think its anything but standard. I am soaking the closed ball bearings in silicone oil.


I love it when designers keep things simple. Here are the four closed ball bearing, all the same size!


Here in profile.


ip

One inside the grip.


One bearing on the head side. You can see the grip control horn here.


 I removed it and Locktited it; it has a short segment that is threaded, that inserts into the control horn, and it all screws into the grip. I Locktited both ends. Screw everything snug, but not gorilla tight. 


I used to use white lithium grease, but it dries and cakes up. I like TriFlow red grease on the thrust bearings and a little on the feathering shaft. I use silicone oil on all bearings and moving surfaces.


The thrust bearings have two sides, one side with a flat surface, the other concave to hold the grease. Grease the whole thing, but when you reinstall it make sure that the concave side faces the main shaft so that the centripetal force will not pull the grease from the bearing. Remember that there are tremendous loads on the thrust bearings in flight.


Make sure you get the order of the parts correct: screw (a little Locktite, remember just a whiff and keep it out of the bearing. Grease inactivates Locktite, so don't mix them), small washer, back thrust bearing plate (remember that with both sides of the thrust bearing keep the raceway, the bearing groove, against the bearings), bearing ring (concave side to the shaft), inner thrust bearing plate, thin larger washer.


The dampers are quite hard. A little grease.


A thrust bearing set about to be installed onto the feathering shaft.


The head is well constructed. In addition to the Jesus bolt (just across from my thumb), it has two screws, one on each side, just across from and under the swash stabilizer arm. The bottom hole of the rotor head is split allowing these screws to bring the sides tightly together on the shaft. The cheap ones often need to be stabilized as the Jesus bolt can't keep the head from teetering on the top of the main shaft. I like the long body and these tightening screws, great design.


The head all put back together. I always hold my breath when I tighten things up expecting things to bind, but everything remained smooth and snug!


One of the shaft tightening screws. I removed these and the Jesus bolt to install the head on the main shaft.


Removing the Jesus bolt.


Installing the rotor head onto the main shaft. In a moment I will realize I have the swash stabilizer arms going the wrong way and will remove them, spin them around, and re-Locktite them in place...


All installed with control rods in place. The gyro stand is empty awaiting the replacement Tarot ZYX 3-axis system to be installed.

This Tarot 450 FBL Rotor head is well constructed, well designed, tight and easly installed! Can't wait to put the FBL computer on and wind this thing up!