The flying monkeys got me...

Helis, Fixed Wing, RC Sailing

AMA 957918

Pirate Kid Skeleton by RadDezigns.
Showing posts sorted by date for query copterx 250. Sort by relevance Show all posts

Wednesday, July 25, 2012

CopterX 250 Tarot ZYX Redux

This evening I completed the build, and the programming of the Tarot ZYX stabilization system on my CopterX 250. She is tiny, and she is now flybarless... She was a lot to handle before, as I was just learning. I am hoping that with my developing flight skills and the stabilization system she will be much more settled down. Tomorrow I shall find out!
 
She seems heavy. Her CG is good, but I did have to move the ESC to the side, out from under the battery tray. The canopy doesn't come all the way back, so I used rubber bands to secure it. I chose to use a voltage regulator instead of the installed BEC on the RSC as I am driving digital servos and the Tarot ZYX, so I wanted more than 2 amps. I don't know if it is necessary, but it works for me.
 
Did I mention I hate Torx screws?
 
There were just so damn many wires...


Friday, July 13, 2012

Baby gets a new pair of shoes

I have decided that now that I can actually fly my helis, and they are all up, I would revisit my CopterX 250Se. She was one of my first helis, back before I understood how challenging helis are to fly and that the smaller they are the harder they are to handle. Some of my first heli blog posts were about the CopterX 250. I remember somewhat her last flight, but a search of my blog reveals I may not have written about it. I don't think it was that crash on May 6, 2011, but it may well have been. It would be odd, because she has a new Align tail boom on her, and I wouldn't have stopped there; I would have finished her. At any rate, it has been scaveneged for its servos, including its tail gyro, its reciever, and its ESC, and the blade grips are missing.
 
So today I inspected her and have been ordering parts. I have Solar 11g digital metal gear servos for the swash, and ordered an Align DS420 for the tail. Found a good price, around $25, and it weighs less than the Hitec HS-5084 I used to have on it by half, at around 12g. Its good to save weight aft since the Tarot ZYX weighs a bit more than a standard gyro. I ordered a HURC 22a ESC. Since I will be flying all digital servos and installing a Tarot ZYX FBL system, I opted to cut out the 2A linear BEC, and purchased a 3A SBEC to replace it. And as I mentioned, I purchased a Tarot ZYX 3-axis stablization system with a Tarot 250 FBL rotor head, from cnchelicopter.com. In working on her I found that the tail servo mounts were missing (the blade grips are missing too, not sure what happened there. Its one of the reasons I decided to go FBL since I needed to buy head parts anyway), and that the tail boom support bracket doesn't fit well. This heli uses Torx screws, those star shaped ones everyone hates because they are guaranteed to strip. One did on the boom bracket, and then it snapped off when I had to use Vice Grips to remove it... so I had to order another boom bracket. I also ordered a couple of feathering shafts. I have the intact original CopterX fiberglass canopy, but I have a nice Tacon 250 canopy I will use. All of these parts have cost me about 4x the original cost of the flybarred heli!
 
These parts, other than some blades I ordered from China, should all be here when I get back from my trip next week to Meridian. I will have a couple of days before I leave for Dayton to finish her up and flight test her. I will have the swash servos in tomorrow so that will save some time. Hopefully I won't crash the helis I take to Meridian and won't have to spend time repairing them... Maybe I will just take two?
 
So in addition to my two 450 FBL helis, and one 450 FB heli, and my two 500's, on FB, one FBL, I will have this baby heli, the most challenging to fly in my fleet. I think she is a prime candidate for the FBL system which should make her much easier to fly as it will tame down the impressive twitchiness 250s a known for. I wanted something small to fly in the parking lot of my apartment in Dayton, and I just can't have a complete heli frame in my lab that I haven't built to flight readiness (that's how I ended up with Frankeheli. I had a complete 450 heli, just in various parts, so lf course I had to put one together)! Besides, the 250 nicely rounds out my heli hangar, and when I get the 600 blt, and step up to a 700 in a year or two, why then I will have a complete set!
 

Tuesday, August 2, 2011

The Last of the Eflite Cornell's

Eflite has discontinued their PT-19 Cornell, so when I crashed mine hard back in June, I was distraught... I have spent the last week putting it back together, and as soon as I can fine some HANU885 Midnight Blue Ultracote I can finish the repairs to the fuse and get her flight qual'ed! I had to engineer some fixes for which I may still pay a price (more forward weight), but we'll see. I had been flying her with a 10x6 prop, but may be stepping up to a 12x6 if there is adequate ground clearance. So, here's the pics so far. Once I finish everything I will post some final pics.


The Cornell in pieces...


The wing refabricated.


Close up of the ugly but functional repair.


Not unexpectedly the right wing was heavier than the left, so I ended up having to put a counter wieght in the other wing. I slid the washer along the wing until it balanced, cut a slit in the underside of the wing, put some cement on a washer in the location it balanced, and slipped it in.


A strip of cote over the slit, and voila,


balanced wing!


The cote job isn't perfect... but it came out pretty darn good. Right top. The red tape covers a bit of an imperfection in the rib structure.


Left wing. Replaced some panels...


Overall, not too shabby.


The forward part of the hatch took a bad hit. I placed a piece of styrofoam underneath it shaped to fit to provide some structure.


The styrofoam as seen underneath the hatch.


Used spackle to fill in the broken areas.


Sanded it smooth, sprayed it with some clear acrylic.


Masked out a template for the black Econocote to fit.


Installed the cote, and added a pilot! He's twin brother to the pilot of the Stearman.


So this is what the stock 3" x 2" x2" motor mount and battery box look like, that nose box sticking out in the front. Part of the battery fits in there, the motor on the front. Mine was toothpicks... So I made one.


Was able to replace the bottom shelf.


Using 4 - 3/8" square dowel perfectly matched, I CA'd and screwed them to a piece of 3x2 3/32 ply aft and the motor mount forward. The ply firewall is CA'd in place and I drilled airflow holes in it. Here it is being dry fit before I drilled the vent holes.


Side view.


Vent holes drilled, motor installed, CA'ing the mount in place. Later I dry fit the cowl, perfect alignment!


Now that the box is gone the firewall blocks the battery from entering behind the motor. So I had to remove part of the floor of the battery box, strengthen the lower part of the firewall and the floor, and pad the frames with fuel tubing...


Added an inclined piece of styrofoam protected with a piece of Dual Lock Velcro, glued to the floor...


So that the battery can incline in, saving some of the forward CG weight, and allowing the battery to fit in the fuse. Its a 3S 3000 mAh battery.


The incline pushes some of the weight forward to preserve some nose weight, and allows the battery to fit below the hatch.


Replaced the aft most servo, which is the rudder servo with an EXI d213f metal gear digital servo cannabilized from my CopterX 250. I had found the original SG90 rudder servo stipped.


The underside of the fuse below the cowl was crushed in, so I lifted it as much as I could then CA'd some salvage sheet balsa, and sanded it down to level.


\

The cowl screws were forced back along the fuse diggin 4 nice trenches. I filled them with scrap balsa and CA, and sanded it smooth. Those are the bald rectangles just aft of the firewall.


Some internal repairs required removing cote. I also replaced the black angled pieces on the top of the fuse aft of the firewall. As soon as I get some Midnight Blue cote, I will finish up the repairs, install the wings, check all the electronics and the motor, and then take her up for flight certification!

Tuesday, May 31, 2011

ERazor Excorcism Begins


I started the process of excorcising whatever demons possessed the ERazor 450 by stripping out the servos, removing the tail boom support struts, replacing the horizontal fin and the vertical fin, restabilizing the tail boom, and taking apart the rotor head and removing the broken main shaft halves. I found one set of one of the main blade grip bearings to be damaged, and replaced those. I am replacing the stock swash servos (which seem to be a variant of the Tower Pro SG90). I will also be taking the Hitec HSG 5084MG tail servo off the CopterX 250 and using it instead of the stock tail servo, which I suspect is the same as the stock swash servos. I have a replacement rotor head block coming since I think the washout guide pins are bent and may have contributed to the last crash. Some of the ball links are a bit stiff, and I will be addressing that as well. The swash assembly doesn't move as smooth as it should. I am confident they will move smoothly after this work is completed.

I am pretty sure that she is going to come out of this refit a very fine 450!

Friday, May 6, 2011

Flew My First Full Pack, then...well, you know...

Yeah! I hovered a full pack without corkscrewing the heli at Bob Miller field today! I went on to hover a couple more packs. I never could really relax though, as I tend to over control and plant them, but it was going too well. I did have a problem with a low voltage brown out. It happened first on the ground after a couple of long hovers, when I heard the motor pitch of the sound change, and did not take off. I noticed the controls were no longer responding, hit throttle hold, and nothing happened. The blades kept going for another few seconds, then spun down. I checked the receiver and sure enough, one blink. I changed out the battery, hovered again, and after about 6 minutes I noticed the heli starting to act odd, not responding well, so I landed her just as she browned out again...

I decided to take a break from the ERazor 450 and wanted to take my CopterX 250 for a spin. I hovered a couple packs, and on the third one I put her down a little hard during a practice landing, and suffered a blade strike... Since she is sooo small and light, it tore her up pretty good.


Bummer, as I was doing a fair job of hovering her twitchy little self. This is going to take a lot of work... What happens in a blade strike in this situation is when I landed her hard, the blades momentum and pitch angle kept them moving down and they dipped, snapping the feathering shaft that secures them to the main rotor head while striking the tail boom (that's why the tail boom is so mangled). Looks like the main shaft is also bent. Will know more when I work on her in a week or so... gonna let her sit for nowas I am going to have to take her completely apart, inventory and order parts.

I wanted to fly my airplanes, having brought the MX2 and the PT-19 Cornell, but there were no Instructor Pilots to box with and I don't feel ready to fly them without an IP. My Cubby's are in the hurt locker. So... I took the ERazor for another spin. Flew wonderfully, but started to get away from me too far. I tried to bring her back but couldn't, and started to lose her orientation. I turned her a little, to the right (she had been tail in to me), and I think she was starting to return to me when I felt I was not in control; I felt she was starting to roll hard. I hit throttle hold and she dropped. I think if I had not lost my nerve and waited, I could have hovered her down or even brought her back, but I freaked out when she rolled. She smacked into the berry's on the far side of the field, and the walk of shame was made worse by my having to walk around in circles until I could find her. She wasn't in too bad of shape. The elevator servo, one that always goes, was stripped, the blades were toast (nice CF ones), the requisite feathering and main shaft bends are there and a few teeth are missing from one spot on the main gear. The landing gear are broken (one is missing). Not too bad, all in all. I am waiting on a bunch of 450 blades, and I don't have the landing gear (Xheli has been out of stock for a while on those, which could be a problem. When I bought her I wasn't aware she was not an Align clone, so I am dependent on Dynam ERazor parts).


Looks worse than it really is.  Good thing I had the animal crackers to make the owie go away...

After a couple of days of this, despite the good company, I was done and decided to pack up and head home. I didn't fly my airplanes, though I did run the MX2 motor (only got about 6 minutes at 3/4 to full throttle). I had let it sit in the sun for about 20 minutes, and when I went to pick her up to pack her, I noticed this:


You can see that the cockpit EPO got all cobblestony in the sun... Hmm....
UPDATE (5/7/11): Turns out it also melted the paint behind the canopy gluing the canopy magnets together... Also caused the elevator corners to droop.

Well, tomorrow is the KOAST Fly-In over in Ocean Springs at their field (their website is wrong, it IS on Saturday, May 7, starting at 8 am). Fly fee $5, Lunch of fried chicken and fixin's $5. I won't likely fly again for a week, unless I get lucky and some parts come before I leave for Meridian for a week, so I may not have much to post.

All in all, while I feel a bit bummed (just tired I think), it was a really good day!

Tuesday, May 3, 2011

Scare me...

A few years ago we were having dinner at one of those Hibachi places were the pseudo-Japanese cook (in this case he was really Japanese) tosses his knives around entertaining you with faux-danger. Except this guy's knife went flying, but he caught it, and demurely stated, "Scare me..."

I had been setting up Frankenheli's gyro when it became evident that the receiver was browning out and the servos were going nuts as a result*. I pulled the receiver from the CopterX 250 and bound her to Franky to see if that was the problem, and its not (I suspect the new ESC; of course I have no idea where I bought it from...). Anywho, I had to rebind the 250, and since I wasn't going to get to garage hover Franky, I thought I would tune up the 250 and give her a shot, now that I am using dual rates and understand expo better. (The last time I flew her did not go so well...). I also had put one of those Hobby King/Assan mini-MEMS 250 gyros on her and wanted to set that up and flight test her. So I rebound her, and set up her CCPM. I took her out to the garage, where I had to have the door closed due to the high winds outside. This gives me the heebie-jeebies 'cause there is no where to run if things get jiggy. I let her spin up on the ground, checked her tracking (sweetly tight) and then brought her up to a hover. She is a 250, which for heli people means she is exaggeratedly agile and quick in response to control inputs, whether the pilot is or not, and I am not, so that added to the tension. I had her in the center of the garage  in a low hover when I heard a loud POP! and immediately hit Throttle Hold as I saw the blades bouncing off the walls and heli going straight down (suggesting they went at the exact same time). These were brand new never flown fiberglass blades! SCARE ME!


She is undamaged. You can see the blades only damage came from striking the walls and stuff in the garage, and that the roots are cleanly snapped off. The fly-bar is slightly bent as the heli tipped a little when it hit the ground with the rotor momentum still spinning the rotor head.


A close up of the blade roots. I wonder what made them fail the same way at the same time... I was only hovering a little skittishly, though it did required a lot of positive pitch to do so.

Well, after I changed my shorts, I put new CF blades on her and reset up the CCPM, then took her back to the garage for an uneventful though brief proof-of-flight-ready hover. The battery was pretty wiped and I had no charged ones, so I called it a day for the 250. I am glad that once again the mini-MEMS seemed quite stable in controlling the tail (amazing how things work out after I read the manual). 

Man, that truly wigged me out, and my heart is still racing...

* UPDATE (5/3/11, 1545 CST): Turns out it was the tail servo. I bought a knock-off one, a DYS S9065 (a clone of the Futaba S9065). This was the first time it has had power, and I think it was shorted. It got hot and smelled, and responded to inputs variably. When I took it out of the circuit the ESC, receiver and servos work fine. When I put only it in the receiver, everything gets wacky. Bought it on eBay, so its a loss. Ordered a Hitec HSG-5084MG, my favorite tail servo, from Helidirect.

Monday, March 28, 2011

Gyros

GilliganSC on Helifreak sent me an old school mechanical gyro. An interesting contrast to the new Assan Hobby King miniMEMS 250 gyro. The miniMEMS $10 gyro purports to contain $150 MEMS micro electronic gyro technology. I bought a couple and hope they work as well as users are saying they are. Hobby King cannot keep them in stock they are so popular.


The case says its a Quest Gyro Systems gyro.


Inside I found a solid brass wheel on one side, and what looks like a wheel on the other covered in metal. Other mechanical stabilization gyros I have seen have a pair of brass wheels, so I wonder if there is a wheel under the cover. The wheel and covered-wheel are on a pivot that can turn only a few degrees each way.


Assan Hobby King miniMEMS 250 gyro kit.


The miniMEMS on my CopterX 250. Foam tape, steel plate, foam tape, Zeal gel tape. This should solve my tail wag! It looks better than it, well, looks....

I will let you know how theses things work out. I have two, another on the way. One on my 250, another  is going on my EXI 450, and another on my Frankenheli 450.

Sunday, March 13, 2011

MCRCC My First Day Gettin' Skooled!

Today was my first day flying with other people and at a club field...

IT WAS A BLAST!!!! This was THE best day in my RC history. I knew it was something I needed to do, but now I really understand the importance of belonging to a good club. I am very glad I joined and cannot more highly recommend it! I happened to come on a day with a wonderful group of people to start with.

MCRCC has this incredible field, supported by Harrison County. We have a nice clubhouse, with a bathroom, and covered benches with AC power. The grounds are immaculate, well groomed and clean. The field looks great, but apparently Harrison County is coming out to level it and help improve the runway!  This is a great, great club!

Special thanks to Jim, who spent hours with me getting my rotor head cleaned up and tuned. We got it sweet and snug, no tracking issues for the first time ever. But, the GY48V gyro is just not any good and I will need to replace it before I can fly it. Jim even tried and the tail kicked out in a simple turn. I will be replacing it, first with the 250 mini-MEMS, and if they aren't any good, a Spartan Quark.  Its amazing between the slop in the head, the fact I didn't know I needed to set the swash not just in pitch, but in aileron and elevator, that she flew controllably at all. We replaced the feathering shaft and that brought everything into final alignment. I always thought something was weird in that I set the blade pitch, but never the aileron and elevator; I just didn't know how. I never thought my rotor head would get so cleanly set up! Now she is setup sweet, and I know what I need to do to the ERazor and CopterX. No wonder I had problems with them. My EXI's CCPM is so tight, I never thought I would have such a balanced head with no tracking problems!

Dick and CJ (who drives over from Slidell) were also incredibly generous with their time! Thanks to CJ for the Align links that helped tighten up my EXI's CCPM, and the great pics, and Dick for letting me fly his 600!


Unpacking for the first day of school at MCRCC! I brought the EXI 450 helicopter, the Cubby (which stayed in the car), and the Alpha Sport 450.


Jim taking a look at my CCPM setup. Dick (left) and Dickie (right, President of MCRCC) in the background. The 600 is Dick's. He let me fly it with Jim on the trainer box. It was incredible flying a large stable heli. Jim was generous with his time and knowledge. A man with a lot of energy, he spent a lot of time with me between flying his own 450 (his 600 was in the hurt locker). What I learned from him in this one afternoon has put me leagues ahead of where I was when I walked in.  Jim will continue to be a great heli mentor.


Here is another MCRCC gem, Mr. Ron, a true Southern Gentleman. A seasoned pilot he is one of the three designated Instructor Pilots at MCRCC. I walked up, introduced myself to him, and asked him to help me. Without hesitating, he took me under his wing. We checked out my Alpha Sport 450, fixed a couple of things, and took her out to the flightline. He connected our transmitters with a Trainer cord, took off and handed her off to me.


We flew "3 mistakes high" for my first flight. The winds were brisk (I measured sustained winds at 7 mph, 12 mph gusts). The first flight I kept hearing the Trainer tone go off when I would lose control of the airplane and Ron would take control. Ron was cool and calm, straightened her out and hand her back to me. I was very nervous on the first flight, a bit less so on the second.  I flew the second with one or two hand-offs, and he let me get down to "1 mistake high"!

CJ Bordelon's Pics


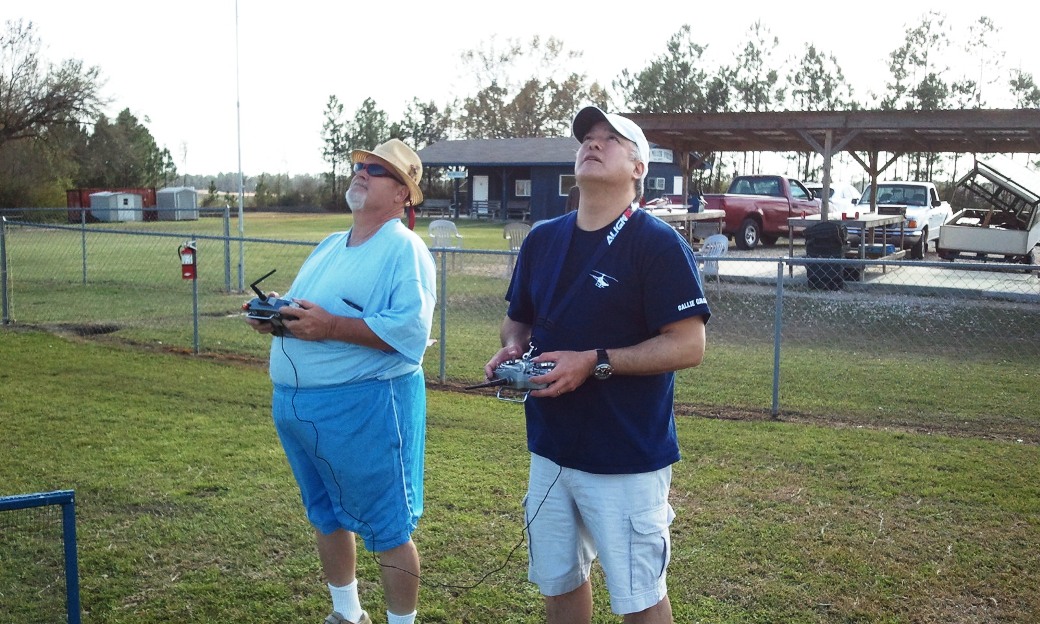
Me, Dick and Dickie, and the crowed Heli Bench. We all just sort of precipitated together. Dickie is the current club president, and is a heli driver.


Me flying Dicks Trex 600, Jim on my left  on the master box.


This amazing pic CJ took in panorama. Runway on the left (with me in a bit of leakover from another pic), the flightline and the work area. We do have a remarkable field!

I can't wait to get back there with my 500!