Thursday, October 27, 2016

Hobby King Sbach 3D EPP 1200mm

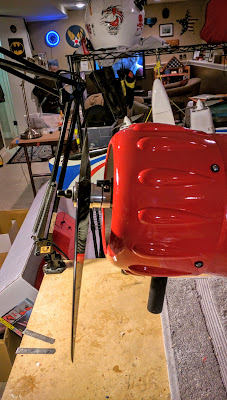
The HK Sbach 1200mm in EPP is Done! It took no time to build. I installed a Hobby King 3D Stabilization Orange Receiver, and a HeadsUpRC PowerUp 25 Speed motor. She'll be flying a 3S 2200 mAh. This model addresses the flaws in the design of the other smaller Hobby King EPP model I had, the Extra. It has a complete wood frame fore to aft. The wing has a carbon fiber spar. I think she is going to fly just fine!

I had set up the HK Stabilizer Gyro using dual ailerons, and it burned out two right aileron servos before I decided to Y harness them into one channel. I have a Solar D654 on that side now, and EXI 9 gm servos everywhere else. I also had to swap out the rudder servo as it chattered like a gossip.


I am interested to see how she flies. 


IT WORKS! IT WORKS!

I FINALLY GOT THE ALPHA6 WORKING!

Cody at Spektrum/Horizon sent me a new unit and I installed it today. At first it had all the same problems. I could not get through the Gain range of motion stage. Nothing I tried again, worked. I called tech support, and a new guy tried, but quickly set me up to talk to Cody, who was out for the day.

I was annoyed...  why is this so hard?

For some reason I thought, what if the MODEL in the DX8 was somehow corrupted? I decided on this whim to set up a whole new MODEL in another slot. I went thought the program steps and was stunned when I flicked the FMODE switch, and got a SOLID BLUE LIGHT! It had accepted the switch!

It looks like the surfaces are all moving in the right directions as I programmed in. I am tired, so will recheck them again later.

I sent Cody an email about this success and asked what the GREEN-WHITE-PURPLE mean as I move the FMODE switch through 0-1-2. Are they RATE MODE-OFF-HOLD MODE? Or is it ON-OFF-PANIC RECOVERY? There is supposed to be a PANIC RECOVERY mode. If so, is that how the PANIC MODE accessed? What exactly does the PANIC MODE do?  You would think these sorts of things would be in the manual, but no....

I am pretty psyched. I will maiden her the first good weather I get!

Friday, October 21, 2016

We'll just swap that out then...

I wish they would have decided this a week ago. The cable for the Spektrum AS3X arrived last night. I updated the firmware in the Alpha6, but that didn't change thing. I tried reprogramming it through the software and got no where.

Today I contacted Spektrum support and before we even tried anything Cody had decided to just exchange the device. He is sending me a new one, along with, one hopes, postage paid to return the bad one.

I removed the unit and plan to maiden the Waco without stabilization. She looks amaze-balls!


She is big... 63" wingspan. I really don't want to take the wing off (I am damned if I am going to remove the right wing, with that switch obscuring the screw and all). I hope I can it it in my car or my wife's...

Thursday, October 20, 2016

Castle for the Win!

I blogged a couple of weeks back about a new in box Castle Phoenix Edge HV80 ESC that was DOA. I contacted Castle and they send to send it in, even though I had no recall of date of purchase or from whom, and it was a couple of years ago... So I sent it in, and it came back yesterday! I suspect that they sent a new one, but I can't tell for sure. My soldered leads were gone (they did send back the cut off EC5).

I set it up on the Trex 600FBL in place of the FunFLy 100A I had installed, and plugged it in to the Castle Link Programming card, powered it up, and nada. Hmmm....  I powered it down, brought out the computer and plugged in the Castle Link Connector, opened the Castle programming software, powered up and immediately there it was!  I updated the firmware, just in case, programmed it for helicopter, and updated the settings. Worked perfectly. Took the Trex 600FBL out to spin her up, and everything worked perfectly! She is ready to go.

Thanks, Castle!


All soldered up.


It doesn't work with the programming card.


But works perfectly with the computer software and connector.  I LOVE it when a software works like its supposed to.


Installed! Thanks, Castle Creations!


The only one not flight ready is the Frankenheli 450 (not pictured).


The connector for the Spektrum AS3X came in from Horizon Hobby/Spektrum today. I did update the firmware, but was unable to accomplish anything else. It still bothers me that there is NO manual for any of this. If this isn't fixed quickly tomorrow I want to return it... I have wasted enough time.  I want to fly the Waco, dammit.

Monday, October 17, 2016

The good news is...

...that un-commanded roll issue is gone on the Trex 500fbl (HK).

The bad news is I didn't fly it very well.

c


I think the gyro gain was a bit off... She's got the BeastX FBL system. She flew ok, but was a bit mushy holding her head, and I was so scared the whole time I was behind her the entire flight. I lost control and she grounded hard. But now that I've secured the gyro that funky death roll on reaching headspeed is gone,

I've already got her back together but for a control rod, on its way from AMainhobbies. And I'll try again with more than 35%.

Saturday, October 15, 2016

December Fly RC Mag Features Phoenix Waco F5C!


They guy who built the plane and wrote the article is a master builder. It shows. What a beautiful job he did with the custom graphics!

I don't know about this Onxy Charger...

A few months ago Hobbico took my bricked charger in and repaired the RIGHT display that had crapped out. Its been fine since. This morning I turned it on and plugged it in and got this from the LEFT display...


Still works, but come on...

Friday, October 14, 2016

Spektrum Alpha6 AS3X - Not Ready For Prime Time

I wanted to put 3 axis stabilization on the Waco, and was going for either the Futaba GYA-460, or the Spektrum Alpha 6 AS3X systems.  Being a Spektrum guy, I went Spektrum. Its advertised as ready out of the box, calibrate and voila!

Ok!


Very nice in the box, the Alpha6 AS3X from AMainhobbies.


Solid, high quality build I expect from Spektrum. Nice metal case. 


Put a nice pad of gyro gel underneath it. Being on a gasser I wanted to isolate it as much as possible.


The wires are a rat's nest under the foam cover.


Installed on the nice CG centered platform, got all the wires going from and to the correct places. A little confused about the rudder having two inputs, R5 and R6 are the channels. One is Rate Only, the other Rate or Heading Hold depending on the gain setting. Ok... I know what these are on my heli, but I don't know how to use this on my airplane.

Well, its not working so well. I have the receiver and Alpha6 setup stock. As you go through the calibration you have to "Cycle the gain inputs and return to center."

What gain inputs?

I finally called Horizon Hobby-Spektrum Tech Support and they have no idea. Well, after some thinking and calling around, they figured that I needed to free up the GEAR channel, and connect a lead from the receiver GEAR Channel to G6 on the Alpha6. Then in the DX8 set the receiver  gear channel to the F Mode switch. Done. This "cycling" would be the F Mode from 1 to 0 to 2 and back to 1.  This would give me three settings, which from the RC Groups forum I figured out are "SAFE", ON and OFF (UPDATE: Thats wrong. Its RATE MODE-OFF-HEADING HOLD) .  NONE OF THIS IS IN THE MANUAL!  It also doesn't say what the default gain percentage is (is it even percentage?), nor how to adjust it. This basic gain setting should be programmable from the transmitter, or at least from the Alpha6, but it sounds like you have to link it to your computer with a cable you have to pay for and they don't say you need, and cannot change it in any other way.

So we did all that switching around, and still can't get past the blinking blue light of "not working". Can't get out of calibrate mode, so the unit is a $129 pass though device with a nice green light.

Now they are working on it. Really? This is THE MOST BASIC setup anyone will do, and it's not in the manual and it's not working. How did this leave the shelf without this basic setup functionality?

While they are bumping heads on this in Champaign, I had to free up the AUX1 channel to set the GEAR switch to AUX1 and use it as the remote ignition kill channel. Done. I had to Y-harness the ailerons, which is fine, I don't need duals, making them a one channel thing (though by doing so I lose the ability to set aileron differential), then plugged the ignition cut out into the AUX1. This changed the behavior and "0 centered"  of the left aileron for some reason, so I had to remove the servo tray for the left aileron, recenter the control arm, fine tune the control rod, and set the new zero, without subtrim. Now its all good. 

I did decide to stop at the "Gain Reverse Mode" for each control surface, and programmed the correct directions for un-commanded movement response, but you save them by... completing the calibration phase. So the surfaces don't move at all except in that Gain Reverse Mode". At least I know the MEMS is working.

As soon as the boys in Champaign figure out what's wrong with their setup they will call me, and we will see if this thing works.

Oh, and they are sending me a programming cable gratis.

With all of this I really want to be sure there is a switch to disable it in flight!

UPDATE  I spent a couple of hours on the phone with the Spektrum guys. They did a great job as we walked through various possibilities. We never repeated things, they were organized, and we remained baffled. I worked with Tyler who then kicked it up to Cody. Cody had me go through some interesting but logical tests that made it clear the Alpha6 isn't responding to signal in the G6 channel. Cody wonders if the channel was inhibited when set up at the factory, but we need the connection cable and the programming software to find out and if it is inhibited and reset it. He's shipping me a cable asap and will walk me through it,

Horizon Hobby Spektrum customer service rocks!


First Run RCGF 26cc in Phoenix Waco F5C

Wowser.  Joe Netter, from whom I purchase this engine used, had her perfectly tuned. Plug and play!

I ran her for the first time today.


I had a small problem with the AGM Hobby Switch I purchased on eBay, new. The Number II switch to the ignition would not reliably turn on, and when on and the vibration from the engine started, it flicked off. I had to remove it from the engine circuit to get the ignition to turn on and stay on. I used only the remote cut from the transmitter (the RCEXEL Opto Cut) to turn the ignition on and off. I realize I can just use this setup, but will see if I can get a replacement from the eBay seller, chinoeuk2010.  UPDATE: Seller offered to replace it, but I had already fixed it by replacing the bad switch with one from another single switch set that I didn't need. Fixed.


Nice run up. I did find that damn right wing bolt bouncing around inside, it having come right out. Now that the switch is out I can get that baby in proper.  

Expecting the Spektrum AS3X Stabilizing system to arrive today from AMainhobbies, and will install that, then the wing.

Tuesday, October 11, 2016

Phoenix Waco F5C Underside Contrasting


This afternoon I took to putting the darts on the bottom, and working up the contrast with the plain red on the topside to help with orientation. I like doing half side in darts because it kinda looks good, and because I don't want to spend a lot of time making the other side symmetric. I will probably add some more white. Still waiting for the RCEXL optic remote cut out.

Sweet.

A great Ugly day!


The Old Man and His Toy


Perfect day! Flew three full tanks before I had to go. The grass was too high, cut a lot, but she more or less she handled it. Ken Osborne was there and tried to fly a large foamie Mustang, but she kept tripping on the grass.

I mailed the Castle Phoenix Edge HV80 ESC this afternoon.  Castle gave me a reference number and I mailed it in. We'll see what they can do.


Thursday, October 6, 2016

Phoenix Waco F5C Mostly Done!

A third build day. The Turnigy NiMH Receiver and Ignition packs arrived, as did the fuel dot and vent, and the switches. Still waiting for the RCEXL remote engine cut. I installed them, and the manual choke, and made an access hole in the cowl to allow me to tune the engine needles without removing the cowl, and I completed the plumbing of the fuel system. Just because, I installed the lower wings. In the process I realized I didn't take the wing securing bolt into account when I installed the switches, which is exactly over it...  I was trying to keep the switch out from under the top wing. I got the right wing on after a lot of pissing, gnashing of teeth trying to access the bolt, but did not rise to cussing. I don't intend to remove the wings if I can avoid it. Having all the control electronics in I bound the receiver and programmed the servos and DR/Expo in the DX8. These surfaces have a whole lot of range of motion, so I toned the aileron limits down to 80%, and max rate is 80% of that. Still scary range of motion. With both upper and lower wing ailerons, this thing is going to have some roll authority.


Large bay, very filled. Stressing about CG as I don't want to add any weight with that big 26cc engine up front. Moved everything I can into the bay and out from the cowl.


LOVE that wide stable stance!


I like big butts and I cannot lie! Look at that tail!

The top wing sits quite forward. The cabanes insert at the very front of the bay, so the top wing will sit at least 1/3 to 1/2 a chord forward of the lower wing, and I think the top wing has a longer chord. I plan to wait until I get the remote cut installed and have full access to the bay. I am loving the beautiful, plain red. I am thinking of putting black darts on the underside of the wing, but the problem with red is it too turns black in low light, so not sure if it will improve orientation. Maybe white ones?  I could have started the motor, but I am in no rush.


Tuesday, October 4, 2016

Phoenix Waco F5C 26cc Build

I started the Phoenix Waco F5C build the other day. I purchased the ARF from Tower Hobbies. I had bought a used RCGF 26cc from a SNHFERCC member for a great price, which made this project possible. It came with the ignition, a carbon fiber 18x7 prop and some other extras. I hadn't planned on that big of an engine, was thinking 20cc, maybe, but what's a boy to do when a 26cc engine comes around for an impossibly awesome price? I took the Hitec HS-5645MG and HS-5485MG servos from the MX-Bach I don't fly, using the 45s for the ailerons and the 85s for rudder, elevator and throttle. I had a Sullivan gas tank stopper kit.  I have ordered Turinigy NiMh 6V 2200 mAh reciever and ignition packs, fuel dot and vent, and RCEXEL remote ignition cut out and QuikFire fuel filter.

I have had 2 full build days without interruption and made incredible progress. Only a couple of gripes about the kit. The parts were taped into the box, but they seemed randomly tossed in. Despite that they were all pristine. The parts are of exceptional build quality, flawless. The main gear upper shrouds are made of a brittle plastic (whats that shroud part called, where the strut joins the fuse?) and the paint peels off of them easily. I have never worked with this part before so could have used some instruction manual guidance. Also they don't fit snug, so I had to use a lot of tape to secure them. Not perfect but they worked out.  The wheel pants have no way to be secured other than pressure from the wheel bolt and nut, so I decided to drill a hole instead of cut up to the axle point. Had to squeeze the wheel and gear axle in, a tight butt puckering feat. Also came out nice.

I am stopping for a couple of days as now all I need now are the ordered parts.


I used my own wire stock and tap to be able to use ball links for the control rods.


Nice installation. I used Du-Bro pin-hinged nylon aileron hinges on all the surfaces instead of the stock CA hinges.


The throttle arm needed to be moved to the opposite side. This was made problematic by the limits of the throttle arm. I had to MacGyver an aluminum control horn to angle back a bit allowing full range of motion of the throttle. I'll put a manual choke rod on later, sorta forgot about it with all the work getting the throttle control rod right.


The RCGF 26cc engine in place. I had to move the motor back on the mounts about 1 cm. I had to make modifications to the firewall for the engine mount, but they were easily made as access to the back of the firewall is direct, a little Dremel sanding to make room for large washers . I had fuel proofed the wood on both sides and inside the fuse with 15 min Epoxy diluted with alcohol. The engine fits, whew...


I centered it much better, this was the first dry fit to see just how much would stick out and to center it.


The cylinder stayed in the cowl! I cleaned up the area around the spark. I don't know how the cowl will fare with the cyljnder head right on it. Its tough fiberglass.


And most critically it doesn't stick out too far!


I picked up some 6-32 stainless screws, T-nuts and neoprene washers to hold the cowl, drilled and installed them, then marked the cowl and drilled it.


It fits perfectly! I chose not to use the false motor front wanting a lot of air. The cowl is well vented as the air flows though a huge vent underneath the fuse behind the cowl edge, and around the cowl edge. Plenty of air! This is the 18x7 Falcon carbon fiber prop Joe tossed in with the engine I will start with.


Side view, looks good for compromising the size. I squeezed a 26cc into this 15cc cowl and the few mm's extra out front ain't no thing.


The wheel pants look sweet. Here's hoping they survive! If you look closely you can see the tape holding the strut shround in place. I will clean that up later with new tape.

I decided not to use the stickers that came with the kit. They are brittle and broke easy, and I kinda liked the plain red. All that is left in the build is installing the engine electronics, the fuel dot, vent and QuikFire fuel filter, ignition and reciever packs, installing the wings and firing the whole thing up!

This maiden will definitely require man diapers as I will either piss or poop myself...


Sunday, October 2, 2016

Align Trex 600 FBL Pro Flight Ready!

This morning I solved the rudder authority issue (I had failed to turn the GYRO on and set it... it was on INHIBIT).  Without the blades, I put in the 12S and gave her a slow start up run to let the gears learn to love each other, took her to full and nothing flew off, took her to about 80% and let her run, all of the odd screeches and noises settled down, nothing smoked. I checked the balance weight on the two tail blades, installed them and spun her up for vibration and authority check, and there be a LOT of power there. Balanced the Align blades (usually spot on, needed a touch of tape) and installed them.

She is now ready for her maiden!


Trex 600e Pro, Trex 600EFL Pro, Trex 500e FBL (HK)


Clean workbench, time to start the 26cc Waco!