I have had 2 full build days without interruption and made incredible progress. Only a couple of gripes about the kit. The parts were taped into the box, but they seemed randomly tossed in. Despite that they were all pristine. The parts are of exceptional build quality, flawless. The main gear upper shrouds are made of a brittle plastic (whats that shroud part called, where the strut joins the fuse?) and the paint peels off of them easily. I have never worked with this part before so could have used some instruction manual guidance. Also they don't fit snug, so I had to use a lot of tape to secure them. Not perfect but they worked out. The wheel pants have no way to be secured other than pressure from the wheel bolt and nut, so I decided to drill a hole instead of cut up to the axle point. Had to squeeze the wheel and gear axle in, a tight butt puckering feat. Also came out nice.
I am stopping for a couple of days as now all I need now are the ordered parts.
I used my own wire stock and tap to be able to use ball links for the control rods.
Nice installation. I used Du-Bro pin-hinged nylon aileron hinges on all the surfaces instead of the stock CA hinges.
The throttle arm needed to be moved to the opposite side. This was made problematic by the limits of the throttle arm. I had to MacGyver an aluminum control horn to angle back a bit allowing full range of motion of the throttle. I'll put a manual choke rod on later, sorta forgot about it with all the work getting the throttle control rod right.
The RCGF 26cc engine in place. I had to move the motor back on the mounts about 1 cm. I had to make modifications to the firewall for the engine mount, but they were easily made as access to the back of the firewall is direct, a little Dremel sanding to make room for large washers . I had fuel proofed the wood on both sides and inside the fuse with 15 min Epoxy diluted with alcohol. The engine fits, whew...
I centered it much better, this was the first dry fit to see just how much would stick out and to center it.
The cylinder stayed in the cowl! I cleaned up the area around the spark. I don't know how the cowl will fare with the cyljnder head right on it. Its tough fiberglass.
And most critically it doesn't stick out too far!
I picked up some 6-32 stainless screws, T-nuts and neoprene washers to hold the cowl, drilled and installed them, then marked the cowl and drilled it.
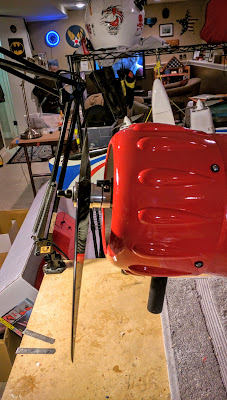
It fits perfectly! I chose not to use the false motor front wanting a lot of air. The cowl is well vented as the air flows though a huge vent underneath the fuse behind the cowl edge, and around the cowl edge. Plenty of air! This is the 18x7 Falcon carbon fiber prop Joe tossed in with the engine I will start with.
Side view, looks good for compromising the size. I squeezed a 26cc into this 15cc cowl and the few mm's extra out front ain't no thing.
The wheel pants look sweet. Here's hoping they survive! If you look closely you can see the tape holding the strut shround in place. I will clean that up later with new tape.
I decided not to use the stickers that came with the kit. They are brittle and broke easy, and I kinda liked the plain red. All that is left in the build is installing the engine electronics, the fuel dot, vent and QuikFire fuel filter, ignition and reciever packs, installing the wings and firing the whole thing up!
This maiden will definitely require man diapers as I will either piss or poop myself...


No comments:
Post a Comment