The flying monkeys got me...

Helis, Fixed Wing, RC Sailing

AMA 957918

Pirate Kid Skeleton by RadDezigns.

Thursday, May 14, 2020

MXS-R Flight Ready, Battery Changes

As I was getting the MXS-R ready to fly and charged the old NiMH 6V receiver and ignition packs, I got this feeling that they just were old now and needed replacing. They were holding a charge, but the meters were all showing different numbers (unloaded) and they weren't getting past 8.5V, and got there kinda quick. I cycled them on the charger down to 6V, and then recharged them, and they didn't take much to get there. Unlike LiPOs where an internal resistance can be very useful to indicate a battery is getting its end of life, I don't know of much else by which one judges the life cycle of an NiMH battery. I have been changing all of my aircraft on NiMH over to LiPO for the charge capacity, the voltage, and because I am more familiar with them, though I have been using NiMH for over a decade. So on a whim, and because I could, and because the 9 year old (few cycles, don't use it) 7.4V 2S 4000 mAh battery I have has IR of 14 and 15 and it takes a charge well, I decided last night was the night.


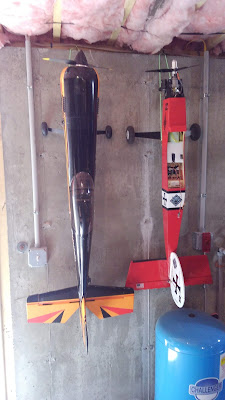
This is a post pic, but I removed the receiver pack pictured above, and the ignition pack that was just aft of the firewall, without any drama. Snip their ties, pull them off the Velcro (I never understood padding them). I didn't date these so have no idea how old they are, but I figure at least 4-5 years as I don't think I have ever changed them in the MXS-R. I built a small platform aft of the wing tube, CA'd it in place with a pair of servo screws (RTL Fastners, awesome utility screws!) for security, thought that thing isn't going anywhere. The net effect will be minimal weight difference and nil on the CG, I am confident. 


I "soldered"* a new harness using two "Futaba" J-connector servo power plugs and an EC3, and ran both through their relevant switches (bottom right), the EC3 of course going to the battery. Voila. New electrical power system in place. Tested perfectly. 


* I don't like large solder joints, I don't think you can reliably join them without a lot of heat, and the wire gauges were remarkably different, joined two black and two red small gauge wires from the Futaba plugs to their larger counterparts to the EC3 using these heat shrink butt connectors. I love these things! Have never had one fail. In this case the red ones worked, fitting the large leads just tight. Just use the air heat soldering iron or the heat gun to melt them. I then covered the two connectors (red, black) with that yellow shrink wrap.


The old packs. The greasy looking one was exposed, then newer looking one was under the front end covered behind the firewall. They are probably still good, I may use them for servo and ESC testing etc.


Forgot to mention a Pirate Captain Duckie has risen to the challenge of flying the MXS-R.


I mentioned I decided to paint the spinner "cub yellow". Damned if the paint, Rustoleum Golden Sunset gloss enamel, didn't match perfectly. A couple of coats of clear gloss enamel over that. It's a carbon fiber spinner that was scratched badly a ways back, but is otherwise in perfect condition. 


The spinner looks amazing!

So she is already to go, the DLE 30cc is rocking it, and I have also charged up a few batteries for the Twinstar with her new legs, and the Sukhoi is charged and ready to go as well. If I can get motivated, today isn't a bad day to fly, but a case of the blues is making it hard to get motivated. Wx has been so unreliably lately I almost feel forced to go, never a good mind set to fly with.

Wednesday, May 13, 2020

Twinstar Tail and Landing Gear done


Finished the repair on the vertical stabilizer. I installed longitudinal runners along the base. Not as pretty as I would have liked.


Port side. This thing ain't goin' no where.


When 
I had tried out the cool jet front landing gear expecting it to fail, and it did not disappoint. Today I installed the 5/16" wire front landing gear. I drilled out the existing hardpoint, and used the lever from the bigger kit, but the hardware is otherwise the original. I am using an original wheel from the Eflite Alpha 450 Trainer (thing is over a decade old!). Drilled it out, a bit off center, but meh. This baby is rock solid.


Very tall, so maybe now I can keep the props out of the grass. Thin profile, less drag.


Breitling MXS-R DLE 30cc Up!


Cleaned up and set up the Breitling MXS-R on the iX12, and today took her outside to run up the engine. Took a bit to start not unexpectedly, but then ran perfectly! Set the low end points, tried to tune in a few more RPMs off the high needle (nope...), and now she is ready!


I decided to change the spinner from that black to cub yellow!


Listen to the dulcet tones of the DLE 30! If you listen carefully at the very end you can hear the differences between landing, approach and flight idle.

Once the winds settle down time to fly!

Sunday, May 10, 2020

Twinstar Tail Fix, 30cc MXS-R Prepped


The other day pulling the Twinstar out of the car I somehow caught the tail just right and she snapped clean off. I removed it, held on by the edge of cote, and cleaned the surfaces, sanded where it was needed. the used 30 min epoxy over the middle where the tab used to be, and CA along the flush edges.


Gave it a couple of hours, and it's set nicely.


I will add a small line of wood along the bottom of the stab to add a little base support, then cover it all in cote. May even try to match the swoops. I will also be changing out the nose gear. The small twin wheels looks great, functions poorly, and the thinner wire that came stock was constantly bent and wobbly, so I will also be replacing that with the hardier wire, which necessitates replacing all of the mounting hard/plastic ware as well. I will bulk up the bulkhead a bit too, to handle the stress.


I brought the DLE 30cc Breitling MXS-R down from the ceiling for cleaning and inspection, replaced the Tygon fuel line/clunk with Viton, and replaced some of the other lines with Tygothane, using the Viton for internal clunk lines' stuff at cheap. I had a bit of charge in the NiMH batteries that I accidentally left from last fall, but topped them off, need to deep cycle them... and tomorrow I will program her into the iX12, and do some run ups on the engine. 

I also finished up a few things on the MX-Bach, fixed the wheels which were a tad wobbly on their axles. Put the cowl back on and she is done, ready to fly!

I spent the better part of the day cleaning the shop, and found a way to hang the helis off the floor. I also didn't like having the big 30cc planes hanging from the ceiling upside down, so found a way to hang them, moved a few of the others around to accommodate the new plan. Once they are all on the wall I'll take a pic.

Saturday, May 9, 2020

That ominous feeling when things just go too well...


After fixing the completely loose muffler, cleaning up the engine on the MX-Bach, I cleaned and touched up the paint on the prop, added white tips and clear coated the entire thing. Came out very nice. I put it back on and that weird feeling that it went too easily came over me. It reminds me of "found time", that ominous feeling when you suddenly have free time when you shouldn't, and you begin to fear there is something you are supposed to be doing and you're not. It's like that. Like this: the bolts for the prop went in perfectly, the holes lined up miraculously, I woke in the middle of the night and it came in a flash. I forgot to re-balance the prop, which I had been reminding myself the whole time to do.


So the next morning I took it off, balanced it, which it REALLY needed (the three big pieces of electrical tape each go down the back of the blade), and re-installed it.  Took her outside and ran her, easily tuning the low idle, and re--tuning a bit the high needle, and she ran marvelously like she usually does. This RCGF-USA 35cc engine is a sweet one, and her shenanigans not running right or idling the other day were gone with fixing the muffler and the mild re-tuning. She even likes her silencer again!


I had mentioned that the Sukhoi with her RCGF-USA 10cc (one of the early ones) was running great but seemed a bit laconic. I had a Master Airscrew 13x8x3 blade on her, and she has suggested she liked a twin blade better, unlike her sister the Stik with the same engine who does great with the 3-blade prop. I static tested the thrust with the 3-blade and got about 3.7 lbs at WOT. I then put an APC 14x8 two blade prop on and she consistently gave the same ~780 rpm but the thrust was now 4.7 - 5.2 lbs! Needless to say I left the twin blade on and will see how this translates in flight as soon as the weather stops acting the fool. I meant to weight the aircraft but forgot to. I will later and will update this post.


I still think the Sukhoi would be much better suited for a 15-20cc engine. The Stik loves the 10cc and has great vertical. You can see the size difference here. Both are great fliers and a lot of fun!

Wednesday, May 6, 2020

A Magnificent Day with My Flying Machines!


Heading out with my trustworthy aircraft with the intent to fly and not fiddle! And this plan survived the day, perfect flying and no damage at all!


The Twinstar with her new shoes. I am not so sure the small front gear will tolerate the clumpy grass...


She does look good though!


Yeah, it took a beating. I had to find the thinnest part of the grass to get her able to attain Vr, as otherwise she was just driving through cutting the grass; too tall and too clumpy. This is 3 mm rod without a spring. I don't think it is a good idea to keep this small gear on here. I would like a shock absorbing gear like the back two. Need to see what I have. The new Du-bro steerable front gear arrive, and its the thicker 5/16" wire, too big, but probably what this will need. Even with the original single coiled spring gear it wasn't sturdy enough and was constantly bent back and to the side. She does need the thicker wire. Set her aside for now. She is covered in thick grass spray.


Just like watching her spool down.


The Stik and her RCGF 10cc gas engine wanted to play the fool with initial idle issues, but a small tweak to richer was all it took. She is fast and flies so amazingly well. Despite that as the wind conditions changed a bit and the rollers at either end of the runway started to enter the approaches, it took some convincing to get her down. Love this plane!


Idling well, ran great! A bit noisy under stress in the air (4-cycles a bit), but powerful and dependable.


The Sukhoi with her RCGF 10cc. This is my best running 10cc, the others being the one on the Stik, also an RCGF, and the cantankerous Evolution 10 cc on the Sbach. This plane is a bit of a pig, nice but not great speed, and she can't vertical long at all. I wonder if I should just use that new 2 blade I got for the Sbach with its Evo? Hmmm... I think I will give that a try. This plane really needs a 15-20cc engine. That cowl just creates a lot of drag. The landing gear are a bit soft, even with perfect landings a slight bump in the grass causes a prop strike enough to stop the engine, and they bow a lot on landing. They are only 3.5 mm thick. I saw a nice more Sukhoi like rounded CF set on Amazon that will fit, and I may commit to using that.


Sweetness. 


Again, just because I love this idle!!!!  Right after a 20 min flight, with another 10-15 min in the tank!

Tuesday, May 5, 2020

MX-Bach Tune Up

The MX-Bach was acting the fool last time I took her out to the field. All of my planes lately have had issues with idles that need to run high, and she was no exception. I have decreased the amount of oil to a bit thinner than 1:40, which I hope will help, and make for a lot less oil thrown on the fuse and wings. 

I noticed on inspection that the muffler has come off the cylinder. The Pulse XT 40 did this as well, seriously affecting how it ran, and its issues resolved with fixing it.. I will need to make this a regular preflight check. I think it is likely one of the reasons I had idle issues. Before I start screwing around with the needles I will start her tomorrow and see if this solves the issues.


One screw holding it on, oil sprayed all over the place, took a bit to clean up, and I couldn't get all the oil stain off the muffler.


Made a new gasket, or I should say, made a gasket because there wasn't one. Liberal Locktite.


The silencer had fallen off on the bench at the field, fortunately not in flight as it would be history. Whew... It popped out of the silicone having lost the securing wire tie. I used two this time.


Last time I took the MX-Bach up she was having idle issues. I had to bring her in hot, and she was floaty, after several attempts I finally brought her in and a foot off the ground killed the ignition. The same hand is used for the kill switch that I have on the elevator, soooo... I accidentally gave a little up elevator, she lifted up and stalled, dropped, and broke off an end of the CF landing gear. Thank goodness I have an exact replacement brand new hanging around in my shop! Some minor internal damage, mostly just cracked spars, easily fixed.


Took no time to drill the new holes and install. New pair of pants!


Messy during Man Working Time!


I installed a new tail wheel bracket because the carbon fiber one was getting too soft and wobbly. I purchased one for 120-150cc sized aircraft because, I don't know why. I should have gone with the smaller one, but I think I went with this one because the hardpoint on the fuse is shorter. I could have just cut the other one. It really doesn't matter, this one works fine. I wanted a metal one that would hold the vertical axle firmly, and this does the job. Since it's off center from the hinge point I thought of and tried a couple of different connections for the turn coupler, and ended up just using the rod method. To keep the turns from being too acute I had to put the rod connector pretty far aft. It works fine.


You can see the hardpoint on the right just fits on the tail of the fuselage. The tail wheel is now much more secure and sturdy. 

This is the kit that arrived. I know what each piece is for, but I don't understand that the silver handle screwed into the blue aluminum piece is. I removed the handle and used the blue part as the rod connector to the tail, as can be seen in the photo above this one, on the left. I was able to put an M2 bolt through it into the wood, so that is what I used it for. If anyone has any idea what that this is really for I am curious. Of course there were no directions/instructions...

I am now cleaning up the prop's paint a bit, and will reattach it tomorrow after re-balancing it and then see what I need to do to get the idle set right.