The flying monkeys got me...

Helis, Fixed Wing, RC Sailing

AMA 957918

Pirate Kid Skeleton by RadDezigns.

Wednesday, October 26, 2011

Eflite Ultimate Flight Ready

Yesterday I started work on my new Horizon Hobby Eflite Ultimate. Today I finished her. Really this airplane is an easy and straightforward build. Its rather delicate though. It's a 3D aerobatic plane, so is purposefully very light. Pressing a part into place with light pressure, such as a servo screw into a predrilled hole, is met with cracking sounds from the fuse. One blog post talked about being concerned about the screws used to secure the interplane struts and the possibility of putting a driver through it. They are small, and challenging to get into place and screwed tight. And yeah... a driver slipped and I poked a hole in the cote... The battery compartment isn't all that bad, but the tray wall is weak or at least the joints weren't glued well (it snapped off  clean at the joints when I was putting a piece of Dual Lock on the other side for the ESC). I strengthened it with popsicle sticks and glued the joints with CA and all is well. The battery compartment is smallish at the entry, but plenty of space beyond. Setting the battery against its Dual Lock without breaking the tray is a bit challenging, but doable. All in all, a simple build, and she looks very good, but she is fragile!

She is equipped with an Eflite Power 10 electric motor controlled by an ExceedRC Proton 40A ESC. She has a Spektrum AR600 DSMX receiver. I am using EXI D213f digital metal gear servos all around, which I have had great luck with.


Spektrum receiver in situ. Also note the sharp corners of the plastic wing fillets. These things snagged on everything and eventually one snapped off. Once I got the wing on I CA'd it back on.


I had to place the ESC opposite the battery on the same tray (the black velcro loop is for the battery).


Canopy glue on the canopy with painter's tape holding it in place. Quick easy fit.


Tuesday, October 25, 2011

Eflite Ultimate Build Day #1

My last plane for a long time... Building the Eflite Ultimate from Horizon Hobby is easy and very straightforward. Some have complained about weak control pieces, but I found them to be fairly strong nylon. Maybe Eflite changed them? The plane is much smaller than I expected, but looks good!


The wings came joined. I had to install the ailerons and the servos.


The servos are angled slightly to align with the air stream, I guess, but angled off. The control rod is straight with the aileron. This geometry results from the swept back wings.


Yes... Goof Off will remove the paint from the sticker... who knew?


I misread the photo and installed the rudder control horn on the wrong side. I had to pop it off, and reinstall it. Came off surprisingly easy despite the CA on this side and the back plate on the other.. Lucky me.


The rudder and elevator leads are dangled down through the fuse. easy as I could stick my hand all the way up through the fuse.

Tomorrow I plan to finish the tail, install the electronics and the motor. Should be able to finish her!

Sopwith on Station

I used a 50 lb hook (and a second failsafe) to hang the Sopwith. I had to move the Stearman as this is the biggest wall. The baby Sopwith looks good, but the cornell looks like its cowering. I made some adjustments to the motor, and set the CG, having to add 1-1/2 oz to the nose. This thing is heavy. Ran the battery and the motor, took almost 10 minutes to lose power. This was done in a couple steps as I found that the motor shaft securing C-pin thingy was not snug and the rotor lifted off the motor at full throttle. Fixed that, but had to remove the entire motor assembly to get at the C. I thought the motor sounded odd, now she sings sweet! LOTS of power using 2x 2S 4000 mAh 30C in series.


Sunday, October 23, 2011

Sopwith Joins the Piratey Squadron

I completed the Sopwith build today! She is ginormous and gorgeous!


Turns out the motor at full extension, mounted through the front of the motor mount so that the motor shaft accepted the collette, came up short. I would have to order a longer adapter collette, and use some spacers for the prop to clear. I hated that idea... so I gave it some thought and this is how I ended up having to engineer it. What dya' know, it worked perfectly! I reversed the motor and the motor mount, added some spacers, and installed the bolt-on prop adapter, so that the motor extends beyond the motor mount, which is the limiting factor getting the motor shaft to extend beyond the cowl. Problem solved.


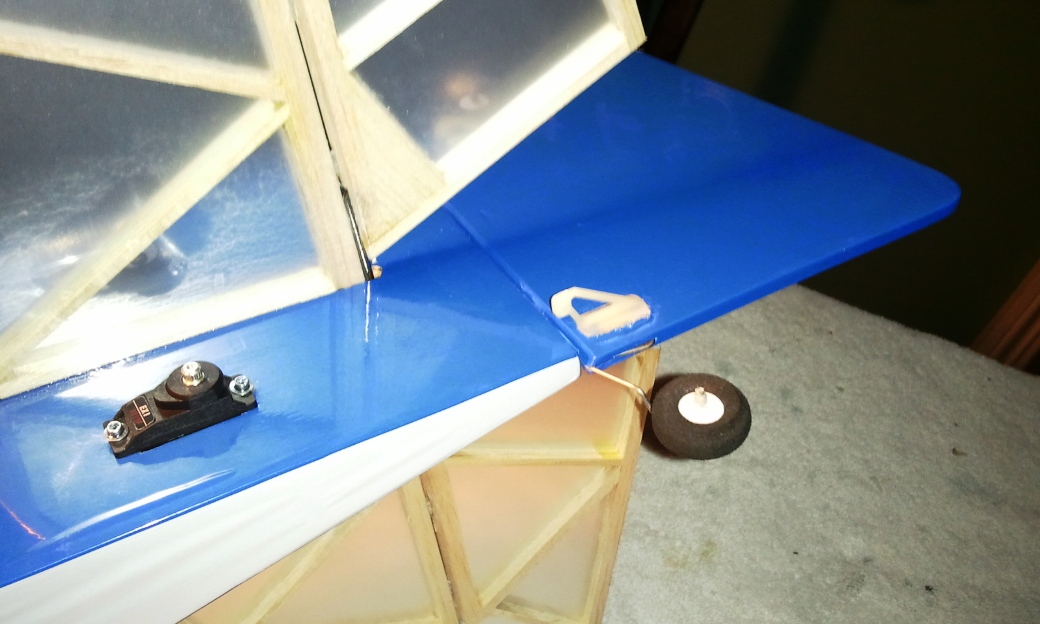
This morning  found that all the O-rings that act as shock absorbers in the landing gear had snapped. They were old and brittle, so I wasn't surprised. Replaced them with some I had for a prop saver.


Xoar wood electric prop installed. Sweet! How about that red band on the cowl, eh?


This was annoying, though given why this happened, I could accept the problem. In the early kits you had to make the stay wires yourself from supplied materials. Mine were all cut to length, and joined with their connectors. In the plans, the attachment to the fuse is where the two small holes are drilled aligned with the tail skid. Well, the pre-made wires don't allow that point, and had to be installed further towards the nose, where those second holes are. Came out very nice indeed!


Top view. Forgot to get the bottom view...


Laying out the main wing stay wires and attaching the wing.


Wow, simple to install the stay wires! I was quite pleased not to have to make each wire...


Close up of the mock motor and cowl.


I thought the stock pilot figure looked dead... I liked this tougher guy better!


Later when I do take her outside, I'll get some nice photos. All done, huge! Excited to fly her!


Saturday, October 22, 2011

Sopwith Day #2

Day Two of the Hangar 9 Sopwith Camel build. Lots done. Do, redo, redo again, then be done until redone again... At least that's what it seemed like. The control rod for the rudder did not like its tube, where it comes out of the fuse in the tail. It took a gnarly turn at the end that I had to cut out to reduce the rub. I also had to put a S turn in it. When they said the motor mount needed to be 5 inches from the firewall, what they meant was more like 4 inches or so. Had to push it back.... The collette for the prop adapter is short, so I won't be able to finish the prop until after I can find a 45mm one, hopefully Monday. Ran out of time, but all that is left is the prop, the top wing and the rigging. She is lookimg really good!


The Hitec HS 485hb servo was just a bit long for the tray, and there wasn't an elegant way to access the tray. I used a Dremel sander to push back the lip.


They fit snugly thereafter. 


The empennage, sans elevators and rudder.


Installing the elevator and the CA hinges.


Rudder and elevator done.


The control linkages. There is another elevator control horn on the other side.


Photo doesn't do the cowl justice. The red border looks awesome!

Didn't get out to fly today, hope to tomorrow. Will likely complete the wing and rigging tomorrow to. All that will be left is the prop adapter, then power testing. This model is so sweet I think it will be a while before I have the kahuna's to fly her.


Skyangel F-86 Sabre: Bad ESC

My mini F-86 Sabre by Skyangel which I ordered from Hobby King arrived today! Very exciting, very fast  shipping (1 week via EMS). It was so simple a build, and took only an hour. What took longer was the ESC was bad... more on that in the video at the end of this post.

This is a well designed, very scale looking model!


A large white box, with this label in the corner. Very well packed. The model had a couple areas that were bent, likely from when it was packed, but not badly damaged.


All the parts, not many!


All done! Used epoxy and foam safe CA. Installed an Orange receiver and satellite. I later added the Pirate flag, welcoming her to the Piratey Squadron.


Curiously the securing screws in the elevator linkages were missing. I replaced them. I had to turn the linkages to the outside (removed them, reinstalled on the outside) as they were impossible to screw in this way. In this pick you can see the flat black I rattle canned into the exhaust (it was white).

Here's a video of the ESC problem I ran into. I was bummed since it is buried in the model and I had epoxied the wing. At first I thought all was lost, but I remembered reading about removing the panel aft of the wing on the underside of the plane to get to the EDF unit, and lo and behold, the ESC was easily accessed.  I was hoping it was just the motor wires were loose, but isolation determined it to be the ESC itself. I first replaced it during testing with an ESC from one of my 450 helis that is down, but its a 40A ESC. Once I was sure it was the ESC, I took the ESC from the Powerline Hobbies / Green RC Super Cub that hasn't flow right since I got it. It too is a 20A ESC. This will keep me from working on the Cub until I get a new ESC. Hoping Hobby King will replace the ESC.


Hoping to maiden her tomorrow!