Sunday, September 27, 2020

Ultra Stick 10cc Build Day 3


Using this Spektrum AR7010 with a satellite. I have a NIB AR 637T I thought about using, but I don't want stabilization on the Stick. Also, I keep thinking I'm short a channel if ai use 6, but I can't think of why.


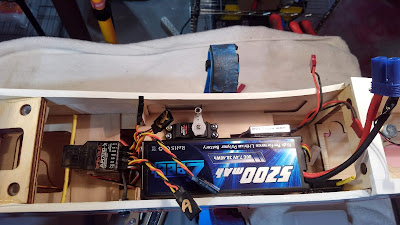
The battery will go on the Duo-Lock, against the Velcro on the side, which I changed also to Duo-Lock. I am not able, without figuring ophow to cut slots, to use a strap to hold the battery in place. I CAd the Duo-Lock for extra hold. This lic is more to show the run of the sat wire under the battery.


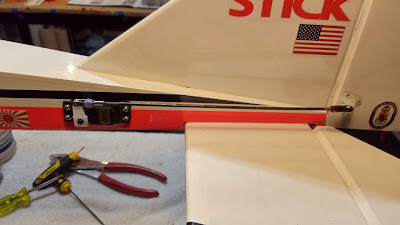
Went with external aft tail servos, here the 3levator.


And the rudder servo.


Battery and the ignition optical cut-out switch, the ignition LED , and the throttle servo, and last the reciever. When the battery switch comes from Hobby King (still hasn't shipped, a week later), i can finish the electronics. 

Stopping for th Patriots game!


Saturday, September 26, 2020

Ultra Stick 10cc ARF Build Progress


Day 2ish. I started with wanting to clean up the hinge gaps, used some white cote just on the top sides.


Moved to the tail feathers. I probably should have done each side separately, then did the joiner bar, but I put the whole thing together. This made getting the hinges in their slots on the second side a PITA... consequence of my decision. This was the only somewhat frustrating  problem in the build to date and it was user error.


In the end the taile feathers look great!


I did have to cut a small piece off the back of the tail hardpoint to make room for the joiner bar. Int only neded a millimeter or two.


The model has a design that allows  for the tail servos to be tail adjacent and external, or in the bay under the wing. The hard case battery I am usning (bought for the engine test stand, decided not to waste it there) is a big 2S 5200 mAh LiPO. I wanted a bigger combo ignition/reciever pack so the 5200 is perfect, weight wise its not different than two NiMh 2200 mAh 5 cell packs. Well that pack takes up a lot of space,  but there was still room to put the servos in the bay, but there's a lot of weight there and forward. The Ugly Stick needed several ounces of weight aft to trim out. Also, for some reason the wing servos are cut for standard servos I expected for this model, but surprisingly the trays in the bay are cut for mini-servos! I don't recall that in the specs... and I would rather have standard servos on the tail surfaces. So they are going aft. I wonder if the aft trays are standard?


I have a set of plastic gear mini-servos, Tactic TSX-25 mini-servo. Tactics aren't made anymore, don't know why. I have had great luck with these less expensive high quality servos. Anyways, not wanting to cut bigger tray holes and this being the throttle servo, a mini plastic gear servo is fine. The Tactic is a little bigger than thr JR MN-48 I had and was about to use, also a mini and it fit fine in the tray without mod. Minor modification and the Tactic fit.

It was getting late, so I called it a day. Next the tail servos, fuel system and engine, electronics. I bought a single switch, a Turnigy smart electrical switch. Of course 5 days later and it still hasn't shipped. I knew that would be a problem with Hobby King. I am using an remote optical ignition cut out switch I have to control ignition power and the single battery pack. I do have a standard double switch, but its pretty busy and I don't need the Futaba ports, so its not a great tool for this project. The only thing I don't have on hand is the switch and that won't be here for 1-2 wks, do no point in rushing. Lastly, I have a Spektrum AR7010 with a satellite. And of course, The Evolution 10cc.

Friday, September 25, 2020

Hangar 9 Ultra Stick 10cc ARF Build Begins


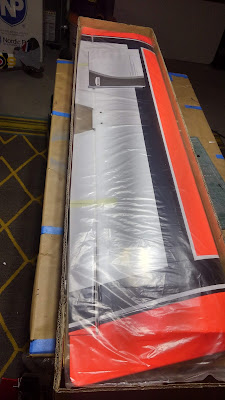
Sold my Dx8 Gen 1 and used the proceeds towards finally buying the Hangar 9 Ultra Stick 10cc from my LHS, ABC Hobbies in Windham. I wanted an Ultra Stick for years, but they went discontinued. I ended up with an Ugky Stick, and I loved it! I planted it after many years of great flying, and in the interim, the new and improved Ultra Stick came out. For its simplicity its a bit pricey, but its worth it! Since the 60" wing comes in one piece, the box is over 60"long. I had to use panoramic view to get it all in!


Ginormous wing. Top side.


Underside.


For a few minutes I thought about using the stock CA hinges, but they always come loose. I wasn't sure I was in the mood for installing Du-Bro Nylon hinges, but I prefer them.


So, that's what I did.


One of the things I don't love about them is that they take so many steps, others are keeping epoxy out of the hinge, and if one of them goes slightly off angle the surface moves stiffly. I line them up dry fitting both side and mark the centers, use my Du-Bro hinge cutting tools to make the wider space required for the nylon hinges, great the hinge lightly to keep epoxy out, then using 30 min epoxy set them kne surface at a time.


Everything looske lined up! Only one hing went slightly askew, on the right flap. It works fine, however. The only reason that happened is the epoxy was curing faster than expected...


The Ugly Stick had a nice Tru-Turn bullet spinner on it, but this airframe is more slick and sporty, so I went with a 2.25 inch aluminum cone spinner from Amazon. I am using the well running Evolution 10cc gas engine. I tried to find a Pitt style muffler from Evolution as it would be affordable, but there are none left for the 10cc. Horizon Hobby, for some reason, discontinued the Evolution gas engines. I don't think they even make nitros anymore.  I would very much prefer one... but it won't be cheap.


I like that the servo trays are already built. There is no skill to it, its just busy work, so having it already done is fine by me.


The ailerons and flaps are on a Y. You have to be careful with these setups, as was seen on the Spitfire, to get the servos facing the correct way to allow oposite aileron movement, and identical flap movement.


Wing is done!


Close up of the aileron and flap Ys.

I did this over a couple of days. I am looking forward to getting to the fuse next!

Thursday, September 24, 2020

Spitfire RCGF 10cc Blow Out

I have been working on this RCGF 10cc engine for a few weeks on the Spitfire. I rebuilt the carburetor and did a thing fixing the stripped sparky with an adapter.  I got it running finally today! Decent albeit slightly high idle, nice smooth acceleration, and a powerful WOT with 5.2 lbs thrust swinging the 14x6 Master Airscrew! And then all of the sudden I couldn't get it to run. What the heck? Wait, no compression?  Turns out the pressure and heat blew the stainless adapter out of the crappy metal cylinder of this first generation RCGF engine. This problem of soft metal has been addressed in the current RCGF-USA 10cc engines.


Found it finger loose. Tightening it was unsuccessful, it just kept slipping.


Stripped...


So... I have a good carb on this engine, and a good cylinder on the other that has a carb problem, I hope. I swapped the carbs, and am now using the new cylinder and crankcase Joe Nelson gave me. One of the carb flapper valve plate carb securing holes on this new engine stripped with no real force! Maybe that's why the "carb" was bad? So, I went back to the failed cylinder, pulled the flapper valve adapter, and swapped it out. The bad cylinder is now a parts farm... which I hate, so eventually will rebuild it. Went ahead and replaced the carb gasket.


So... brand new cylinder and crankcase, swapped flapper valve adapter plate, and the original good carb, installed. Got late for running an engine, so will have to wait until tomorrow. Disappointed, that orginal was running almost perfectly today! Tomorrow I hope to finally get the Spitty up and running  and flight ready!

Saturday, September 19, 2020

Faith Restored: Evolution 10cc runs perfectly!

Back in June I pancaked the Sbach and her Evolution 10cc when I lost control authority. I thought this was a radio issue (don't we always?) but knowing the radio is fine having had it inspected by Horizon Hobby/Spektrum, I have to think I just stalled it... Anywho's, I, of course, haven't run the engine since. Today I put her on the test bed.


It's narrower than the RCGF-USA 10cc the mounts are set up for. To keep it simple I just made a thingy. Two bolts on the left, on on the right.


Didn't take much to get her started once I got fuel to the spark.


Happens. I was finger choking the carb (has no choke) and touched the sparky, giving me a little surprise shock, making me jump and nicking my finger in the back of the prop.


UPDATE 9/20/20: This is what it looks like this morning when I took the band-aid off. It looks much better a few hours later when I let it dry out a bit. It's really not as bad as it looks.


I don't think I have ever had an engine exceed 9500 RPM before! 
The Evolution was rocking 10,250 at one point swinging a 13x6!


Listen to that sound!

Needless to say, my faith in the little Evolution is renewed, and as soon as they are back in stock its going on the Hangar 9 10cc Ultra Stick!

Friday, September 18, 2020

New shop floor "covering"


It was time to replace the interlocking foam squares that covered a 10x10 section of the shop floor as they were a mess after more than 3 years. I was tired of things bouncing off into the abyss, so this time I went with this holey design, hoping that wayward screws would be forced to narrow their bounce and be contained. We'll see. Its soft and comfy, easily moved for cleaning. The spaces between the squares seem to have permanently stained the concrete floor. I wondered if it was moisture, not sure why that would be, but a fan on it overnight changed nothing. It may be a more deep seated moisture that will fade with time.

Wednesday, September 16, 2020

450 FBL Update


The #2 aileron servo (port side) had a different range of motion than the #1 pitch servo (starboard side), causing a CCPM interaction at either end other of motion. I could not overcome this with endpoints for some reason, so I decided to replace the servos. I bought some inexpensive digital MG90 micro servos and tonight I installed them. Tomorrow I will program the ZYX Flybarless system and weather permitting test fly her! I will take her and the 450 Sport (flybarred) out.

Tuesday, September 15, 2020

Defeat


I give up. I can't get the Walbro carb to work on my 10cc RCGF engine, even after rebuilding it. When  I took it apart it was full of gas. Running it before and after rebuilding it I would see light smoke and a lot of fuel coming out of the exhaust, no matter how I leaned or richened or changed endpoints. It would never catch nor sputter. So I took it off the engine stand, and was planning to try the small 10mm Walbro I had tried some time ago, but in emails with Gary Hoffman, my engineer, I decided to bring it to him to have him hit it with whatever rocks he has. If he can't get it to run its not likely ever going to, but I will then have Joe Nelson Of RCGF-USA take a whack at it. I will be shocked if Gary doesn't get it running. Tomorrow I will take it out to Gary in Hampton, NH, on my motorcycle, two birds, one stone!

I may put the other RCGF 10cc on the engine stand, the one on the Spitty. I have had problems finding a nice low needle that idles well and accelerates well. Not sure, may just test it on the plane as is. I don't want to put the Evo 10cc on it, would need to see if the RCGF muffler fits as I am not putting the huge torpedo muffler on the Spitty, and also because I kinda think its weaker than the RCGF though I have no objective support for that. I had just found its sweet spot when I crashed the Sbach, so it was running perfectly. I'll give the RCGF a chance on the Spitty, but may replace it... we'll see.

New GT Power Servo Tester


My basic Turnigy servo tester is over 10 yrs old and was starting to show its age. In those 10 yrs I have also wanted to know things about my servos it couldn't tell me, like speed, dead band, etc. So it was time to replace it with an upgrade. I found the GT Power Professional Servo Tester on eBay for $30 shipped from hangarstuff4sale (gave you the MotionRC listing for detail).  I put it on a switch since it doesn't have an I/O switch, it turns on when powered up as far as I can tell, which meant it was going to need a platform, and here it is! I can easily charge the pack through the switch. Built a little box with a hatch to cover and contain the wires, used on old NiMH recieiver pack, some paint and Dual Lock and voila!

My trusty blue Turnigy tester will be hanging around for a while, for sentimental reasons. 

Monday, September 14, 2020

Walbro 10cc Carb Update

 I took the cleaned carb out attached to the RCGF-USA 10cc on the test stand.


She would not catch at all at first, but gas was going through it. Changed from the iffy new spark,mwhich was sparking, and used a good spark, no change. When I had it at WOT, she would try to run a few RPMs, but not consistently. After an hour I gave up, I was wasting a lot of gas to flooding. 


I took the carb apart, and it was full of gas. The valve sheet was rubbery. Now, the replacement kit comes with a least 3 types of material cut for this carb, one is kinda rubbery, one is this thin plastic, and another is a little thicker and looks reinforced. I have no idea which one to use, I've not knowingly used one over the other, and the blue one looks most familiar, so I went with it.


Put it all back together. In consideration of my neighbors, I don't run before 10 am, and usually not till noon, and stop after 5 pm. I will try again tomorrow. 

Saturday, September 12, 2020

Updated Engine Test Bed!

 I needed my test platform to work on my 10cc carb problems, and I wanted to update it a bit. Put a throttle servo and an Orange receiver on it, added a second battery pack so I can run longer. Added a hole behind the engine to increase air intake airflow.


Its late now, tomorrow I will take it outside and run the engine whose carb I just cleaned.

Cleaning a Walbro Carb

I've been having carb problems. Pretty much anytime you have trouble with an engine, its the carb. The ignition and wires are second on the list. The rest of it is pretty tough and resilient to problems. I have been having issues with the carbs on both 10cc engines. These little buggers have such small tolerances for mixture that any debris or clog, and air leak, can cause weird stuff to happen that causes gnashing of teeth, sore backs from standing way too long to solve a problem trying the same thing over and over again because what you are doing is supposed to solve the problem. The machines are not hard, they just are complex. You've been there, don't lie.. If there was one thing I hate about gas its that the smaller engines are so unreliable day to day. The 20cc and bigger, probably the 15cc too but I don't have any, are so much more stable. So when someone tells you gas is reliable, they don't fly less than 10cc. Remember, the engine is fine, its almost always the carb.

I use this with the little red tube to blow out the passages and soak the carb.


I've take the carb apart but for the valves (throttle and choke). Both the metering and the pump side are disassembled, and the needles removed, including the metering needle. I don't peel off any gasket that doesn't want to come unless it needs replacing. The pump side gasket and valve sheet are fine, but the valve sheet might use replacing if I get one. For now its fine. I have cleaned everything thoroughly with carb cleaner spray, blowing out all the fuel pathways, soaking the carb to let any build up break away and flushing it again. I cleaned all the gaskets and the valve sheet with the carb cleaner. Carb cleaner melts gloves, by the way...


Here I reassembled the metering needle. Getting the metering spring under the round depression in the metering lever is challenging, and it must be properly seated. This will be the only frustrating part of the process, be patient. I use a flat micro driver to hold the spring compressed while keeping the lever in the head of the metering needle, and the hinge bar in its slot. Takes a few tries, and a couple of rounds of searching the floor on my hands and knees for a launched spring, but in the end it gets where its suppose to be. I don't Loctite the metering securing screw. Snug it in nicely.


Someone will happily sell you a fancy tool but any rigid piece or your Mark 1 Mod 0 Eyeball does just as well. The top of the metering lever should be exactly level with the top of the carb case. The other end on the needle head should move the metering needle noticeably when the lever is depressed, it is either open or closed. I find that the lever is only slightly bent when set properly. If this is screwed up the carb will not work well.


The metering diaphragm goes small washer thing side up. It should rest pushed out by the metering needle, Tapping it should have a nice range of motion and a quick rebound. If not the spring is likely wrong or the lever is not adjusted properly.


The metering cover is in place.


There are lock washers, but I still Loctite the screws, all of them except the metering hinge screw. I screw these down gorilla-tight.


Pump side. Gasket goes out, the valve sheet in, so that the flapper valves cover the fuel pump holes they are assigned to. Those are all the passages I blew out with carb cleaner. All of them.


Pump gasket and valve sheet in place. The valves should lay flat over the fuel holes they are assigned to. If not, the valve sheet should be replaced.


Pump side cover in place. I Loctite and gorilla-tight this screw. Make sure the gasket is properly seated, there are posts that usually assure this that pass through the gasket.


The fuel flow needles. They are different. The long skinny one is the low speed needle, the fat shorter one the high speed needle. They also have their own sized springs.


They go in their own holes. Seat the SOFTLY and completely. Walbro recommends both needles out to 1-3/4 to 2 turns as the starting point. You will need to adjust the needles. If you know what they were set at before you can try those settings.


Here the low is set to 1-1/2, the high to 2 turns.


The gasket between the crankcase and the carb is essential! It serves to prevent air leaks both ways, and to insulate the carb where the magic happens, from the heat of the crankcase/cylinder where the violence happens. Some engine use a spacer here to improve that insulation. I coat it with a thin layer of red grease.


There is a vacuum hole on one side of the carb, you can see it here. If your gasket has one small hole, it must be lined up with this passage or the carb won't work. My gasket happens to have two holes, one is vestigial.


Secure the carb to the crankcase being sure that the gasket is properly aligned. Use Loctite and again, gorilla-tight! The process is completed. Next, putting the engine on the improved test stand. I hope this cleaning solves the low needle/idle and acceleration issue. I gorilla-tightened all of the cylinder screws I could reach (two are blocked by the muffler screws, yep, Loctited and gorilla-tight).