Sunday, September 29, 2019

HK500 Tarot Swash


The washout arms came in from Amainhobbies quickly as always! They had M2 screws, but Tarot head uses M3 so I had to swap out the bearings. I only damaged one of the old ones removing them from the arms, but had several on hand.


Installed easily! Like the red among the black finishes.
No other adjustments were necessary but for zeroing out the control rods. Nailed it, no tracking error!


Everything checked out!  Took her out back and despite full swash movement -11 to +11 on the bench, she barely lifted off. Recheck and she was only getting +5. Reset the swash limit in the BeastX and that's fixed. Took her up and she has her positive rate now. But the tail control lever main bolt stripped, so I had to replace that and use a nylon lock nut opposite it, and now she is 100% ready! Have to run out to my wife's work party, so no further flights.

Time on the sim. Unimpressed  with my focus.

Tuesday, September 24, 2019

Align Trex 600e PRO

Oohh... look who got cleaned, lubed and bench checked! When did you last see a flybarred icon?


Making sure the 5S 5000 mAh batteries fit. I flew her 6S so I was pretty sure, but I don't have any 6S batteries anymore and don't need the power.


Since this pic I changed some of the velcro. I was kinda annoyed that the reciever pack is at 4V per cell, as it's been over a year since I flew her. But it's a LiPO so hopefully it's fully dischargeable and rechargeable.


Who doesn't love a flybar cage?


Sweet. 

HK 500 Repairs

Started the repair process of the HK500. Its done but needs new swash washout control arms as the originals took so much energy they twisted. 


Both of the washou arms are twisted.


Found this replacement pair at Amainhobbies for the 500x. Hope they fit.


I had to replace the tail shaft, main shaft, feathering shaft, tail control rod, the swash control arms, the washout arms  and the main blades. Not bad at all. I think its time to replace tha canopy though... once again excited about flying helis again!

UPDATE:   Went ahead and purchased a new canopy.


Pricing 5S batteries, again dismayed at the expense! 


Monday, September 23, 2019

Well, it's a start.


After several months of pouting and focusing on my new planks, I moved the HK 500 to the work bench. She will probablybsit there a while before I get around to actually fixing her. I need to tinr up that e 600's and the few 5S batteries I have. Try to get my heli mojo back.


Friday, September 20, 2019

Sweet end of summer day!

A day off, the promise of possibly awesome weather, yeah, we are going flying!


Just took the Pulse XT60 with its RCG-USA 20cc, and the Sbach with its Evolution 10cc.


Jay and Louis were there flying their helis. When I first went up there were a few winds up high, and the rotor at the south end was active, but things calmed down amazingly, and it turned out beautiful just as I had to leave.


So the Sbach is tuned and running well. There was a curious period where in idle when I moved her from the start bench to the ground and held her nose up. The fuel pump failed to maintain flow and she quit. This repeated itself. I decided to just fly her anyway.  After a long flight I held her up again and she ran on fine. She flew well, ran perfectly. She needed some DR/Expo changes. I turned the ailerons down from 40% to 35%, and the elevators to 35%, and she tamed right down with a bit more authority. With the higher expo I was over driving the sticks, and my style is a bit more subtle on the controls. The Sbach is always a twitchy wench, one has to pay attention as she is very unforgiving. Remember, I had to put vortex generators on her wings.  She catches the thermals over the dump parking lot and rises rapidly, and is sensitive in the rotor between the south end Ents and the rise of the landfill we fly on the top of an after rising over the lot, drops like a stone in front of the trees, and then rises again as she approaches the runway on the top of the hill. She isn't unique in this habit, but does seem more affected. Combine that with a tail wind on the base in front of the trees and a 90 degree crosswind on final, and it can take 2-3 approaches before we get wheels down. And then we are hauling ass, so we run out of runway fast. FUN!

She doesn't have a lot of power, is fast, but runs out of vertical fast. That's with the 13x8 two blade. I decided to look at the 12x8 three again, so will fly her that way.

Incidentally, at the field her power switch failed. Noticed that the vibration when the engine was running was making the light blink.. I had my suspicions this past week and today she was twitching her surfaces like crazy and the engine was missing. We figured out it was the switch with that blinl, so I was flying her by connecting the battery directly to the reciever. This evening I replaced it with another one, exactly the same, and she is behaving.

I also flew the Pulse XT60. she flew without any drama. She still sputters in the midrange, but idles well and has plenty of power! She wasn't bothered too much by the winds, but that Hershey Bar wing liftes in the crosswinds. 

I now have them in the normal rotation!


Tuesday, September 17, 2019

Hobbyeagle A3L v2 isn't going to work with dual elevators

I described in the previous post the issues I am having on the Sbach with with dual elevators and trying to get the Hobbyeagle A3L to work with it as it has only one elevator input/output, and the elevators have to be on a Y. This makes them move in opposite directions. So I thought I would try a simple signal inverter.


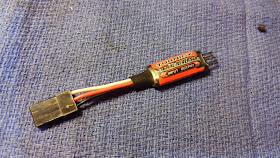
About $12 on Amazon. You can get one for $45 too.


Installed on the left elevator side of the Y.


The signal lag is too much, and the surfaces don't travel the same distances. 

So... this was an expensive "failure". The device works great. As I noted before, this single channel thing is true of all the stabilization systems I know of. Shame, as this is a small plane I would like to fly in higher winds. So, I removed it, set the radio back up to dual elevators (no mix) and we are back to where we started. Also, no issues with the ignition light fading at full deflection anymore.

I may use this on one of my simpler planes... Do I have one on the Stearman? I also have a remote Kill switch I don't need.

BTW: The maker never returned my email.

Sunday, September 15, 2019

EagleHobby A3L v2 3-Axis Stabilization System

I have worked with several "gyro" stabilization systems, on helis (ZYX, BeastX), and on planks (Orange, Spektrum Alpha6), and now the EagleHobby A3L v2 system. The Alpha6 was a failure and is no longer made by Spektrum (and I can't understand why Spektrum makes programming the AS3X systems so difficult, requiring a special "bought separately" cable or a Bluetooth app).


The bag came with two bags inside,  nicely done.


These are the kits parts. The voltage regulator (nice, had never seen one before, put it on my receiver), the gyro, a pair of 3M foam stick pads, and 3 male-to-male short connector wires. There an no intructions, nor any link to a manual.

Google found a v1 manual which more or less is the same. The v1 had 3 gains pots, which I suspect were main, auto-balance and auto-hover. I think v2 pots are main and I have no idea what the second one is.


I mounted it on one end of the 9ch reciever. It's a nice little unit, well constructed,  and is programmed with the black button and its LED, which is very easy to operate. VERY easy. Screw it up, factory reset works well, same button. Here's how I know... when I first powered it up one of the connection leads they provided shorted, the magic came out of the wire in a nice little puff. I powered it off and replaced the lead, the brown(black) wire melted its covering off. Restarted it and cranked up the main gain so I could see the surfaces move in response to moving the plane in yaw, pitch and roll. The rudder moved in response to PITCH, and the elevators in response to YAW. WTF? I checked everything and the connections were correct. It was dinnertime so I fired off a quick email to support, knowing I should probably try a hard reset first. After dinner I did just that and the problem was solved. Sent my "never mind" to support. It now works fine. The short must have given it a concussion.


I went into programming and changed it to Mode 2 (On, Off, Auto-balance) since I don't hover, and programmed that to the F-Mode 3 way switch on my DX8 Gen 1. I do wish the order was Off, On, Auto-balance, because if it freaks out and I freak out, I don't want to hunt for the center switch position. I want to shove it to the stop instinctively.  I then set the servo frequency to 250hz since I am using digital servos (I figured they should be fine), and they were except the servos screamed, the  right wing servo went ape-shit in a noisy jitter then died, I killed the power. So, I am replacing that Tactic TSX47, and since I couldn't confirm the freq, took them back to 50hz, where they work just fine. All the surfaces were oriented fine, no changes. Will need to remeber to turn the gain back down once I get this all set up with the new servo. Didn't want to use the remote gain for now, so left that unplugged; I haven't found the need to dynamically adjust gain, and am worried about having it on a knob that migh turn without me thinking about it.

Why is it so hard to find servo frequency info? A lot of modern devices need that info.

This is a standard gyro setup. Three leads from the reciever to the gyro. All of these systems, (functionally the Alpha6 was one lead each control surface, though it had plugs for each of dual ailerons and elevators,  it would not handle them, you still had to use a Y. One of the many issues the device had). One plug for aileron, elevator and rudder. Output is one for each as well, so the ailerons will need to be on a Y-connector. This works for most aircraft.

The Sbach has dual ailerons AND dual elevator servos, which I ran through a transmitter mix when it was set up without the gyro. The right elevator was connected through the ELEV channel, and the left elevator was set through AUX3. The mix was ELEV>AUX3 and they responded to the same control input. Works great, can program the elevators individually through the radio. When you put the elevators on a Y, they move in opposite directions (actually the same direction, but being mirrored it functionally moves opposite). Mechanically the only way to get them to match is to have one connect under the horizontal stab (standard), and the other over. Right now both are the standard under.

So, I have to use a Y-connector. The elevators move in opposite directions.

HOW DO I FIX THIS? How do I make them move in the same direction?

I have that question in to EagleHobby support. I supect the only way is to mechanically over/under the servo control rods, or use a signal inverter, and I am not interested in doing that.  To be clear, this is not unique to this gyro, all of these seem to be single channel per axis: pitch, yaw, roll.

I do notice that the ignition light dims with aggressive control inputs. Will need to watch that, may just be a low battery? Nope, 4.1 V per cell. I may need to go to a two battery system if the draw is too high for the voltage. Right now I have a Tech-Aero IBEC on it, but may need to revert to a separate battery and kill switch. I don't think the Tech-Aero IBEC, so, more money for an RCExl Kill Switch...


This is a very nice unit and is now my go to stabilization system. I just may not be able to use it on the Sbach. I'll let you know what I figure out. I may end up forking out for a servo reverser...

UPDATE: Ah, screw it... bought a reverser on a short leash. $12 on Amazon. I like this one because its Turnigy (good quality), I can plug it inline on one servo lead, its very short so no significant resistence added, and not have to have another Y since I already have enough.  I had thought that the manual said something about not using them, but I can't find it, so... I'll let you know how it works.

Started as a simple addition for about $35. So far it's cost me $29 for a new servo, $12 for a reverser, $76. And likley a kill. Ouch.


UPDATE 2:  Ah, screw it again.  Went ahead and bought the RCExl remote Kill Switch too. Last thing I need is a voltage drop on the ignition. There is the capacitor that came with the kit that is on the receiver, I moved it to the gyro and it still flickered a bit. I'll just run two 2S 2300 mAh reveiver packs. What's a little extra weight on a 10cc gasser anyway....  The short was bizarre, still unexplained. The only cause has to be a voltage/amp spike overloaded the wire (it was the lead from the reciver aileron channel to the gyro aileron input, and likely is related to the now dead servo).  Is there some amp/voltage draw that is overwhelming the delivery, the capacitor and the capacitors on the IBEC board? That's kinda spooky...  I think the best way to handle this is to unload the draws by giving the ignition its own battery pack, so that all the voltage and amps from the reciever pack go to the servos and reciever, and there is no danger of losing the ignition to a spike from servo draw.  We'll see.

UPDATE 3 (Final):   Nope...

Friday, September 13, 2019

Simple Late Summer Day

Ah, beautiful day, fair winds but gusts to 15 mph expected. Sometimes they over estimate, so I took both the MX-Bach RCGF-USA 30cc and the Sbach Evolution 10cc out. At the very least I could run the engine. This Evo is the only non-RCGF-USA engine I have as those of you who know me know I am something of a RCGF-USA and Joe Nelson (owner) FanBoy.


In the car. Same ones came back in the same condition, so it was a great day!


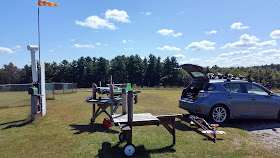
Windsock straight out in a 45 deg cross wind.


Light winds.


Wagner Field 360!
Clarence, that grass is something else! BZ!


Mx-Bach, my "Hangar Queen" to "Lead Flyer" 
thanks to the RCGF-USA 30cc engine from Joe Nelson!


New sneakers look good!


Sweet sound with the exhaust silencer from Mile High RC. Takes the piercing high notes out and gives her a nicer deep voice.


A boy and his toy.


Sbach Evolution 10cc


Another 2 days and another fly day!

(BTW, who are these people who look to be living in my house?)

Thursday, September 12, 2019

New Wheels on MX-Bach


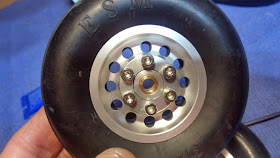
I picked up these for $35 on eBay for the MX-Bach. 3.5 inch with aluminum wheels. Very high quality.


Except one the holes are not aligned.


On the other they are. Cosmetic difference.


Installed.


Very nice! A bit narrower than the DuBros.


Foreground is the MXS-R 30cc with its aluminum wheels, background is the new one on the MX-Bach.

Wednesday, September 11, 2019

Replacement Tail Wheel on on the 30cc MX-Bach

I could not find a collar with a tail wheel rod connection without buying an entire tailwheel set. This piece fails a lot, so I found it curious there's no replacement collars. But I don't like that design anyway, preferring something more robust. So I did this.


I bought this on eBay because it looks robust, is the right size and a fair price. The link may expire someday...


Compared to the original. You can see the rusted collar on the top of the old wheel. I used the same CF brace.


I came up with the idea of using a blue servo arm I have that allows the top to screw down tight against the servo spline. This fit nicely and tightened up sweet. A drop of CA for good purchase but it wasn't slipping at all.  I used a snug fitting rubber grommet as a bearing, allowing a little shock absorption and there is a little play in the ball link connector screw. I don't have a ball link big enough to fit the M3 screw. I trimmed about 5mm off the top of the tail wheel axle.


I used a 600 size helicopter control rod turnbuckle to act as an arm. I angled the blue servo arm a bit to allow things to fit, and to allow a clean full side to side range of motion.


You can see the plywood plate I put in on the end of the fuse as the tail wheel hardpoint, epoxied in place, and then 3 large wood screws attach the CF wheel brace to the hardpoint, with a touch of CA as well.


Seen nicely in this pick, I used an M4 bolt into the rudder, about 2cm deep secured with epoxy, with vertical play allowing it to move up and down as the wheel bounces, and it too has a tad amount of play between the bolt and the ball link connector. All of the play amounts to very little but needed movement.


Here is full range of motion! Solid stuff right there.

Now that is what a tail wheel assembly should look like!

Replacing a Spektrum Satellite Reciever Antenna


I had snapped off the functional exposed end of a Spektrum satellite antenna, and I didn't want to buy a new one if all I needed was a replacment. Surely someone makes a replacment. This wasn't the first, not likely to be the last time I break one. So I went online and found a lot of single antenna for the price for which I got 20 for. The attachment looked right. What the heck, I ordered them. As with Amazon, even not Prime, it got here quick. I went and did the repair today.


These ar the ones I got, $12 shipped.


The case opened easily, two tiny screws on one end, clamshelled open. You can see that the antenna is missing the thinner piece.


The antenna easily unsnaps and comes out with the guard which is not rigidly attached. Its held in place with the case, no glue or snapping in. This slips right off.


You can see here that the attachments are different sizes but the same design, the new one being smaller. Turns out the difference is the original big one snaps over the outside of the circuit board connector, and the smaller new one snaps inside that connector. Coaxial connection just the same.


The new antenna is longer. You can trim this down if you want, just make sure that the exposed functional inner antenna is at least 3.2 cm long for 2.4ghz. Place the guard on the new antenna, snap it in, reattach the case and that's it!


The black radio opaque covered part of the antenna is not active, and I wanted to protect the attached end, so I used shrink tube. I decided to keep the antenna long.


I installed it back to the reciever and it bound to the transmitter with a nice solid orange light without rebindibg! Done!